InventoryConfigure Equipment for Stored Items
This how-to will show how to configure Equipment for Items that were previously created. Specifically, the Sword and the Shield.
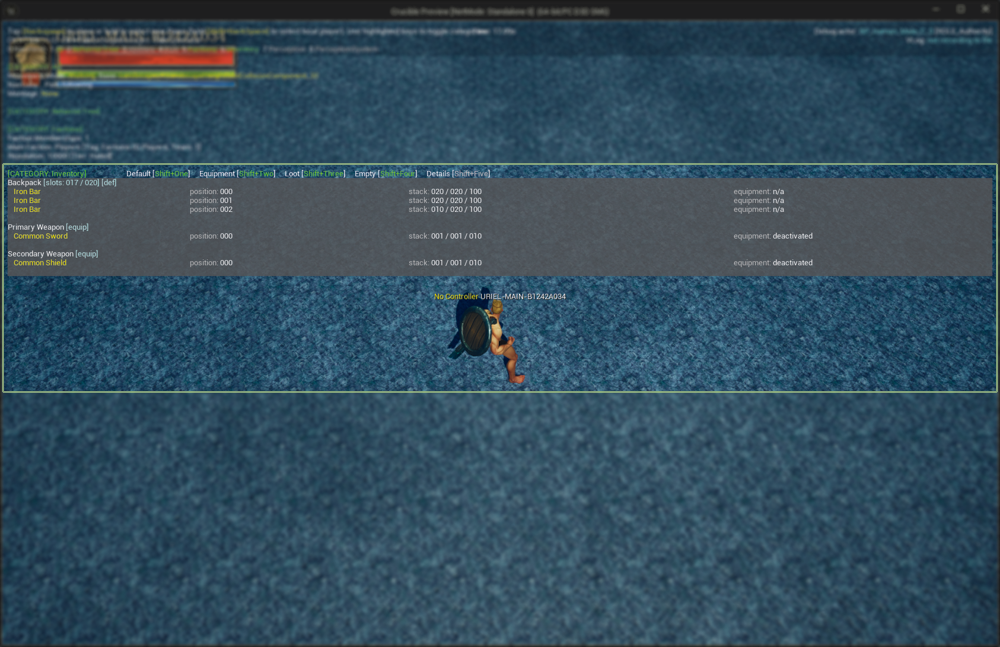
Currently, these items are automatically assigned to their preferred Containers. These Containers are configured to set the default Equipment State to Deactivated. Therefore, an Equipment Definition should be introduced to properly represent these Items.
In this topic, you will see a Static Mesh being used to represent the stored weapons, so make sure to have those ready before getting started.
Open your character's Skeleton Asset.
Add a socket named
sSword_RHto the Right Hand bone. Adjust the location and rotation as necessary.Add a socket named
sShield_LHto the Left Hand bone. Adjust the location and rotation as necessary.Add two sockets to the Spine 03 bone:
sSword_StoredandsShield_Stored. Adjust their location and rotation as necessary.Open your character's Blueprint.
Add a Static Mesh Component, child of the character's Mesh, set the Parent Socket to
sSword_Stored, and addEquipment.Slot.Back.Weapon.A.Rightto the list of Component Tags.Add a Static Mesh Component, child of the character's Mesh, set the Parent Socket to
sShield_Stored, and addEquipment.Slot.Back.Weapon.A.Leftto the list of Component Tags.
Add the Equipment Manager component to your Character.
BlueprintC++In Blueprints, go to your Components, search for
Equipmentand add Ninja Equipment Manager Component.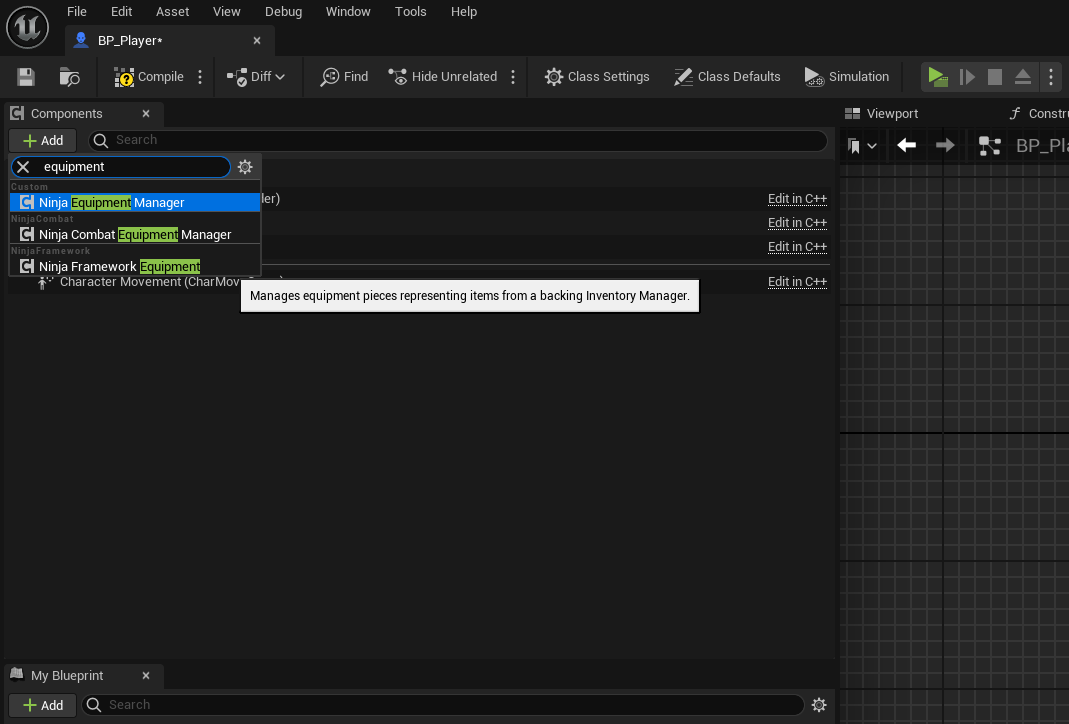
Create a variable for the of
UNinjaEquipmentManagerComponentin your class.#pragma once #include "CoreMinimal.h" #include "GameFramework/Character.h" #include "PluginLabsPlayerCharacter.generated.h" class UNinjaEquipmentManagerComponent; UCLASS() class PLUGINLABS_API APluginLabsCharacter : public ACharacter { GENERATED_BODY() public: APluginLabsCharacter(const FObjectInitializer& ObjectInitializer = FObjectInitializer::Get()); private: /** Hard reference to the Equipment Manager Component used by the player. */ UPROPERTY(EditDefaultsOnly, BlueprintReadOnly, Category = "Components", meta = (AllowPrivateAccess = true)) TObjectPtr<UNinjaEquipmentManagerComponent> EquipmentManagerComponent; };Create an instance of
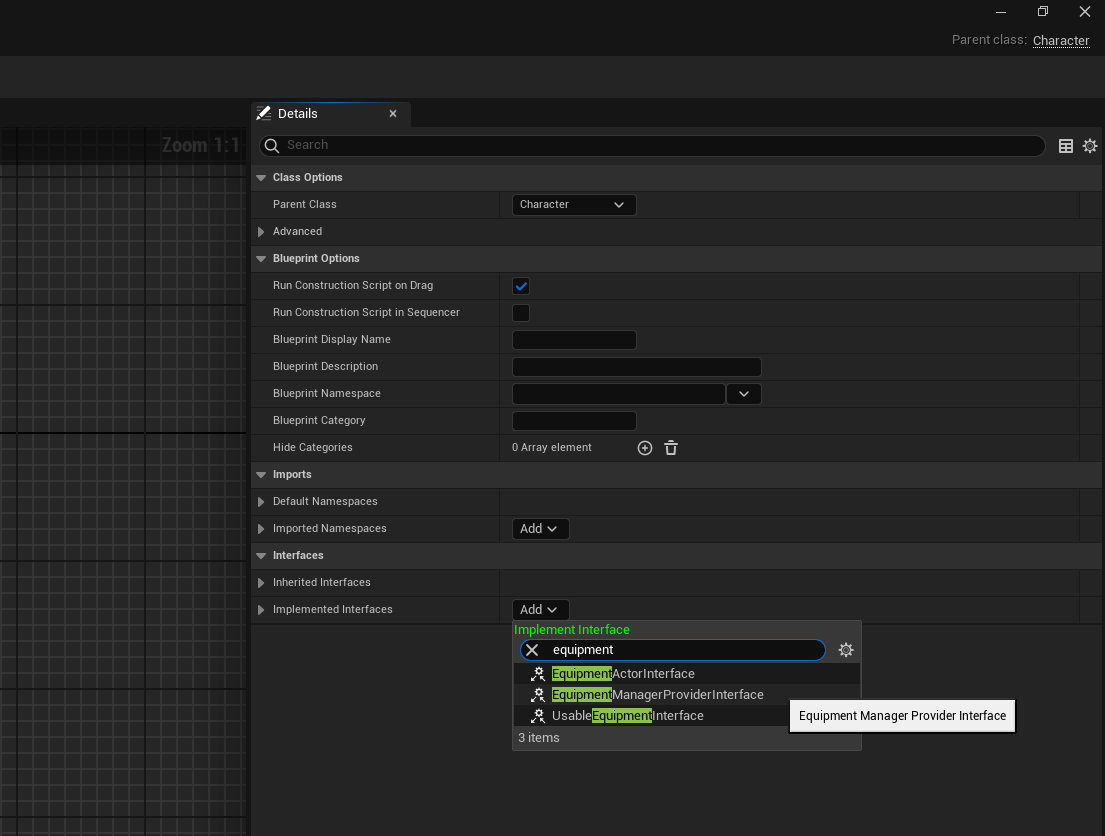
UNinjaEquipmentManagerComponentin your constructor.#include "GameFramework/PluginLabsCharacter.h" #include "Components/NinjaEquipmentManagerComponent.h" APluginLabsCharacter::APluginLabsCharacter(const FObjectInitializer& ObjectInitializer) : Super(ObjectInitializer) { static const FName EquipmentComponentName = TEXT("EquipmentManager"); EquipmentManagerComponent = CreateOptionalDefaultSubobject<UNinjaEquipmentManagerComponent>(EquipmentComponentName); }Add the Equipment Manager Provider Interface to your Character.
BlueprintC++Open your Class Settings, navigate to the list of Implemented Interfaces and add the interface.
In the My Blueprint panel, under Interfaces, expand Equipment Manager Provider and double-click Get Equipment Manager.
In the Blueprint Graph, drag your Equipment Manager into the Return Value.
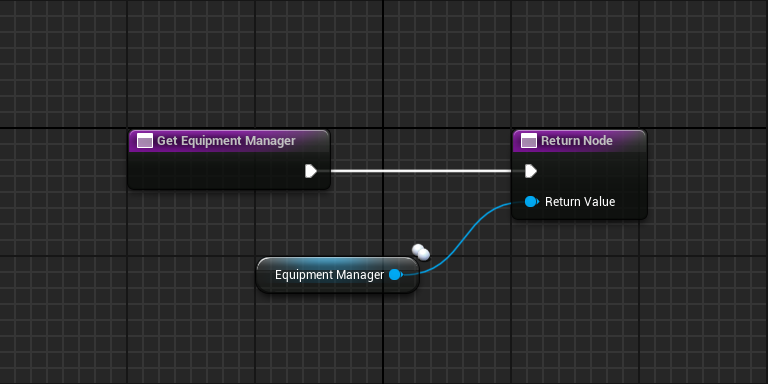
Add
IEquipmentManagerProviderInterfaceto your class declaration, and overrideGetEquipmentManager.#pragma once #include "CoreMinimal.h" #include "GameFramework/Character.h" #include "APluginLabsPlayerState.generated.h" class UNinjaEquipmentManagerComponent; UCLASS() class PLUGINLABS_API APluginLabsCharacter : public ACharacter { GENERATED_BODY() public: APluginLabsCharacter(const FObjectInitializer& ObjectInitializer = FObjectInitializer::Get()); // -- Begin Equipment Provider implementation virtual UNinjaEquipmentManagerComponent* GetEquipmentManager_Implementation() const override; // -- End Equipment Provider implementation private: /** Hard reference to the Equipment Manager Component used by the player. */ UPROPERTY(EditDefaultsOnly, BlueprintReadOnly, Category = "Components", meta = (AllowPrivateAccess = true)) TObjectPtr<UNinjaEquipmentManagerComponent> EquipmentManagerComponent; };Implement
GetEquipmentManager, so it returns the Equipment Manager.#include "GameFramework/PluginLabsCharacter.h" #include "Components/NinjaEquipmentManagerComponent.h" APluginLabsCharacter::APluginLabsCharacter(const FObjectInitializer& ObjectInitializer) : Super(ObjectInitializer) { static const FName EquipmentComponentName = TEXT("EquipmentManager"); EquipmentManagerComponent = CreateOptionalDefaultSubobject<UNinjaEquipmentManagerComponent>(EquipmentComponentName); } UNinjaEquipmentManagerComponent* APluginLabsCharacter::GetEquipmentManager_Implementation() const { return EquipmentManagerComponent; }
In your Content Browser, navigate to your equipment data folder. If you are creating a new folder, it should match the configuration in your Asset Manager.
Right-click in any empty area, select the Inventory category and then Equipment Definition.
Name your new container asset
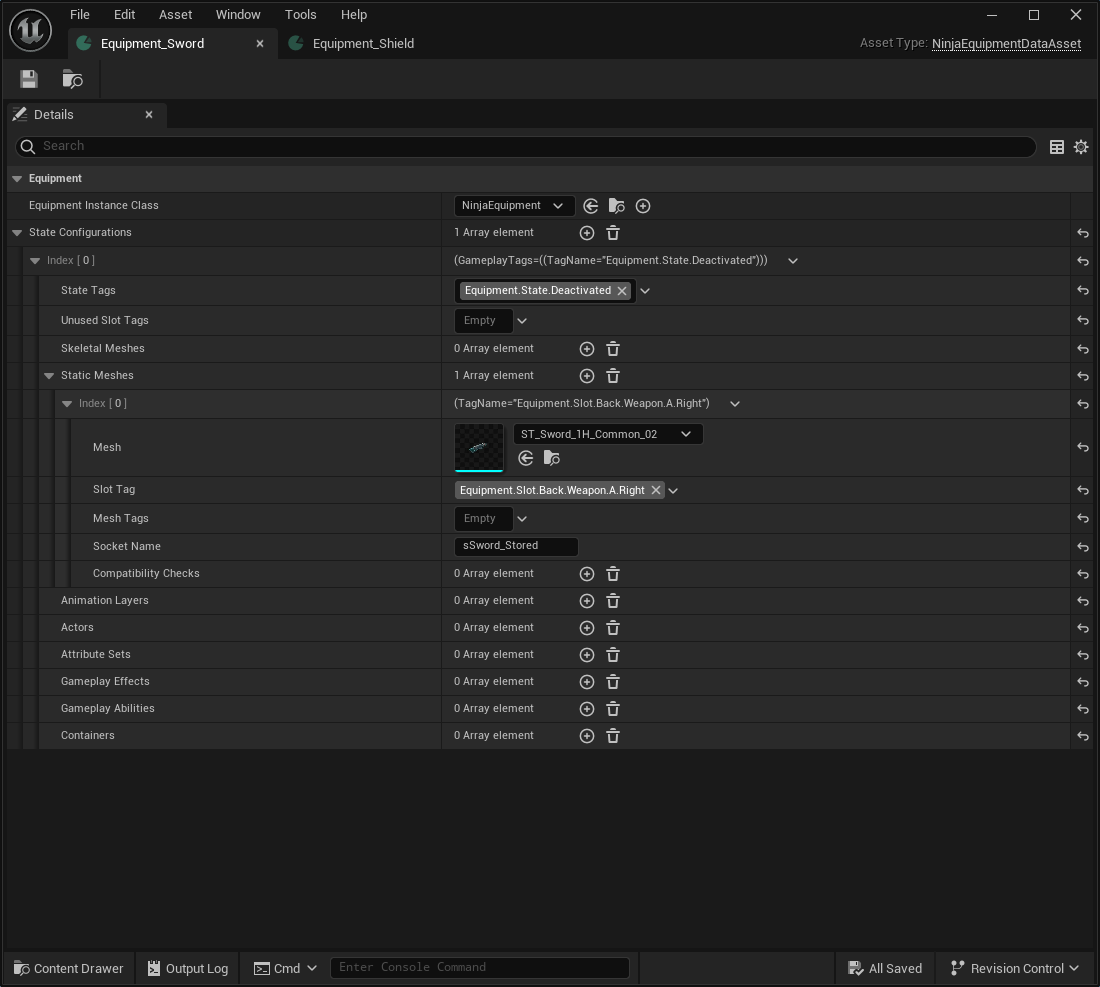
Equipment_Swordand open it.Add a new State Configuration and set the State Tag to
Equipment.State.Deactivated.In the Deactivated State Configuration, add a new entry to the Static Meshes array. Set the Static Mesh that represents your sword to the Mesh.
Set
Equipment.Slot.Back.Weapon.A.Rightto the Slot Tag andsSword_Storedto the SocketName.tip
This is the same Tag set to your Mesh Component, during the first part.
When you are done, your Sword Equipment Definition should be similar to this.
Open the Sword Item Definition and add an Equipment Fragment
Set the
Equipment_Swordto the Equipment Data.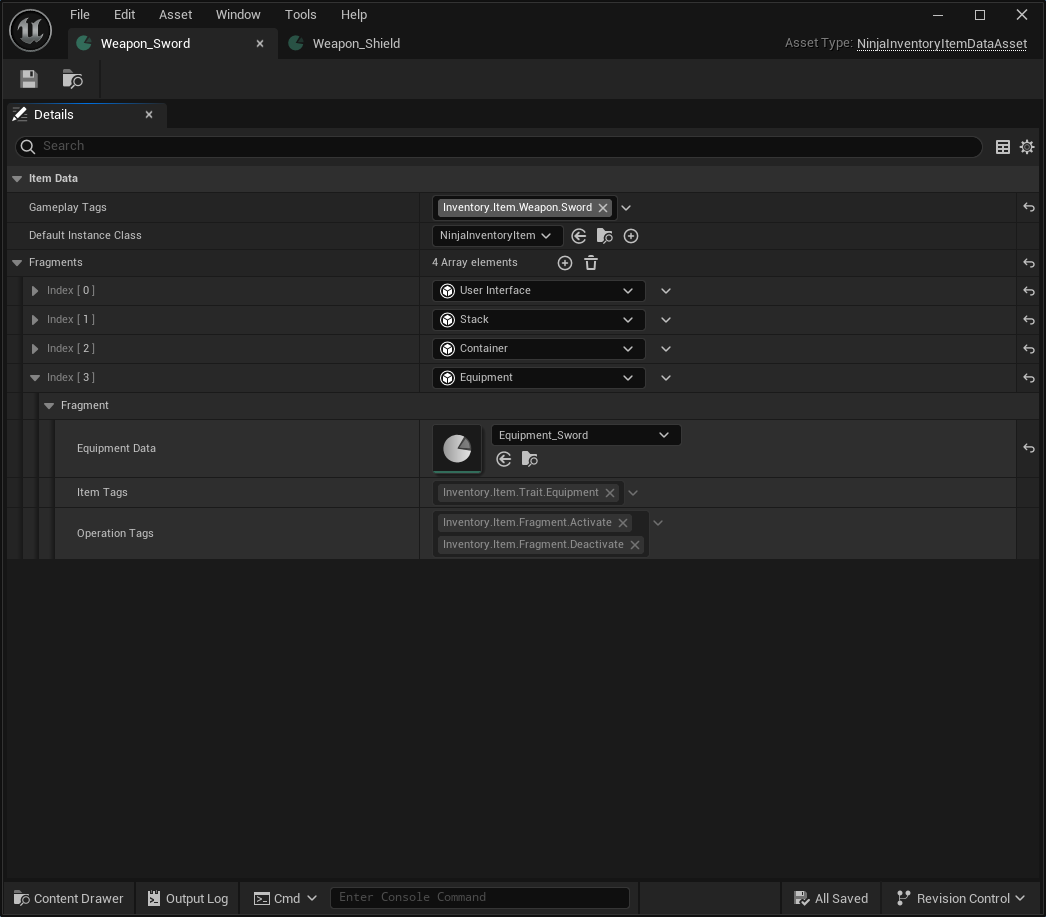
In your Content Browser, navigate to your equipment data folder. If you are creating a new folder, it should match the configuration in your Asset Manager.
Right-click in any empty area, select the Inventory category and then Equipment Definition.
Name your new container asset
Equipment_Shieldand open it.Add a new State Configuration and set the State Tag to
Equipment.State.Deactivated.In the Deactivated State Configuration, add a new entry to the Static Meshes array. Set the Static Mesh that represents your shield to the Mesh.
Set
Equipment.Slot.Back.Weapon.A.Leftto the Slot Tag andsShield_Storedto the SocketName.tip
The Gameplay Tag matches the one set in the Off-Hand Container Definition.
When you are done, your Shield Equipment Definition should be similar to this.

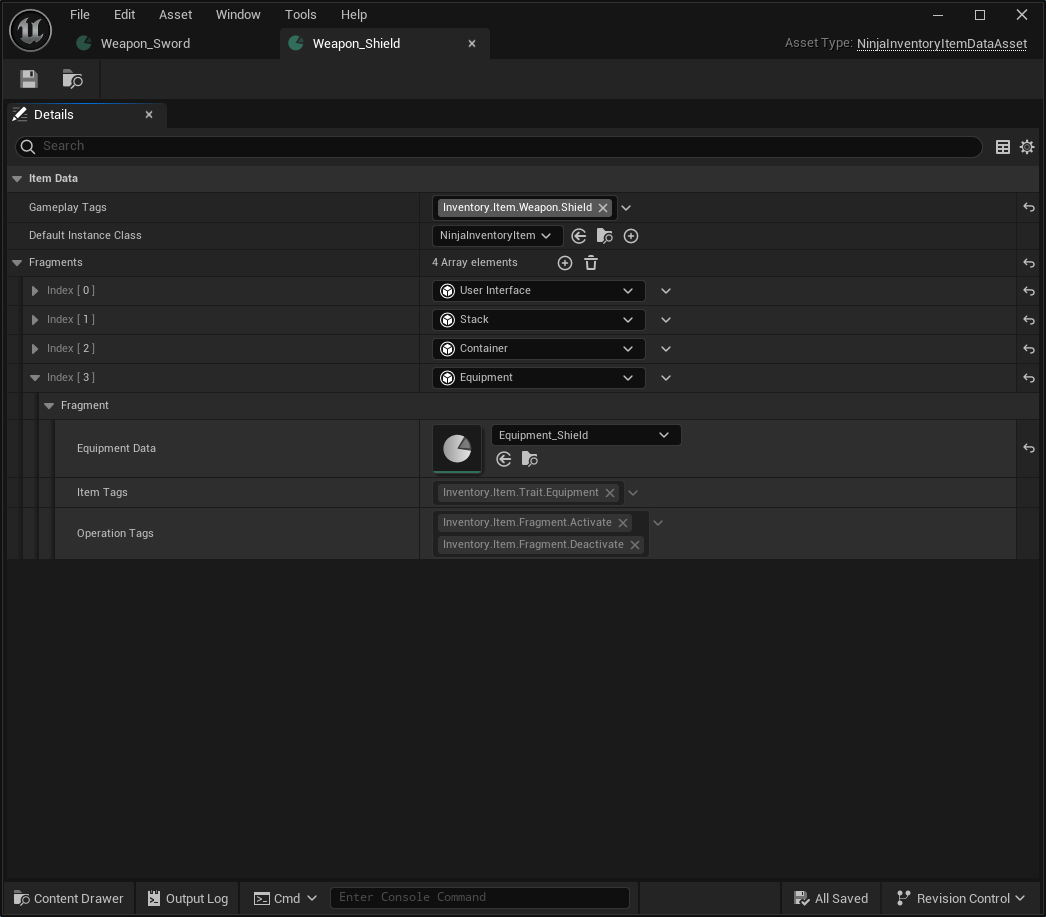
Open the shield Item Definition and add an Equipment Fragment
Set the
Equipment_Shieldto the Equipment Data.