Create and Use Consumable Items
Last modified: 05 December 2024This how-to will enhance the Health Potion to add the actual consumable logic.
Part 1: Configuring the Consumable
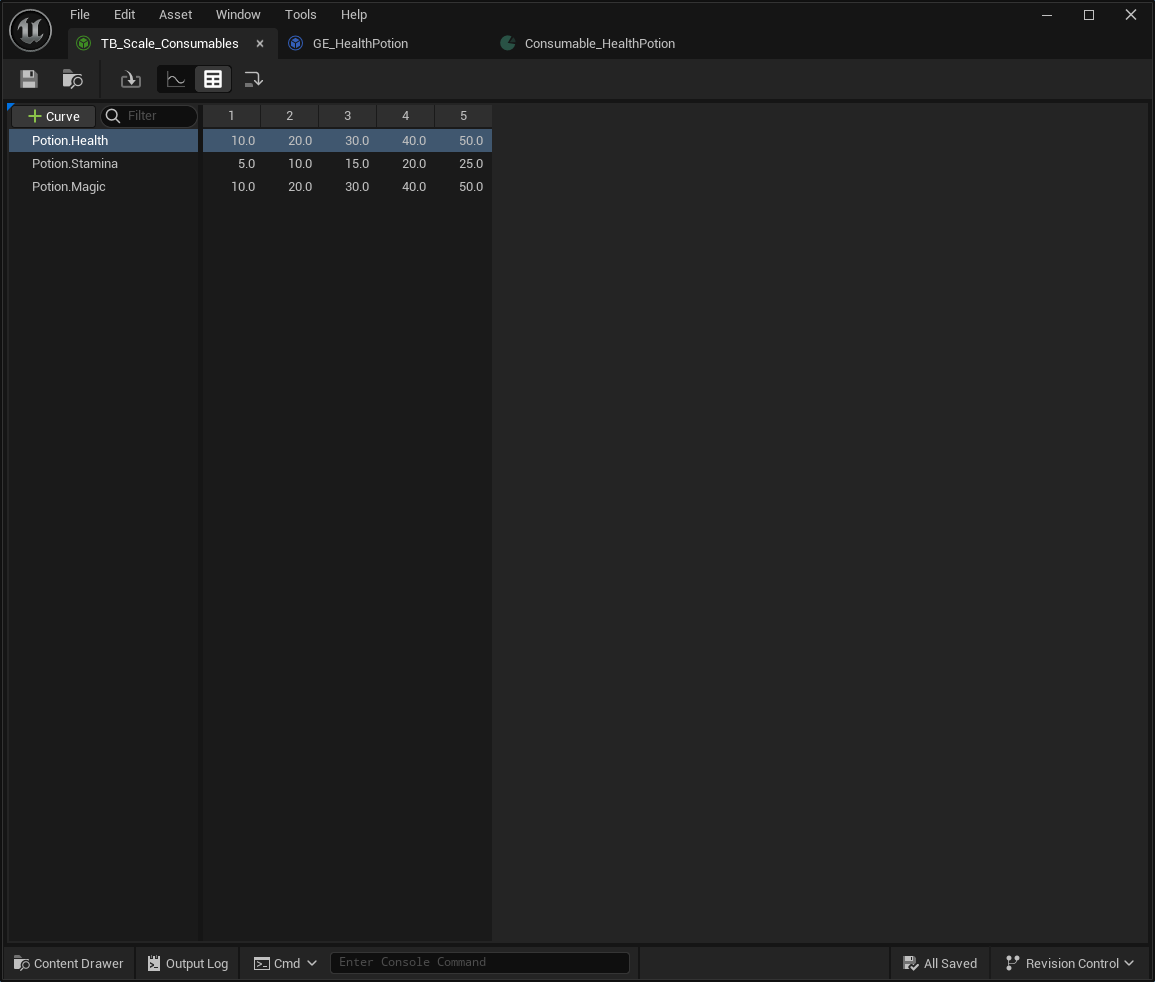
In your Content Browser, create a new Curve Table and set the Interpolation Type to Linear. For this example, we'll name it "
TB_Scale_Consumables".Open your new Curve Table and click the Add button to create a new curve. In this example, we'll name it
Potion.Health.This curve contains Level over Magnitude, add as many values as you find necessary, by clicking the Append Column button.
Once you are done, you should have a similar Curve Table. Feel free to add others, if you like!
In your Content Browser, create a new Gameplay Effect Blueprint, using
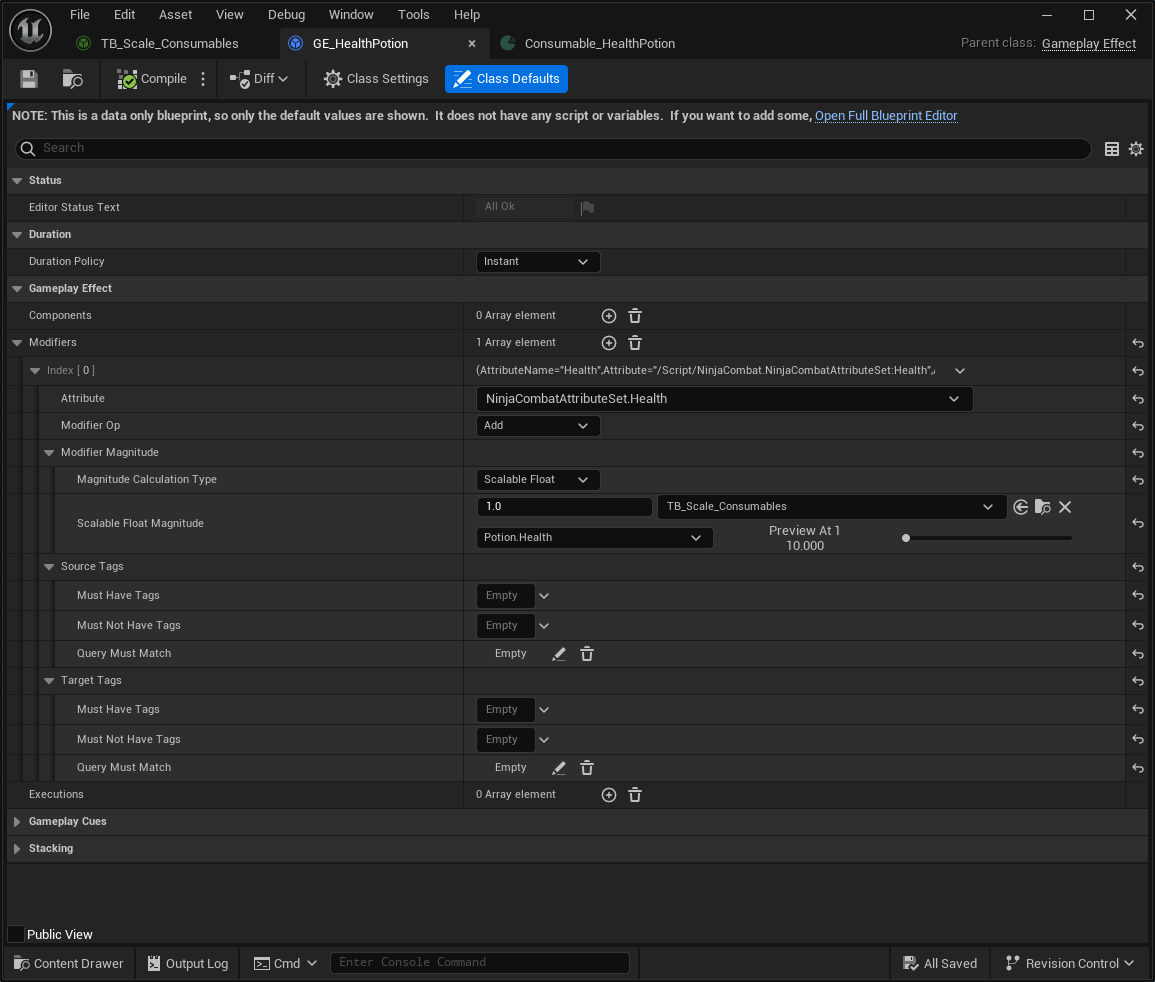
GameplayEffectas the base class. For this example, we'll name it "GE_HealthPotion".Open your new Gameplay Effect Blueprint and make sure it's Duration Policy is set to
Instant. Then, add a new Modifier entry.Select the Attribute that you want to modify. For this example, we'll use the
HealthAttribute, from Ninja Combat.Set the Modifier Operation to
Add.Set the Magnitude Calculation Type to
Scalable Float.Set the Magnitude to
1.0, the Curve Table toTB_Scale_Consumablesand the Curve toPotion.Health.Once you are done, your Gameplay Effect should look like this.
Create or select the Item Definition that will be used for your potion. In this example, we'll use the
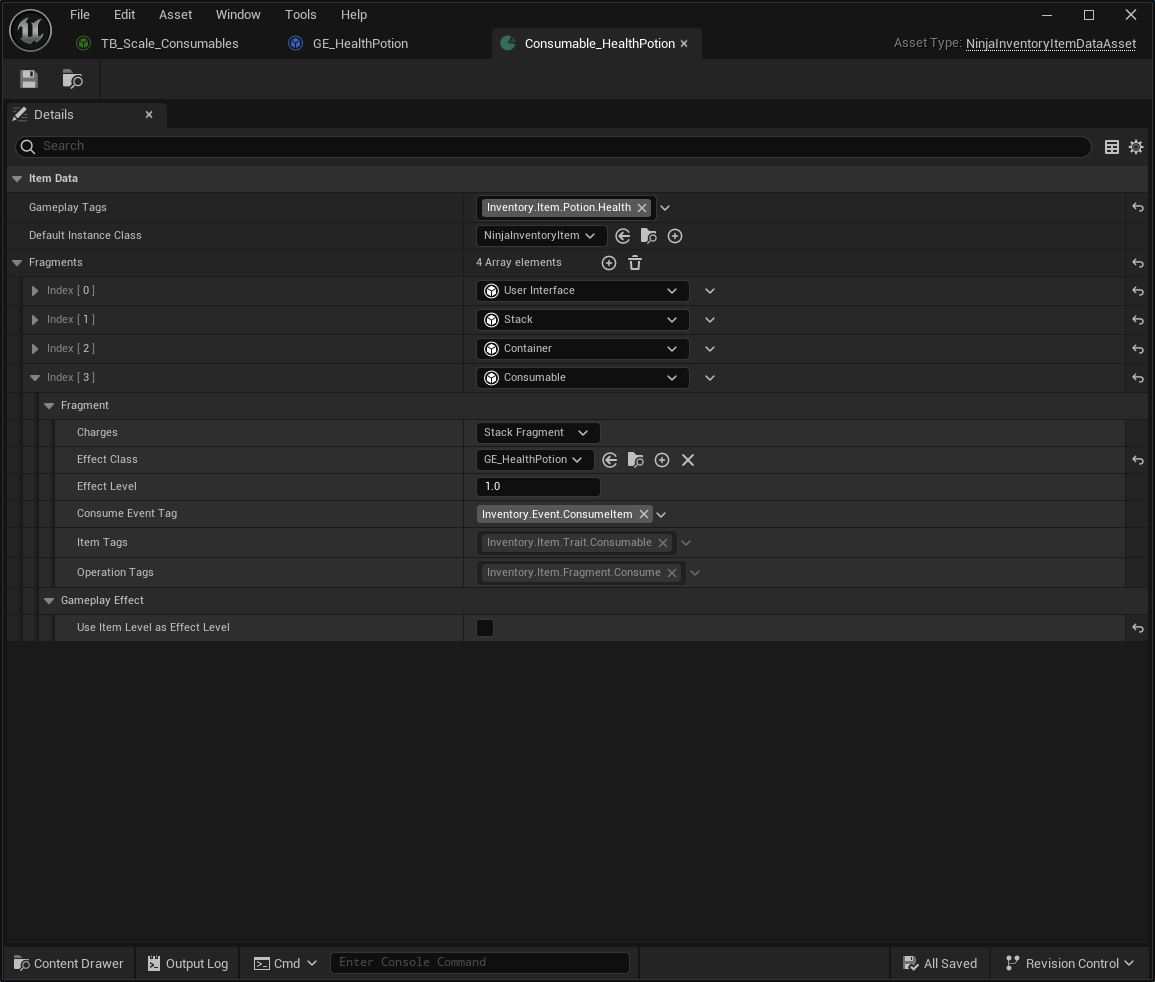
Consumable_Potion_Healthitem.Add the
Consumablefragment to the Fragments list.In the Consumable Fragment, set the Charges to
Stack Fragmentand the Effect Class toGE_HealthPotion.Disable the option Use Item Level as Effect Level.
Once you are done, your Health Potion Definition should look like this.
tip
Setting the Charges strategy
note
You can choose other types of Charges if that makes more sense to you. A Flask, for example, could use a Gameplay Attribute instead.
Part 2: Configuring the Gameplay
Select the Animation Sequence representing the Activate action. Create an Animation Montage from it and name it
M_ConsumePotion.Open your Animation Montage and add the Consumable Animation Notify State to the frames where the consumable should be displayed.
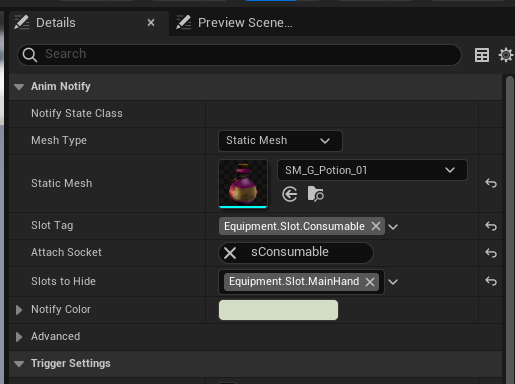
Set the appropriate Mesh Type for your scenario, the Mesh Asset, the Slot Tag in your character and the Attachment Socket
Add any other Slots to Hide as well, in this case, we'll hide the Main Weapon, represented by the tag
Equipment.Slot.MainHandOnce you are done, your Animation Notify State should be similar to this.
tip
This Animation Notify is a work-in-progress and in the future it will allow dynamic meshes.
In your Content Browser, navigate to your ability folder and create a new Gameplay Ability using
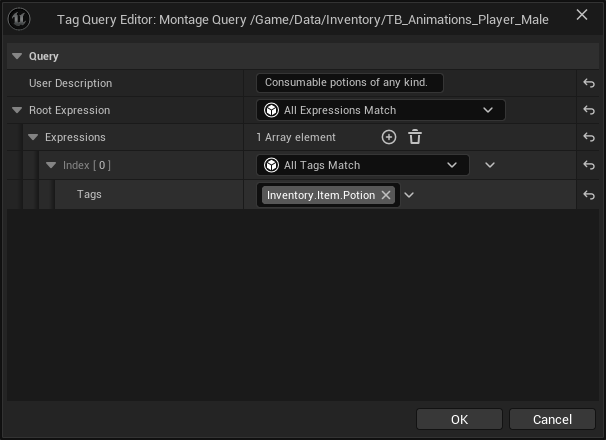
UInventoryAbility_ConsumeItemas the parent. Name itGA_Common_Consume.Open your new ability and configure the Consumable Query to find any Consumable Items in a Consumable Slot.
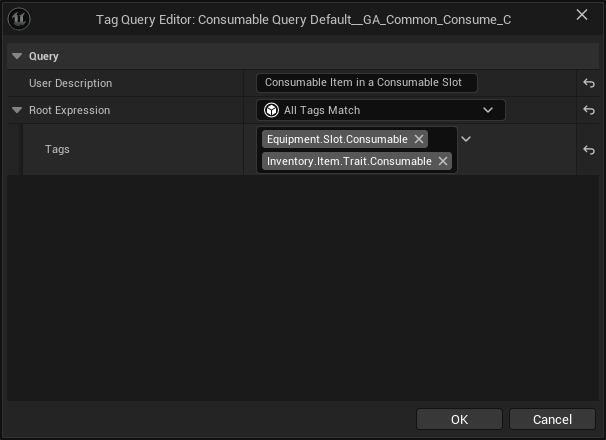
Set
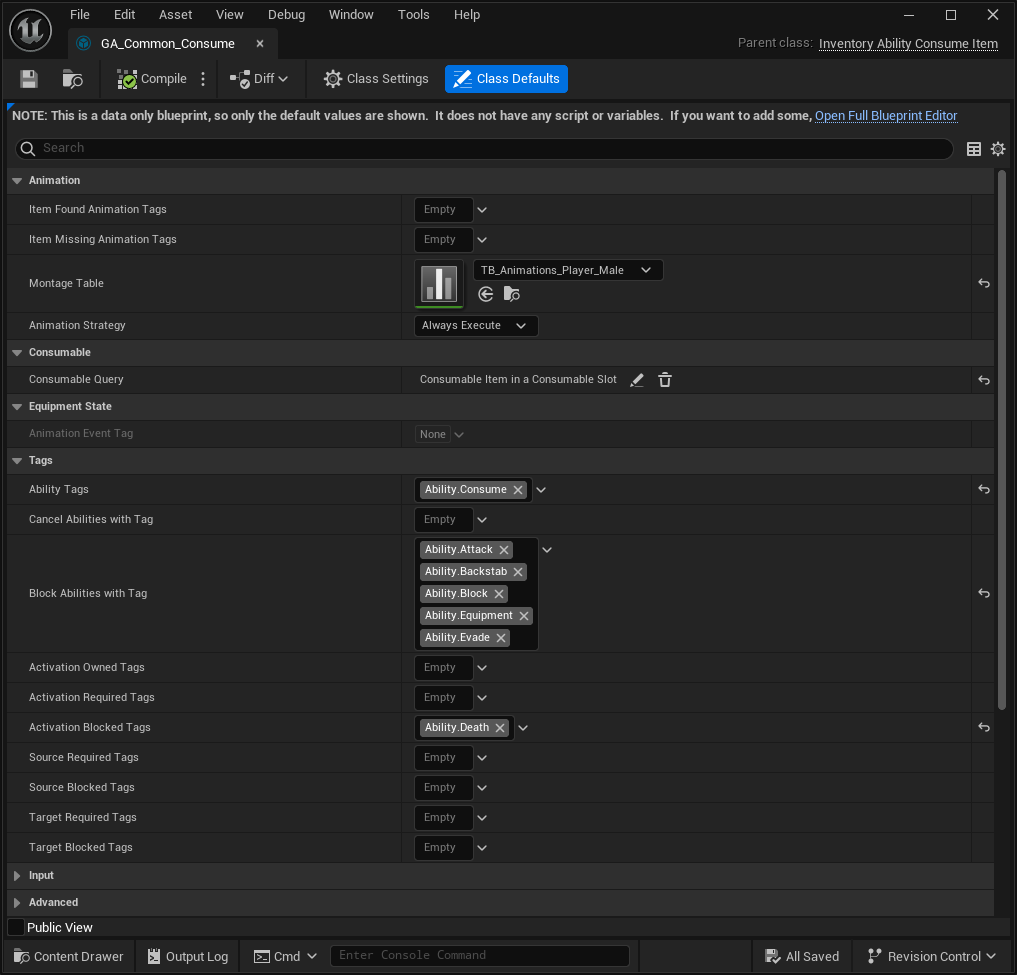
TB_Inventory_Animationsas the Montage Table.Add
Ability.Consume.When you are done, your Ability should look like this:
Open your Character Blueprint or any other location where you are handling Player inputs.
Create a new Consume Operation, using the Inventory Function Library to create the Payload.
Retrieve the Inventory Manager from the character, using the Inventory Function Library
Using the Inventory Manager, obtain the consumable item using an item query.
Request the execution of the Consume Fragment Operation to the Inventory Manager.
Compile and save your Blueprint.
note
Multiplayer Events
The Consume Operation is a Gameplay Event and as such, in multiplayer games, it must be triggered on the Server and Local Client.
Make sure to account for that in your input handling. The Ninja Input plugin can help you with that!
