Set up the Inventory Manager and add your items
Last modified: 05 December 2024This how-to will show how to configure your Inventory Manager component, including the interface implementation. Since this guide focus on preparing the Player Character, the component will be added to the Player State.
Before starting, please make sure that:
The project has a Player State, and it is assigned to the Game Mode.
The Gameplay Ability System is configured, and it has the Inventory Attribute Set initialized, including the Backpack Attribute.
The Gameplay Debugger is configured, including the Inventory Category.
Add the Inventory Manager component to your Player State.
BlueprintC++In Blueprints, go to your Components, search for
Inventoryand add Ninja Inventory Manager Component.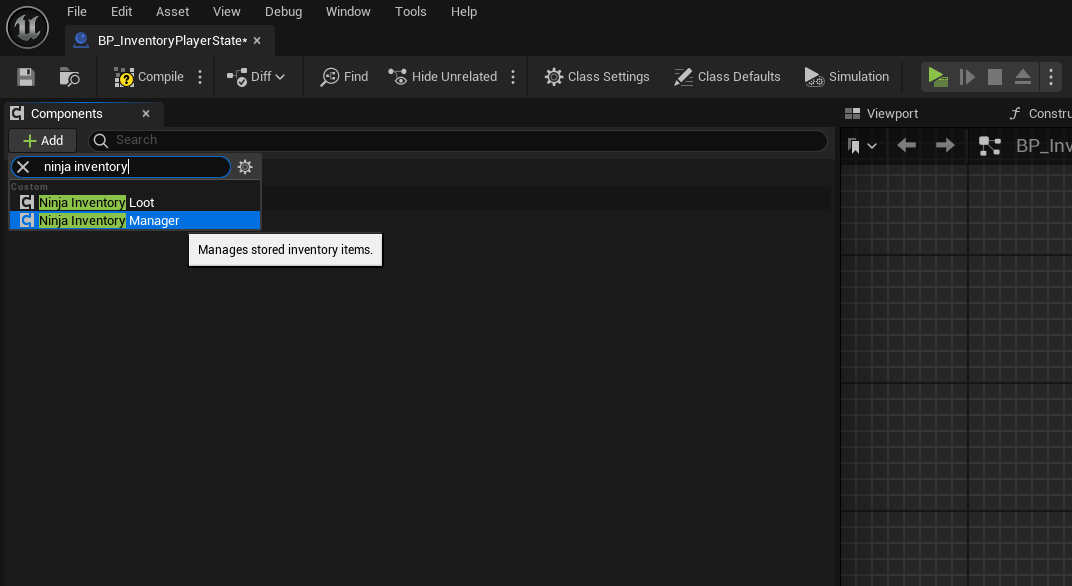
Create a variable for the of
UNinjaInventoryManagerComponentin your class.#pragma once #include "CoreMinimal.h" #include "GameFramework/PlayerState.h" #include "PluginLabsPlayerState.generated.h" class UNinjaInventoryManagerComponent; UCLASS() class PLUGINLABS_API APluginLabsPlayerState : public APlayerState { GENERATED_BODY() public: APluginLabsPlayerState(const FObjectInitializer& ObjectInitializer = FObjectInitializer::Get()); private: /** Hard reference to the Inventory Manager Component used by the player. */ UPROPERTY(EditDefaultsOnly, BlueprintReadOnly, Category = "Components", meta = (AllowPrivateAccess = true)) TObjectPtr<UNinjaInventoryManagerComponent> InventoryManagerComponent; };Create an instance of
UNinjaInventoryManagerComponentin your constructor.#include "GameFramework/PluginLabsPlayerState.h" #include "Components/NinjaInventoryManagerComponent.h" APluginLabsPlayerState::APluginLabsPlayerState(const FObjectInitializer& ObjectInitializer) : Super(ObjectInitializer) { static const FName InventoryComponentName = TEXT("InventoryManager"); InventoryManagerComponent = CreateOptionalDefaultSubobject<UNinjaInventoryManagerComponent>(InventoryComponentName); }Add the Inventory Manager Provider Interface to your Player State.
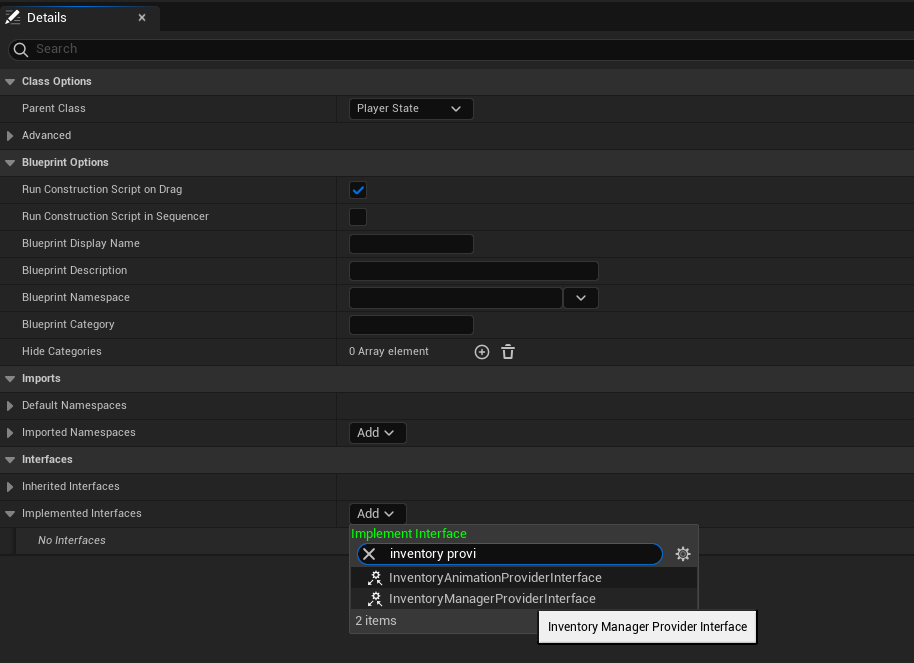
BlueprintC++Open your Class Settings, navigate to the list of Implemented Interfaces and add the interface.
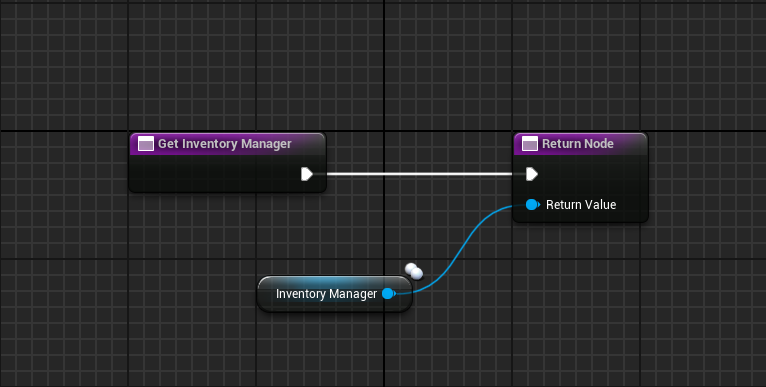
In the My Blueprint panel, under Interfaces, expand Inventory Manager Provider and double-click Get Inventory Manager.
In the Blueprint Graph, drag your Inventory Manager into the Return Value.
Add
IInventoryManagerProviderInterfaceto your class declaration, and overrideGetInventoryManager.#pragma once #include "CoreMinimal.h" #include "GameFramework/PlayerState.h" #include "Interfaces/InventoryManagerProviderInterface.h" #include "APluginLabsPlayerState.generated.h" class UNinjaInventoryManagerComponent; UCLASS() class PLUGINLABS_API APluginLabsPlayerState : public APlayerState, public IInventoryManagerProviderInterface { GENERATED_BODY() public: APluginLabsPlayerState(const FObjectInitializer& ObjectInitializer = FObjectInitializer::Get()); // -- Begin Inventory Provider implementation virtual UNinjaInventoryManagerComponent* GetInventoryManager_Implementation() const override; // -- End Inventory Provider implementation private: /** Hard reference to the Inventory Manager Component used by the player. */ UPROPERTY(EditDefaultsOnly, BlueprintReadOnly, Category = "Components", meta = (AllowPrivateAccess = true)) TObjectPtr<UNinjaInventoryManagerComponent> InventoryManagerComponent; };Implement
GetInventoryManager, so it returns the Inventory Manager.#include "GameFramework/PluginLabsPlayerState.h" #include "Components/NinjaInventoryManagerComponent.h" APluginLabsPlayerState::APluginLabsPlayerState(const FObjectInitializer& ObjectInitializer) : Super(ObjectInitializer) { static const FName InventoryComponentName = TEXT("InventoryManager"); InventoryManagerComponent = CreateOptionalDefaultSubobject<UNinjaInventoryManagerComponent>(InventoryComponentName); } UNinjaInventoryManagerComponent* APluginLabsPlayerState::GetInventoryManager_Implementation() const { return InventoryManagerComponent; }
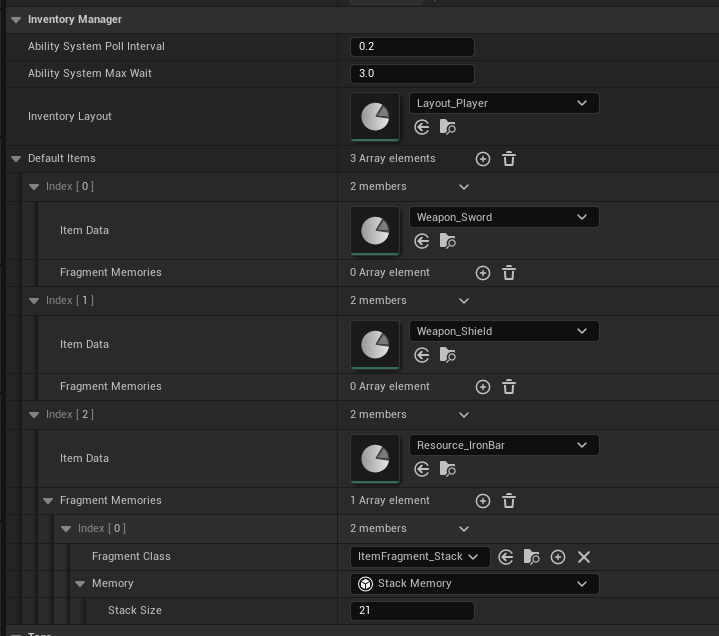
Navigate to the Inventory Manager in the Player State.
In the Defaults Panel, go to the Inventory Manager category and set the
Layout_Playeras the Inventory Layout.Add a new entry to the Default Items property, select
Weapon_Swordas the Item Data.Add another entry to the Default Items property, select
Weapon_Shieldas the Item Data.Add one more entry to the Default Items property, select
Resource_IronBaras the Item Data.For the
Resource_IronBar, add a new Fragment Memory, select theStackfragment class along with theStack Memory. Set the Stack Size to50. This will initialize default values for the Stack Fragment present in the Iron Bar Definition.Ensure that your configuration is similar to this.
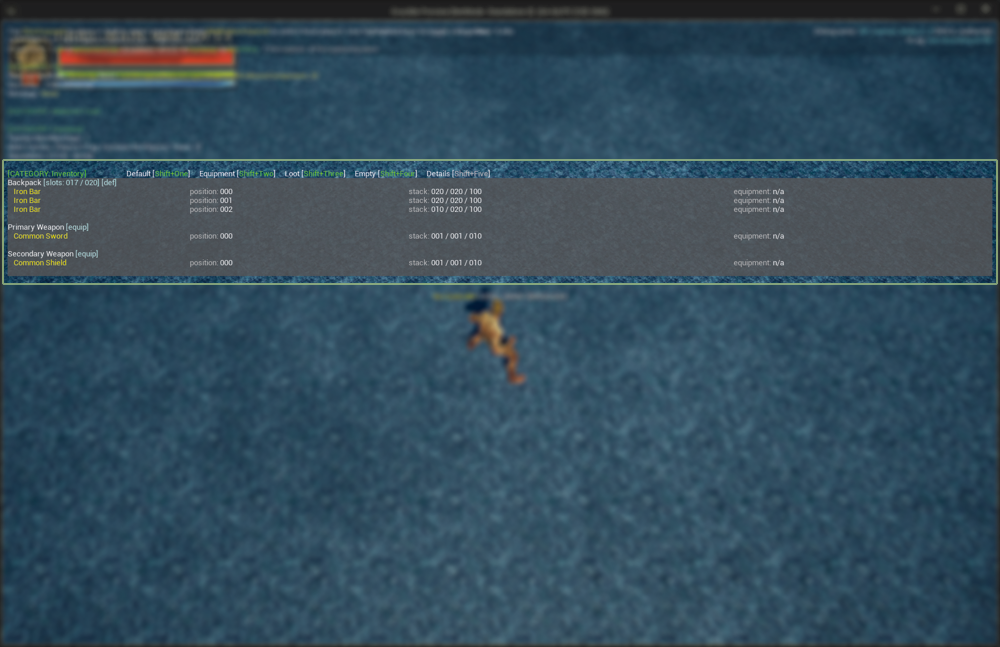
Hit Play, open the Gameplay Debugger and activate the Inventory category.
Confirm that the Sword and Shield were assigned to their Preferred Containers.
Confirm that three stacks of Iron Bars were created: two stacks with a size of 20, one stack with a size of 10. They occupy positions 0, 1 and 2 in the Backpack. This indicates that the stack was properly distributed following its configuration.
