Create Containers and an Inventory Layout
Last modified: 05 December 2024This how-to will show you how to create your first Containers and create an Inventory Layout, which is a bundle that can be added to an Inventory Manager.
In your Content Browser, navigate to your container data folder. If you are creating a new folder, it should match the configuration in your Asset Manager.
Right-click in any empty area, select the Inventory category and then Container Definition.
Name your new container asset
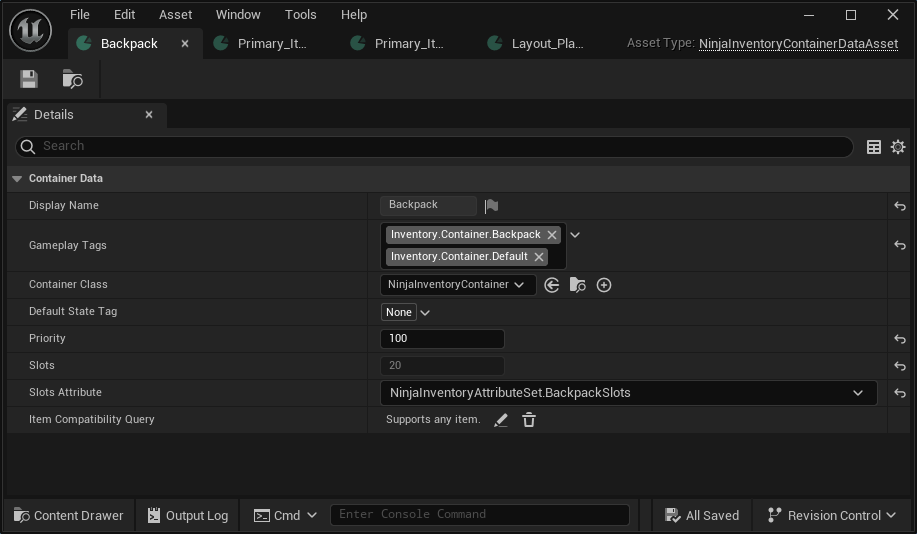
Container_Backpackand open it.Set the value
Backpackto the Display Name property.In the Gameplay Tags property, add the
Inventory.Container.BackpackGameplay Tag, to identify this container.In the Gameplay Tags property, add the
Inventory.Container.DefaultGameplay Tag, to mark this as the default container.Set the priority to
100. This makes the default container to be selected last, prioritizing equipment slots.Set your Slots Attribute to
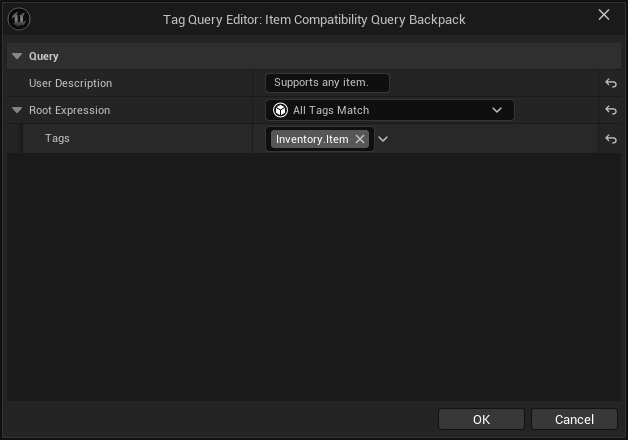
NinjaInventoryAttributeSet:BackpackSlots.Set your Item Compatibility Query to support any items.
When you are done, your Backpack Container should look like this.
In your Content Browser, navigate to your container data folder. If you are creating a new folder, it should match the configuration in your Asset Manager.
Right-click in any empty area, select the Inventory category and then Container Definition.
Name your new container asset
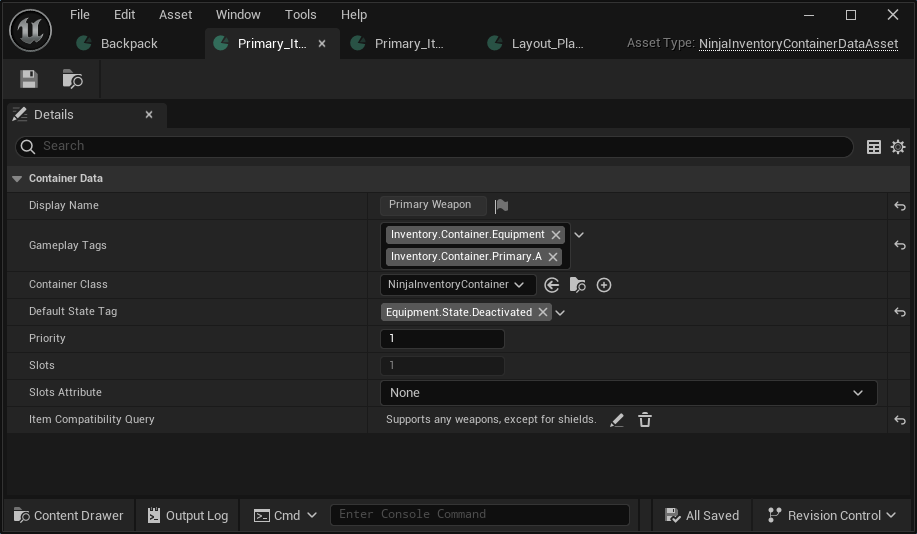
Container_Primary_Item_Aand open it.Set the value
Primary Weaponto the Display Name property.In the Gameplay Tags property, add the
Inventory.Container.Primary.AGameplay Tag, to identify this container.In the Gameplay Tags property, add the
Inventory.Container.EquipmentGameplay Tag, to mark this as an equipment container.Set the Default State Tag to
Equipment.State.Deactivated, to determine the initial state of equipment instances added to this container.Set your Item Compatibility Query to support any weapons except for shields.
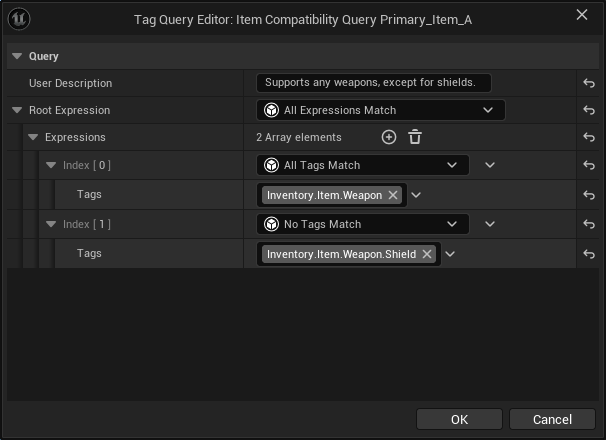
When you are done, your Primary Item A Container should look like this.
In your Content Browser, navigate to your container data folder. If you are creating a new folder, it should match the configuration in your Asset Manager.
Right-click in any empty area, select the Inventory category and then Container Definition.
Name your new container asset
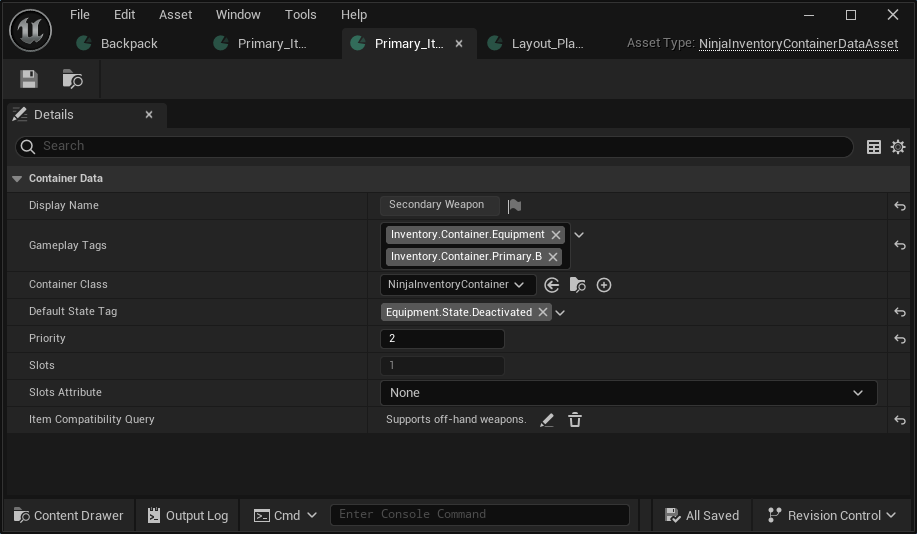
Container_Primary_Item_Band open it.Set the value
Secondary Weaponto the Display Name property.In the Gameplay Tags property, add the
Inventory.Container.Primary.BGameplay Tag, to identify this container.In the Gameplay Tags property, add the
Inventory.Container.EquipmentGameplay Tag, to mark this as an equipment container.Set the Default State Tag to
Equipment.State.Deactivated, to determine the initial state of equipment instances added to this container.Set the priority to
2. This gives the secondary slot a lower priority than the primary one.Set your Item Compatibility Query to support off-hand weapons, including shields.
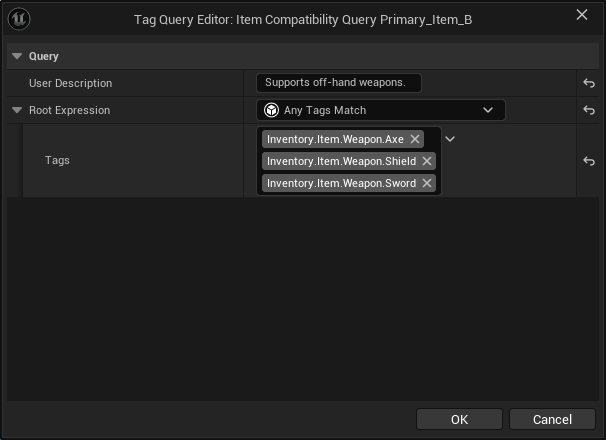
When you are done, your Primary Item B Container should look like this.
In your Content Browser, navigate to your container data folder. If you are creating a new folder, it should match the configuration in your Asset Manager.
Right-click in any empty area, select the Inventory category and then Inventory Layout.
Name your new container asset
Layout_Playerand open it.Type
Inventoryin the Display Name property, or select a value from a String Table.Notice the Default Container Query. It will look for Containers marked as
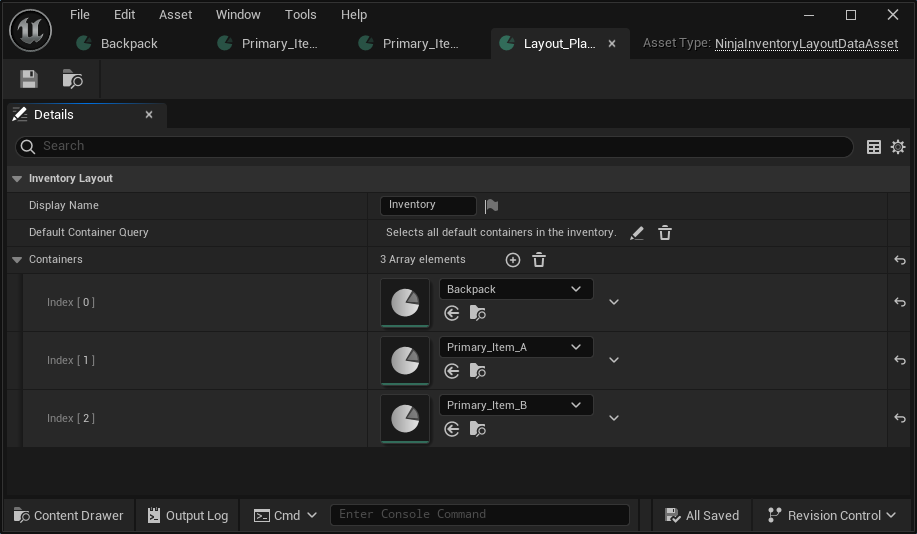
Default.Add the containers created in the previous steps.
When you are done, your Inventory Layout should look like this.
