React to Fatal Damage
Continuing the damage handling, we will handle fatal damage, which starts the death flow and activates the Death Ability.
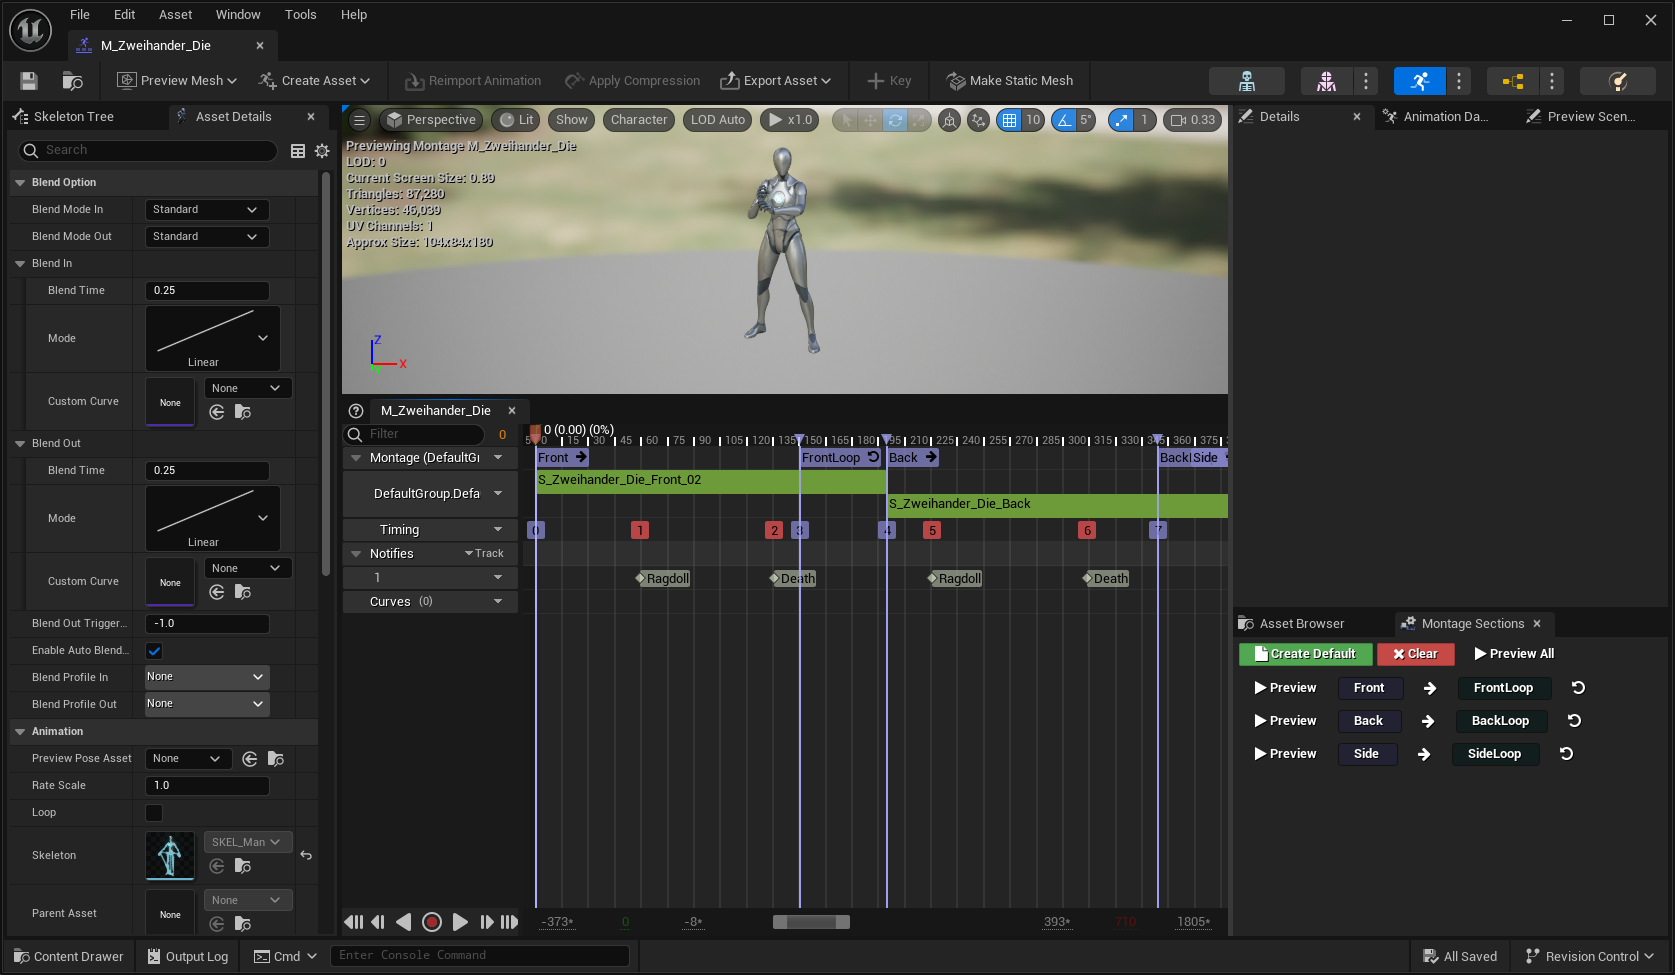
For the default death reaction, we will use directional animations. Create an Animation Montage and organize all the sequences.
Create Montage Sections for each sequence, with appropriate names, based on their directions.
Add a looping section where the ability is in a static pose, it will ensure that the character never resets to the wrong stance.
Organize all montage sections so main sections go into their static parts, which will then loop into themselves.
Add the Ragdoll and the Death notifies in the appropriate frames..

Create a new Gameplay Ability extending on
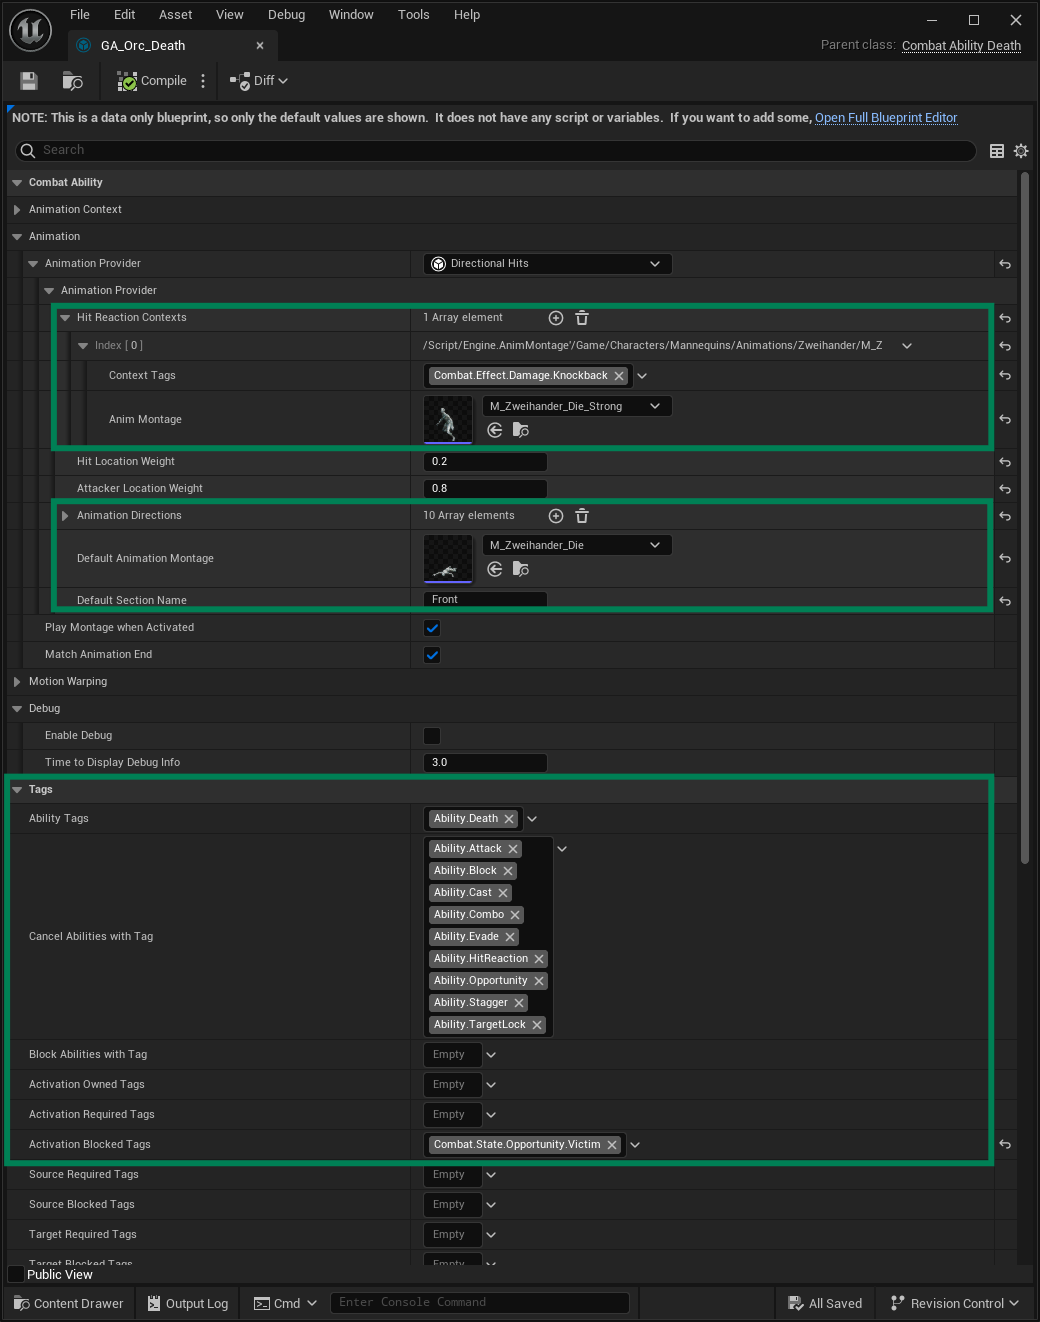
CombatAbility_Death.Change the Animation Provider to Directional Hits.
Adjust the Hit Location Weight and Attacker Location Weight if necessary.
Map the direction ranges to the correct animation sections, you can add, remove or completely change the ranges as needed.
Set the default Animation Montage and default Montage Section.
The Cancel Abilities With Tag should be correct, but feel free to adjust these Gameplay Tags if you need. This container is used to indicate abilities that should be cancelled when the death ability activates.
Add
Combat.State.Opportunity.Victimto your list of Activation Blocked Tags. This should avoid conflicts between the Death Animation and the Opportunity System.Add the new Gameplay Ability to the Ability Data Asset created for the enemy character, so it is added by default.

Navigate to the Damage Data Asset created and assigned to the enemy in the previous guide.
Set the Death Time Limit to
5.0. This will ensure that the character is destroyed even if something goes wrong in the Death Ability or Animation Notify.Add the Dissolve Handler which will update the defined material parameters, in all character meshes, based on the provided curves
tip
The Dissolve Handler requires adjustments in your Materials, so they can actually adjust the emissivity and opacity based on certain parameter values.
You will need to create that Material Function or use one of the many dissolve materials available in the Fab Store!
note
Change the Base Damage attribute in your Player Attribute Table to a higher value, so you can defeat the enemy with fewer hits!
Press play and attack the enemy.
You should see the Hit Reactions from the previous guide.
On fatal damage, the enemy should play the appropriate death animation, considering the damage direction.
If fatal damage is applied from a heavy attack, the appropriate animation for strong attacks should be used.


