React to Player Damage
To make sure that our attacks work, we need an enemy. Using concepts established before, we will create a new enemy character that properly reacts to incoming damage and eventually dies.
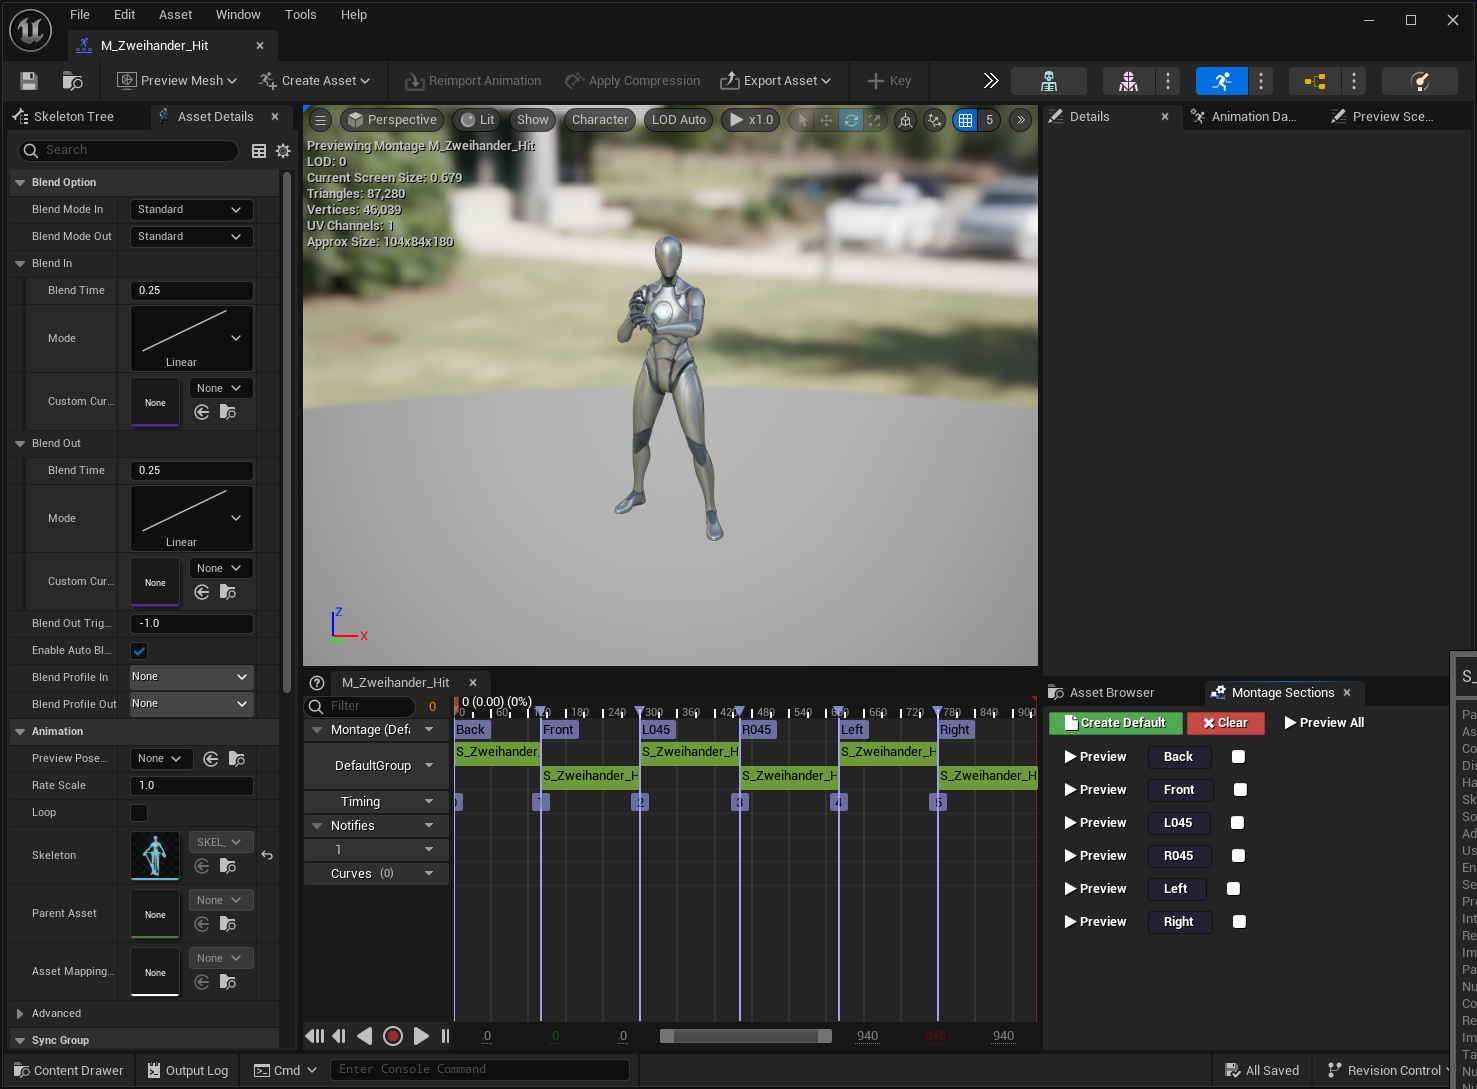
For the default hit reaction, we will use directional animations. Create an Animation Montage and organize all the sequences.
Create Montage Sections for each sequence, with appropriate names, based on their directions.
In the Montage Sections tab, make sure to break the links between all sections, so they won't play in a sequence.

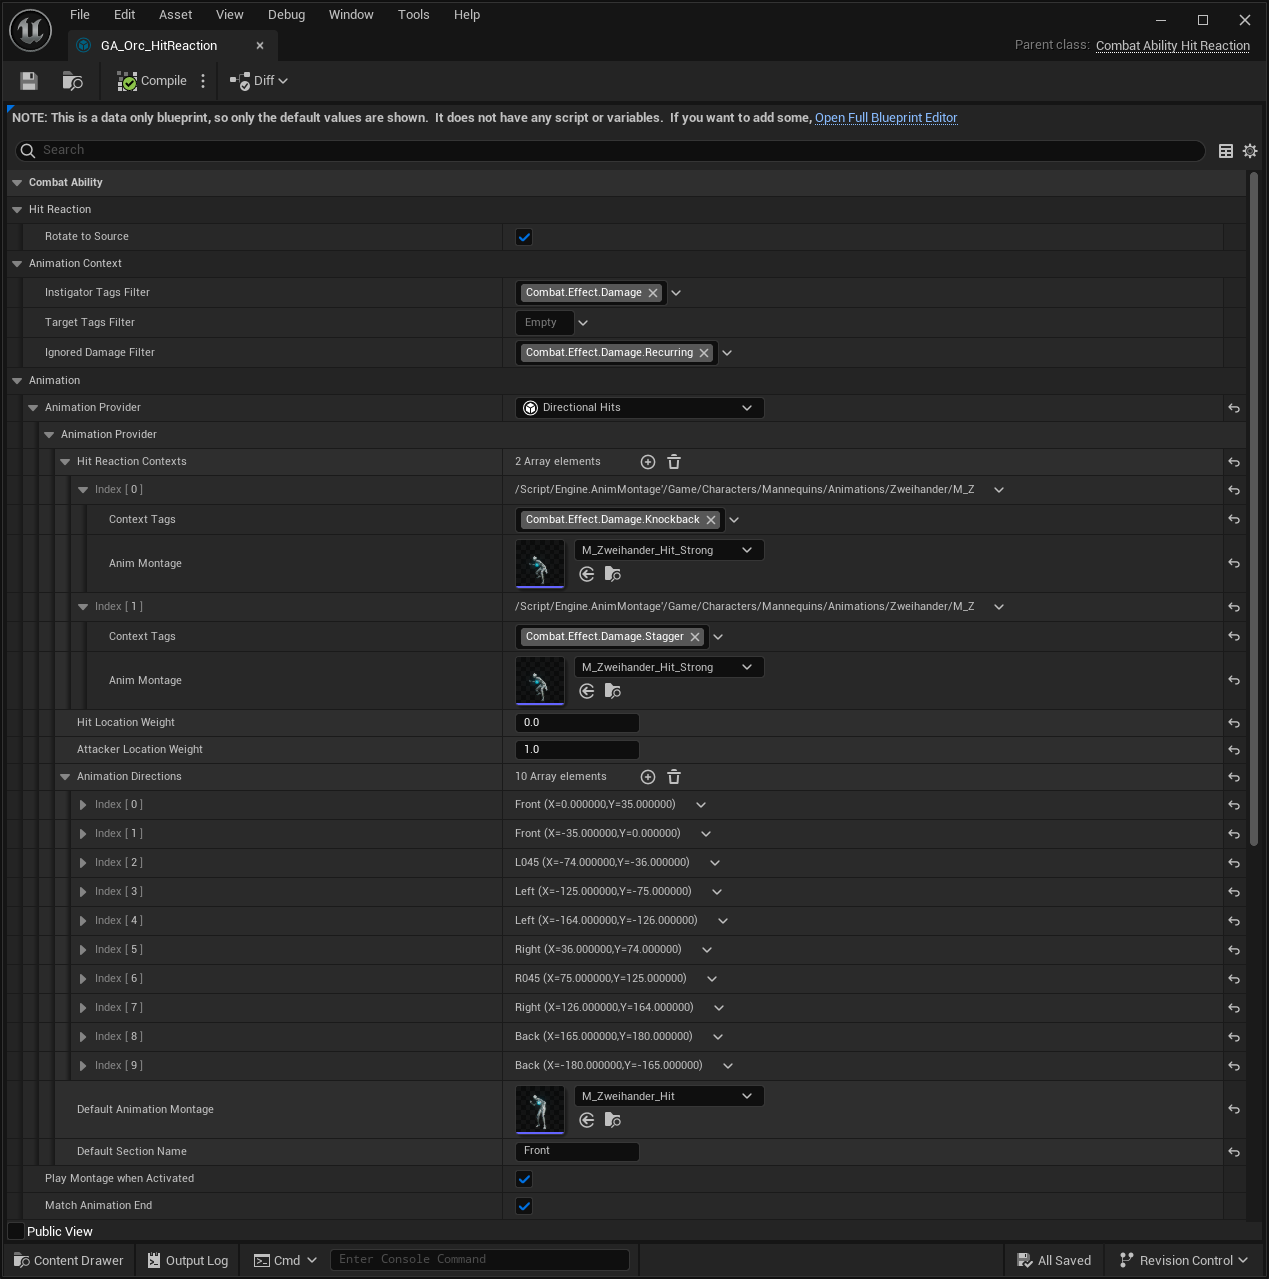
Create a Gameplay Ability from
CombatAbility_HitReaction.Add a new entry to Hit Reaction Contexts for
Combat.Effect.Damage.Knockback. Add the heavy hit animation to it.Add a new entry to Hit Reaction Contexts for
Combat.Effect.Damage.Stagger. Add the heavy hit animation to it.Adjust the animation directions, so they use the appropriate montage sections.
Set the Default Animation Montage and Default Section Name that will be used when no direction is set, or a direction entry cannot be found.

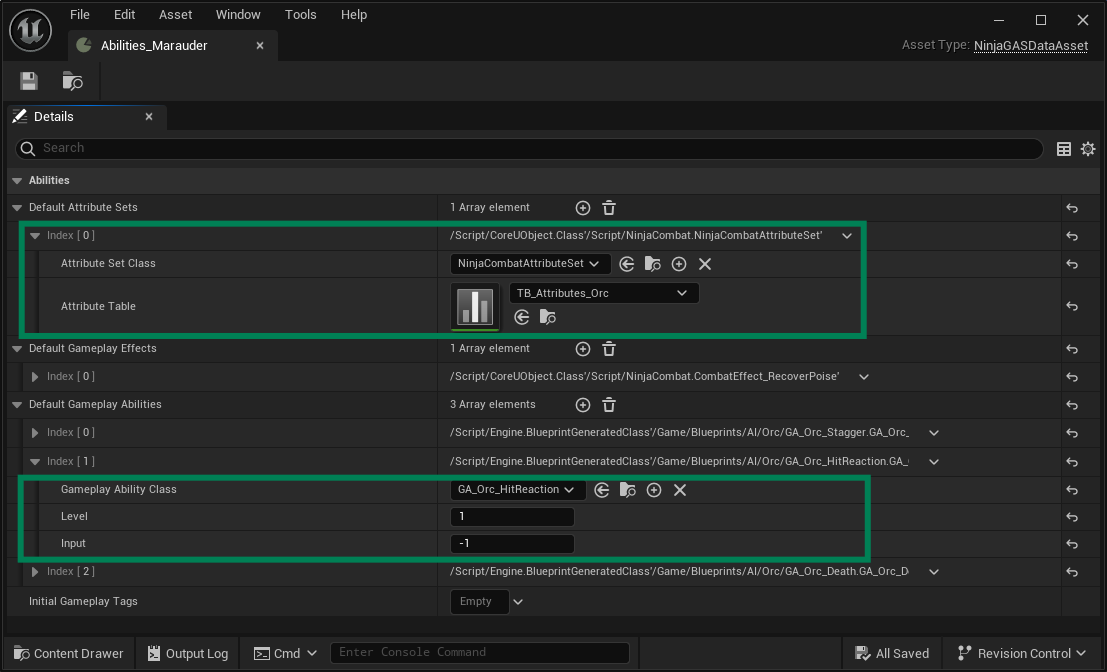
As done before, create a new Attribute Set Data Table that will be used to initialize the Combat Attribute Set.
Create a new GAS Setup Data Asset for the enemy.
Add the Combat Attribute Set and initialize it with the Attribute Table.
Add the Hit Reaction Ability to the list of Default Gameplay Abilities.

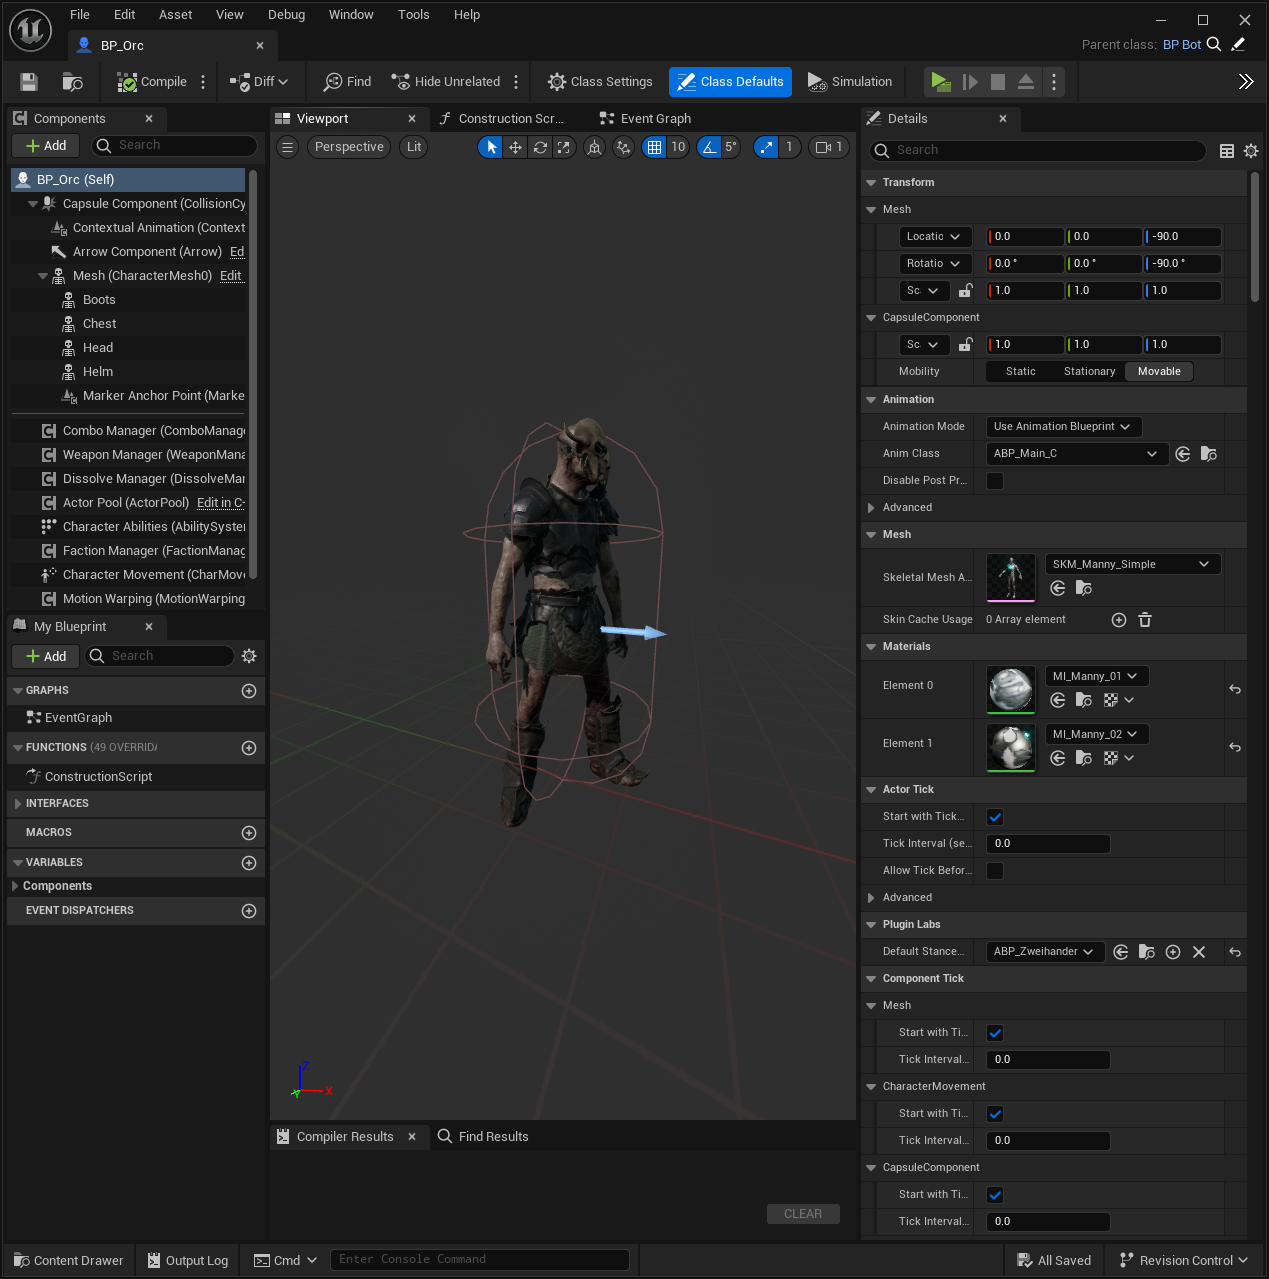
Create a new blueprint for the enemy. This blueprint should inherit from
NinjaGASCharacter.As done before, Add the Combat Manager Component as before, implementing the appropriate interface methods.
Add the Damage Data to the Combat Manager.
Add the Ability Data to the Ability System Component.
Make sure that the enemy's capsule collision is set to ignore the weapon channel Also make sure that the enemy's mesh is set to block it.

note
When setting the Animation Blueprint, make sure to add a slot that can play the Animation Montages.


