Create Melee Attacks
With the melee weapons configured, the next step is to create a primary and a secondary attack using the Attack Ability, add these abilities to the player character using Ninja GAS and configure their inputs using Ninja Input.
Create an Animation Montage from an appropriate Animation Sequence that represents the primary attack.
In the Animation Montage, add the Melee Scan Notify State along the frames where the scan should happen.
In the Melee Scan Notify State Details:
Set the Source to
Weaponand your Scan Channel toWeapon.Leave the Scan Socket Prefix value unchanged, since it matches the names used in the sword mesh sockets.
Leave the Scan Mode set to Line Trace.

Configure the Weapon query, so it will obtain the sword from the Weapon Manager.

tip
This is the same Gameplay Tag that was added to the Weapon Actor created for the sword!
Create an Animation Montage from an appropriate Animation Sequence that represents the secondary attack.
In the Animation Montage, add the Melee Scan Notify State along the frames where the scan should happen.
In the Melee Scan Notify State Details:
Set the Source to
Weaponand your Scan Channel toWeapon.Leave the Scan Socket Prefix value unchanged, since it matches the name used in the shield mesh socket.
Set the Scan Mode set to Box Sweep and set dimensions that roughly match the shield's dimensions.

Configure the Weapon query, so it will obtain the shield from the Weapon Manager.

tip
This is the same Gameplay Tag that was added to the Weapon Actor created for the shield!
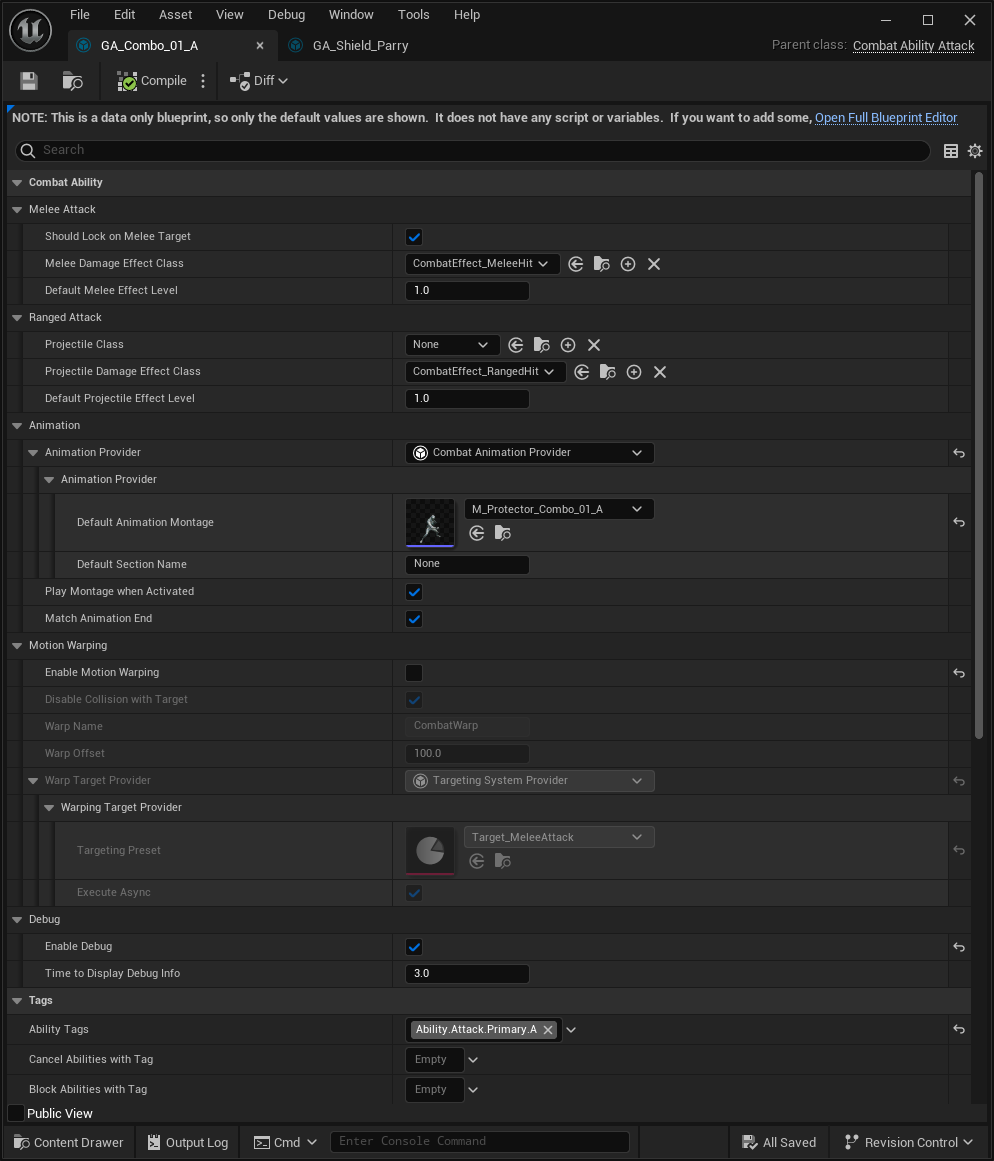
Create a new Gameplay Ability for your primary attack, using
CombatAbility_Attackas the base class.Set the Animation Montage for the primary attack in the Default Animation Montage.
Disable Motion Warping.
Enable debugging.
Add
Ability.Attack.Primaryto the Ability Tags, so it can be used for the activation.Add
Ability.Attack.Secondaryto the list of Block Abilities with Tag, to ensure your attacks won't interrupt each other.

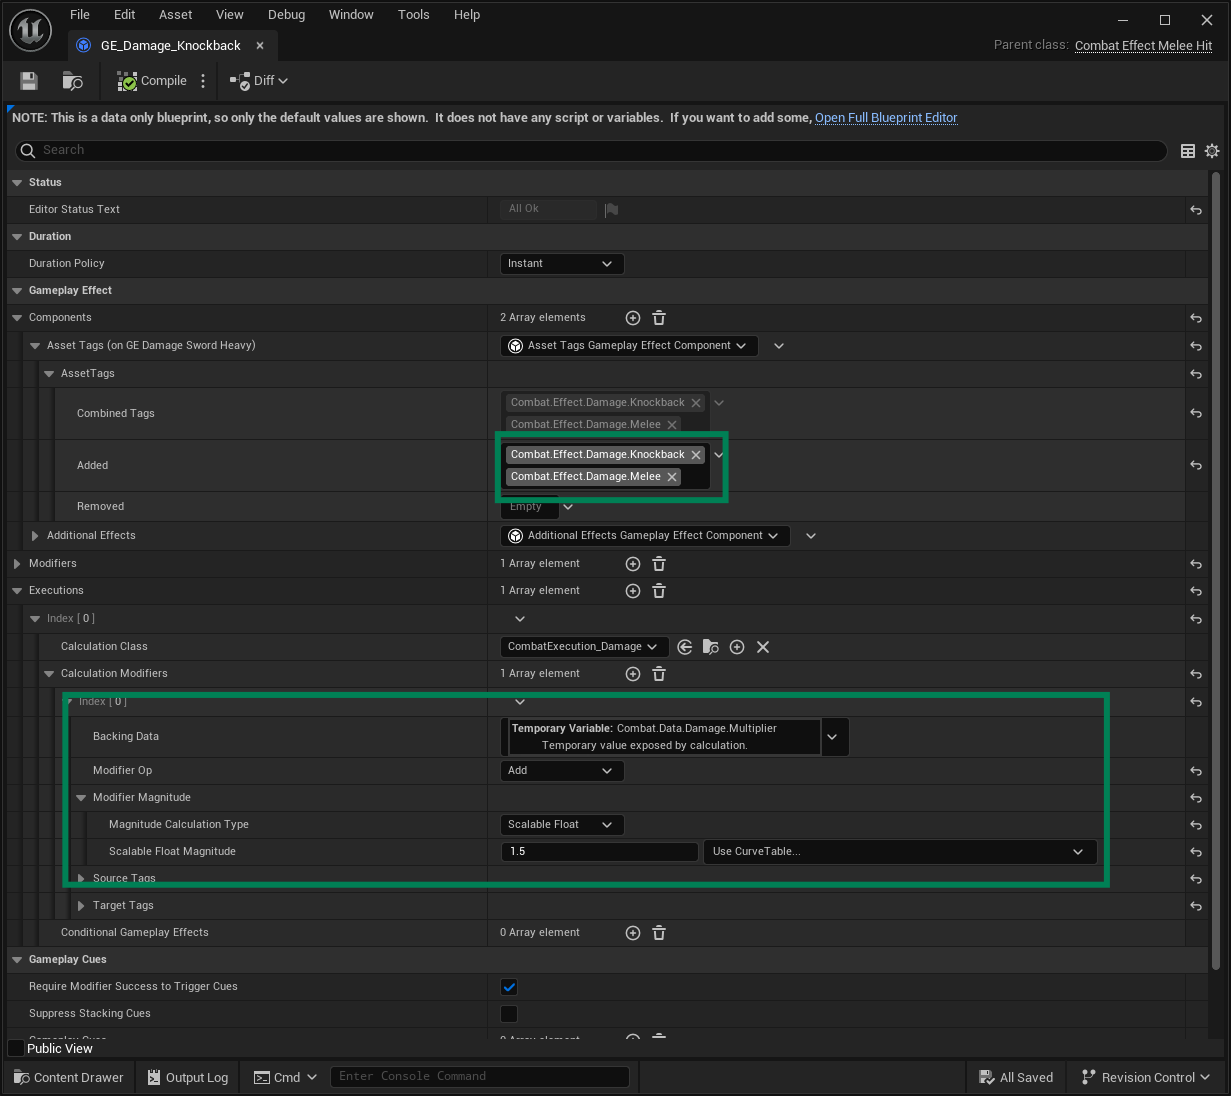
Create a new Gameplay Effect using
CombatEffect_MeleeHitas the base class. It will be used by the secondary attack.Add
Combat.Effect.Damage.Knockbackto the list of Gameplay Tags Added to the Effect.In the Execution list, add a Calculation Modifier using
Combat.Data.Damage.Multiplierand set a Scalable Float with a Magnitude of1.5.

tip
Make sure to read about the Damage Modifier, if you need a recap on why we are setting this value in this Gameplay Effect.
Create a new Gameplay Effect using
GameplayEffectas the base class. It will be used for by secondary attack.Add the Additional Effects Gameplay Effect Component and include Cancel Stamina Regeneration in the On Application Gameplay Effects list.
Add a Modifier to reduce stamina by
5.

tip
Make sure to read about the Regeneration Cancellation, if you need a recap on why we are adding the additional Gameplay Effect.
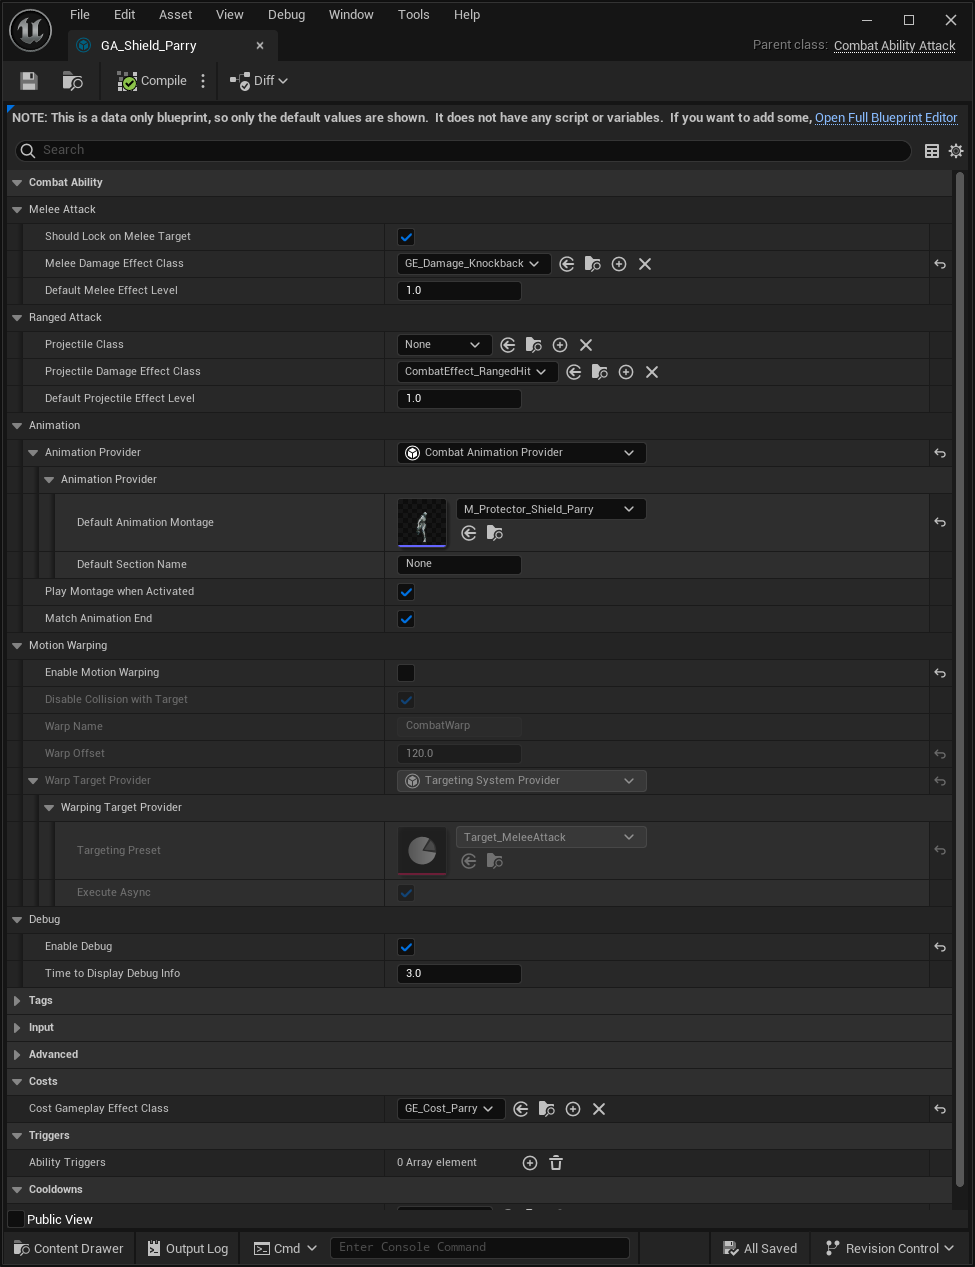
Create a new Gameplay Ability for your secondary attack, using
CombatAbility_Attackas the base class.Set the new Damage Gameplay Effect, configured on the previous step, as the Melee Damage Effect Class.
Set the Animation Montage for the secondary attack in the Default Animation Montage.
Disable Motion Warping.
Enable debugging.
Set the new Cost Gameplay Effect, configured on the previous step, as the Cost Effect Class.
Add
Ability.Attack.Secondaryto the Ability Tags, so it can be used for the activation.Add
Ability.Attack.Primaryto the list of Block Abilities with Tag, to ensure your attacks won't interrupt each other.

Create an Input Action for the Primary Attack. Add a Pressed trigger. Map this Input Action to your Input Mapping Context, assigning the Left Mouse Button as the key. If you have a Gamepad, also map it to the Face Button Left.
Create an Input Action for the Secondary Attack. Add a Pressed trigger. Map this Input Action to your Input Mapping Context, assigning the Right Mouse Button as the key. If you have a Gamepad, also map it to the Face Button Top.
Add two Input Handlers to your Input Setup Data Asset, using the Activate Ability by Tags (
InputHandler_AbilityTag) as the base.Set the correct Input Actions for each attack, and the correct Ability Tags defined earlier:
Ability.Attack.PrimaryandAbility.Attack.Secondary.When you are done, your Input Setup Data Asset should be similar to the following image.

Click the Play button and execute your primary and secondary attacks, pressing the appropriate buttons.
Both your attacks should execute correctly, and you should see scan lines for the debug.
Gif
tip
Since the melee scans are confirmed to be working correctly, you can disable debug in the attack abilities.


