Configuring Target Locking
This guide shows how to implement target locking so players see a visual representation of their prioritized enemies and can reuse the locked target for systems such as motion warping and strafing movement.
For more information, see the documentation for Target Locking.
Prerequisites
Collision and Components
Your collision channels, combat components, and base character setup should already be configured. For more information, see Combat Setup and Combat First Steps.
Input Handling
Make sure your input setup can activate gameplay abilities. For more information, see Combat and Input Integration. Integration with Ninja Input is optional, but input handling for ability activation should already be configured.
Motion Warping
Motion Warping is commonly used by melee attacks to move the attacker closer to the target by adjusting the animation's root motion.
This requires adding the Motion Warping Component to your character and implementing the appropriate getter function from the Combat System Interface.
Add the Motion Warping Component
In your Character Blueprint or base class, add
NinjaCombatMotionWarpingComponent.Implement
GetMotionWarpingComponentfrom theCombatSystemInterface, returning your Motion Warping Component.
Targeting Preset
Motion Warping can use a Targeting Preset to find the target that the attack should warp toward. We will create a preset that prioritizes the locked target first. If no locked target is available, the preset will collect targets using a fallback area scan.
Create a Targeting Preset
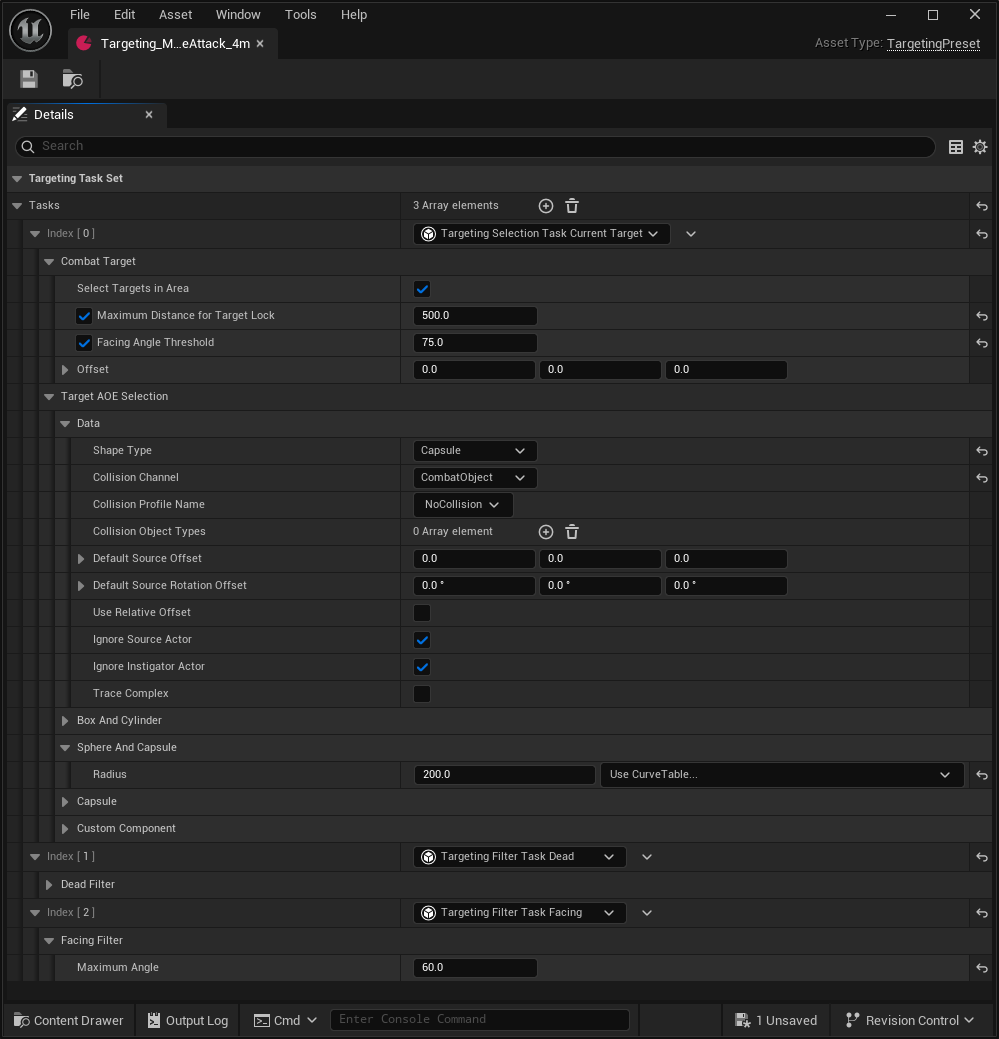
Create a new Targeting Preset asset.
Add the Current Target Selection Task and set the following properties:
Set it to Select Targets in Area, so it will perform a scan as a fallback when no target is locked on.
Set the Maximum Distance for Target Lock to
500.Set the Facing Angle Threshold to
75.Set the Shape Type to Capsule.
Set the Collision Channel to Combat Object.
Set the Radius to
200, or any other value that fits your design.
Add the Dead Filter Task.
Add the Facing Filter Task and set the Maximum Angle to
60.Add the Distance Sort Task.
Target Lock Anchor
Every actor that can be locked on must have a scene component that represents the location where the Target Lock actor should be attached to.
Configure the Anchor Scene Component
Open your base combatant class and add a new Scene Component parented to the main mesh.
Adjust its location as needed.
Add
Combat.Component.TargetLockAnchorto the list of component tags.
Target Lock Actor
The target lock actor is used by the Target Manager Component (by default, the Combat Manager) to represent the current locked-on actor.
Create the Target Lock Actor
Create a new Gameplay Widget to represent the marker (e.g., a simple dot or arrow).
In your Content Browser, create a new Actor based on
NinjaCombatMarkerActor.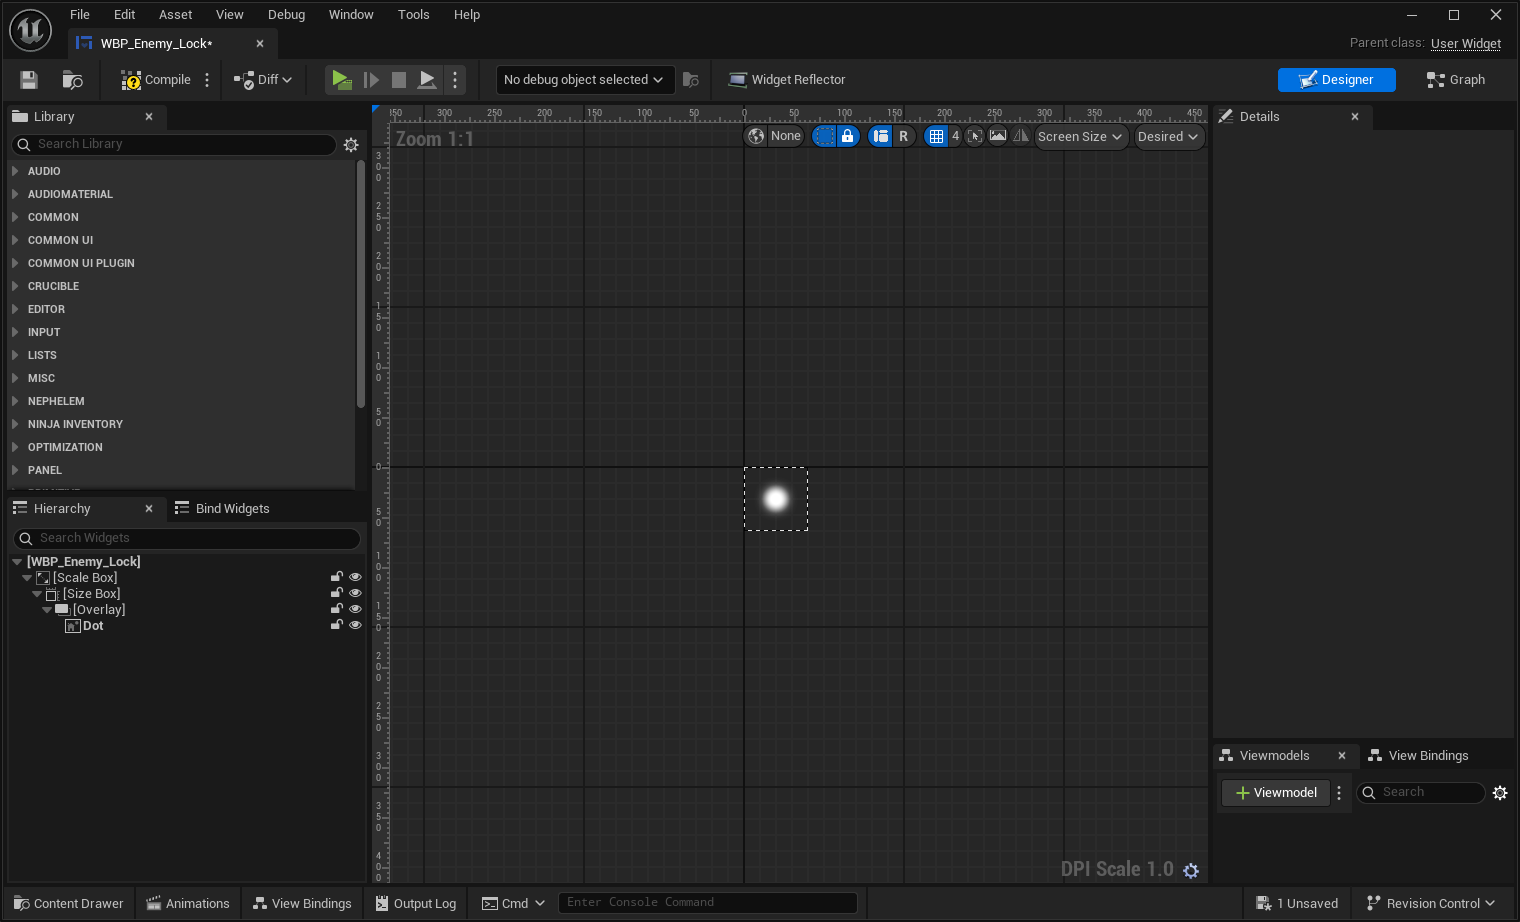
Assign the created Widget to the Target Lock Widget Component of your new actor.
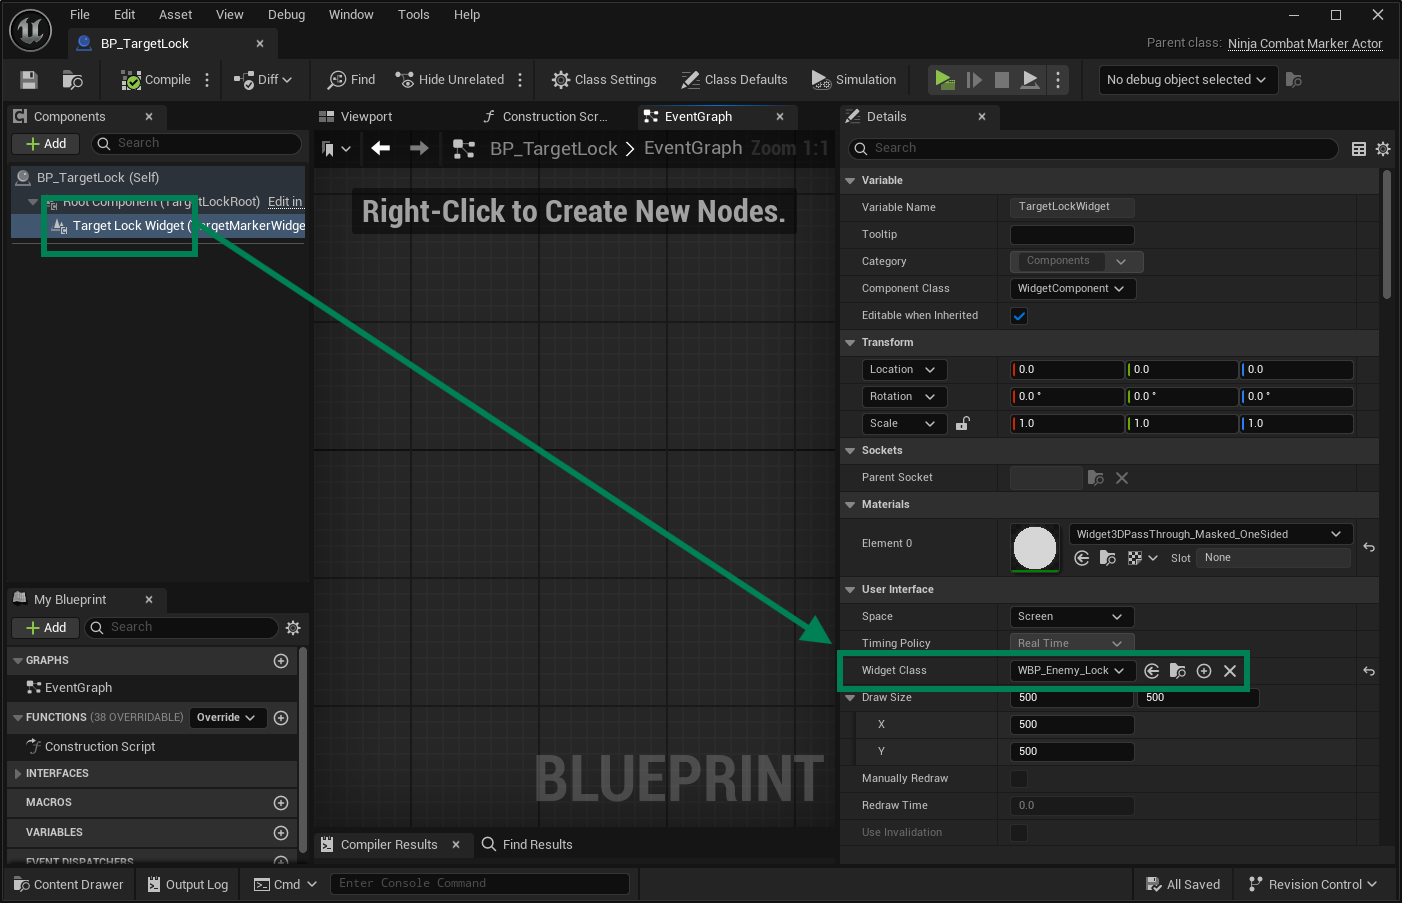
Set the Target Lock Actor to
TargetMarkerActorClassin the Combat Manager.
Target Lock Ability
The Target Lock Ability collects the target using a Targeting Preset and supports activation by tags or Gameplay Events. It also supports additional events to scan for targets, cycle targets, and dismiss the current one.
Create the Target Lock Ability
Create a new Gameplay Ability based on
CombatAbility_TargetLock. Set your Targeting Preset in the ability's properties.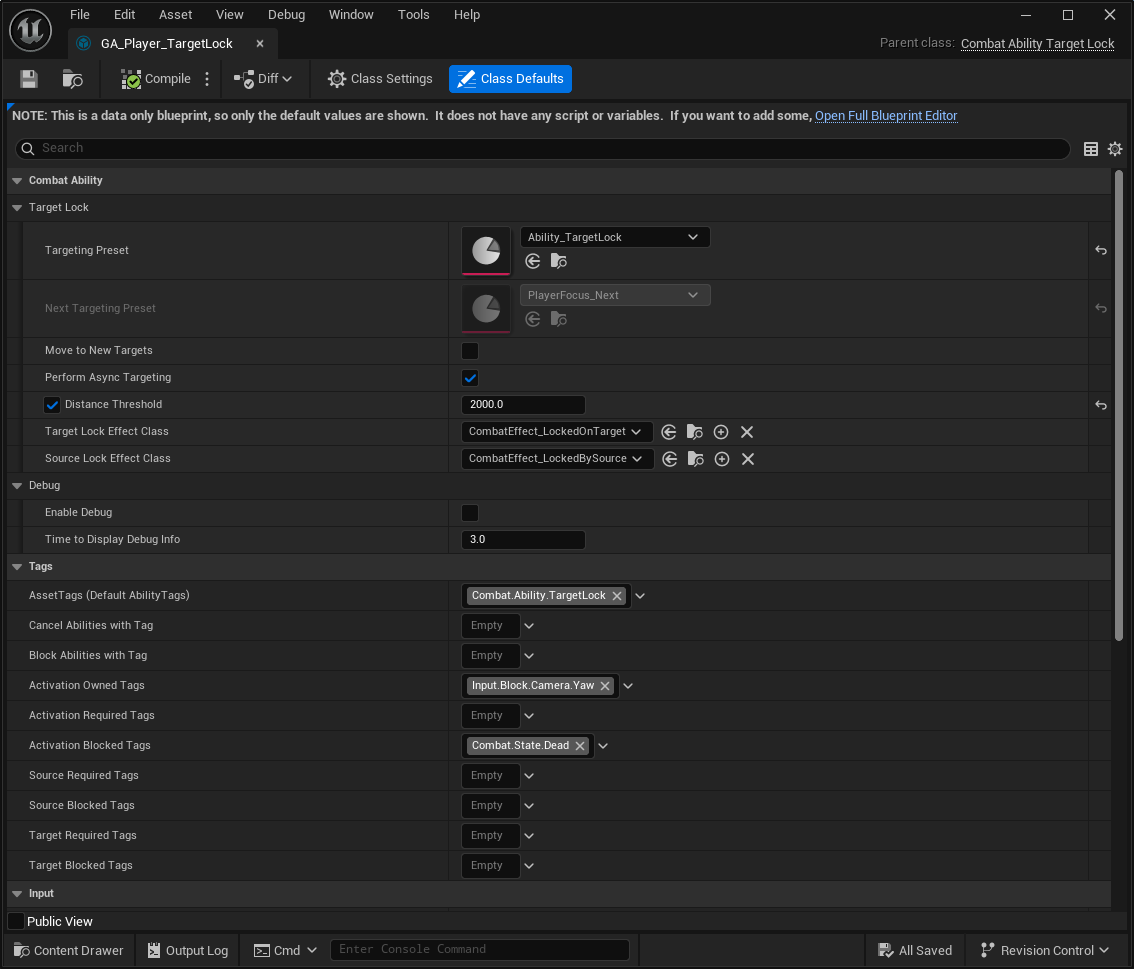
Set the Gameplay Targeting Preset previously created as the ability's Targeting Preset.
Enable Track Distance and set a reasonable Distance Threshold for your project.
Add an Activation Tag to the Ability Tags container, such as
Ability.Activation.TargetLock.Optionally, if using Ninja Input, also add
Input.Ability.Toggledto the list of Ability Tags.This will allow the ability to be activated by an input and then deactivated when the same input is received again.
Grant the ability to your character.
The Target Lock Ability can be activated using common Ability Activation Techniques. If you are using Ninja Input, make sure to check the Integration Page to see how to use Input Handlers to toggle the ability and send Gameplay Events to scan for targets, cycle targets, and dismiss the current one.