Configuring Ranged Attacks
This guide shows how to create a basic ranged attack using a Gameplay Ability, an Animation Montage, and a Projectile Actor.
The setup works with different ranged sources. The same flow works for projectiles launched from the combatant and for projectiles launched from an equipped weapon. The shared prerequisite is that the projectile source must implement ICombatRangedInterface.
For more information, see the documentation for Ranged Attacks.
Prerequisites
Collision and Components
Your collision channels, combat components, and base character setup should already be configured. For more information, see Combat Setup and Combat First Steps.
Input Handling
Make sure your input setup can activate gameplay abilities. For more information, see Combat and Input Integration. Integration with Ninja Input is optional, but input handling for ability activation should already be configured.
Weapon Management
If your projectiles originate from weapons, make sure to configure them first. For more information, see Weapon Management.
Projectile Actor
The projectile actor is launched by a Gameplay Ability and owns the Gameplay Effect application.
Create the Damage Gameplay Effect
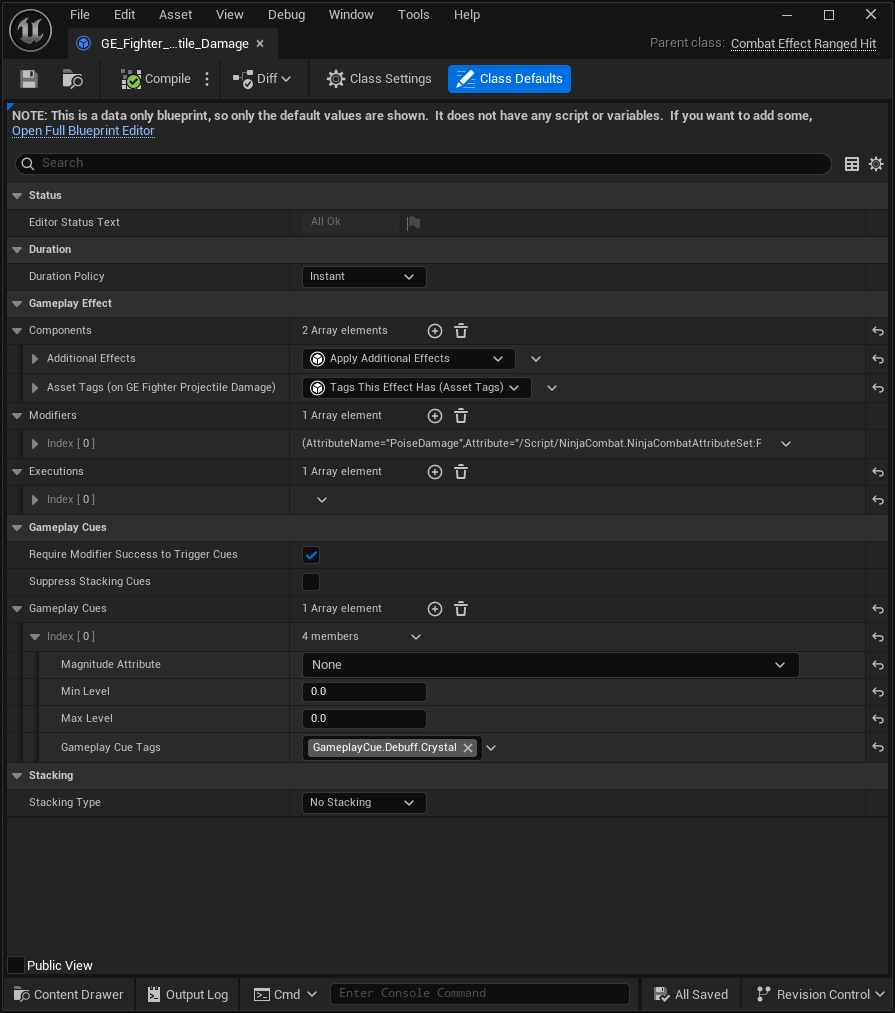
In your Projectile Ability folder, create a new Gameplay Effect Blueprint using
CombatEffect_RangedHitas the base class.Optionally, add a Gameplay Cue that should be applied to each target affected by the projectile.
Create the Projectile Actor
In your Blueprints folder, create a new Projectile Actor Blueprint using
NinjaCombatProjectileActoras the base class.Review the default Projectile Behaviors and adjust settings as needed:
In the Hit Processor behavior, set the Hit Adjustment Trace Channel to
CombatObject.In the Scan behavior, set the Scan Channel to
CombatObject.In the Exhaustion behavior, adjust the Active Duration as needed.
Add a Niagara Component to the Root Sphere. Set Auto Activate to
false.In the My Blueprint tab, expand Overridable Functions and add the following events to the Event Graph.
Double-click
LaunchProjectileto add this event to the graph. Right-click the node and select Add Call to Parent Function.Double-click
Exhaustto add this event to the graph. Right-click the node and select Add Call to Parent Function.
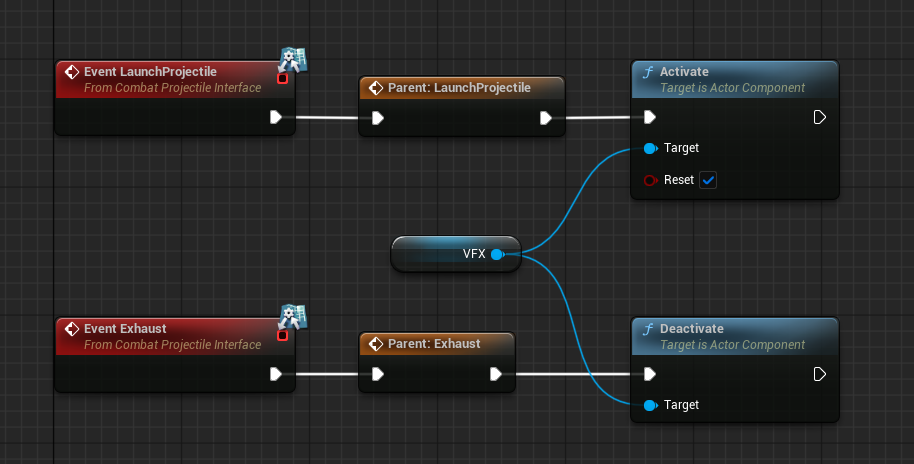
Implement the new events, activating and deactivating components.
When launching the projectile, activate the VFX component. Make sure the component is set to Reset.
When the projectile exhausts, deactivate the VFX.
Close the base Blueprint and create a new Child Blueprint. This child Blueprint is the one that will be used by the ability.
Assign the Niagara System and Sound assets that should be used by this Projectile Actor.
Set the Gameplay Effect applied by the Projectile Actor to the Impact Effect Class.
Gameplay Ability
The Gameplay Ability will activate, wait for a Gameplay Event from the animation, and launch the projectile.
While using Gameplay Event mode, the ability can launch a Projectile Actor class provided by the Projectile Payload, or use the Fallback Projectile Class configured in the ability.
Create the Animation Montage
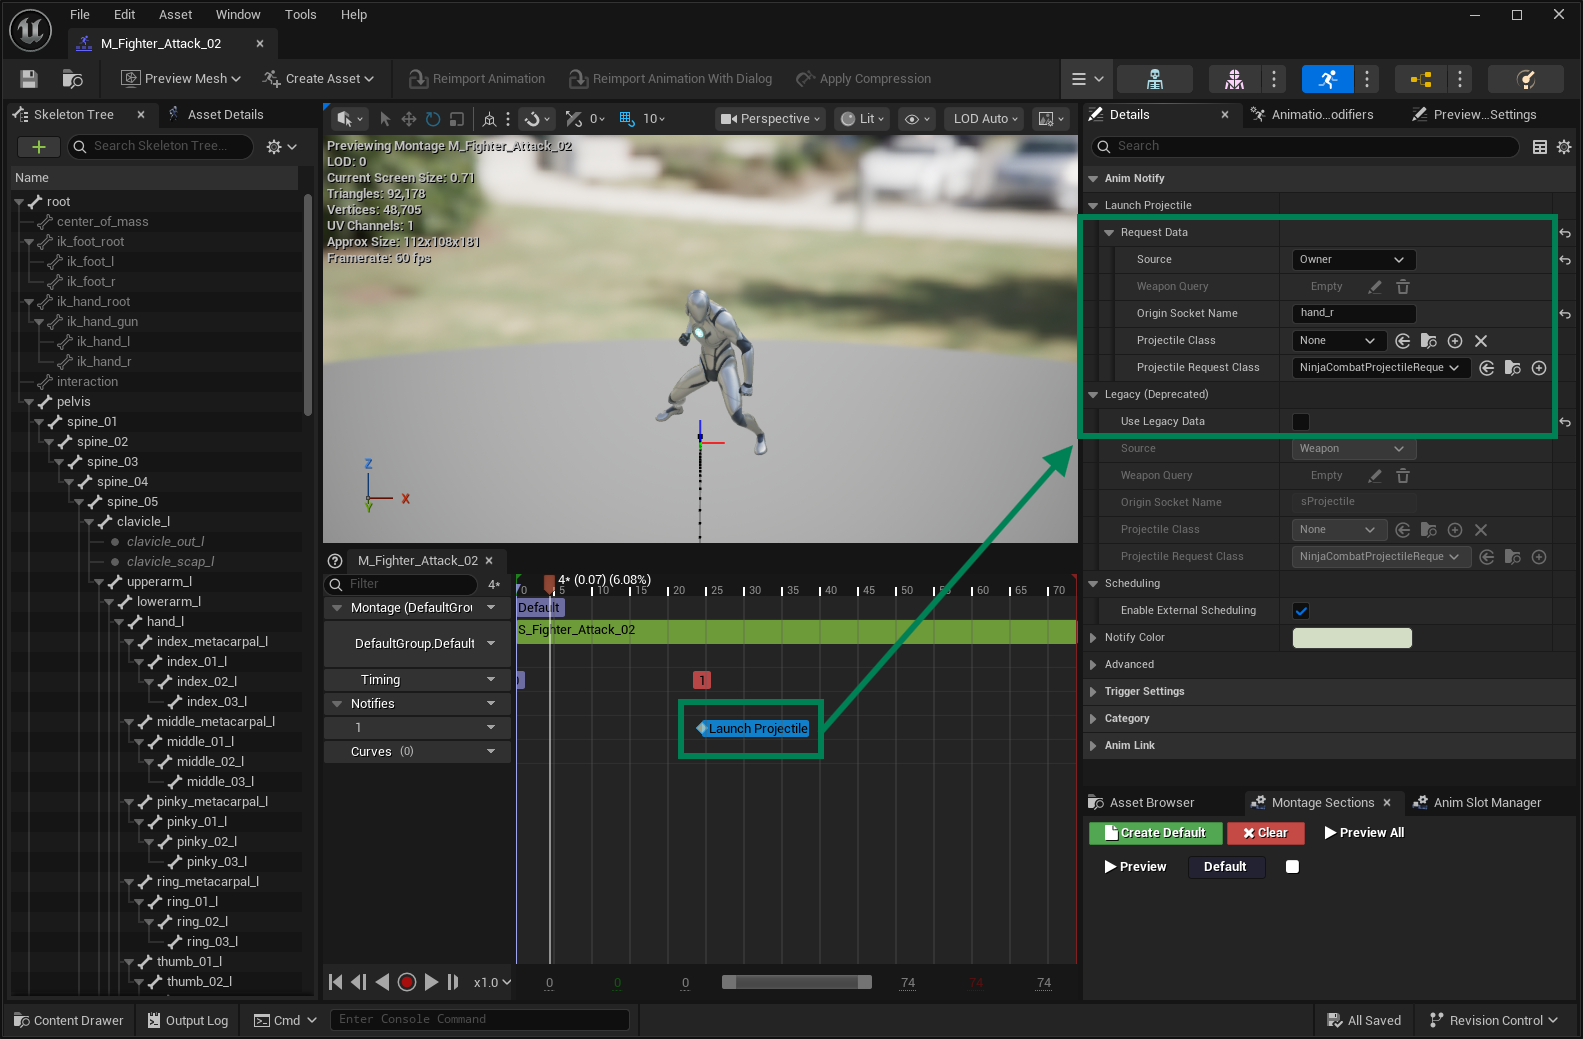
Select the Animation Sequence that represents the ranged attack and create an Animation Montage from it.
If applicable, select the correct Slot for the Animation Montage, based on the setup in your Animation Instance.
Navigate to the point in the Animation Montage where the projectile should launch, then add the Launch Projectile Animation Notify.
Configure the Animation Notify with a proper Source and Origin Socket.
Create the Projectile Ability
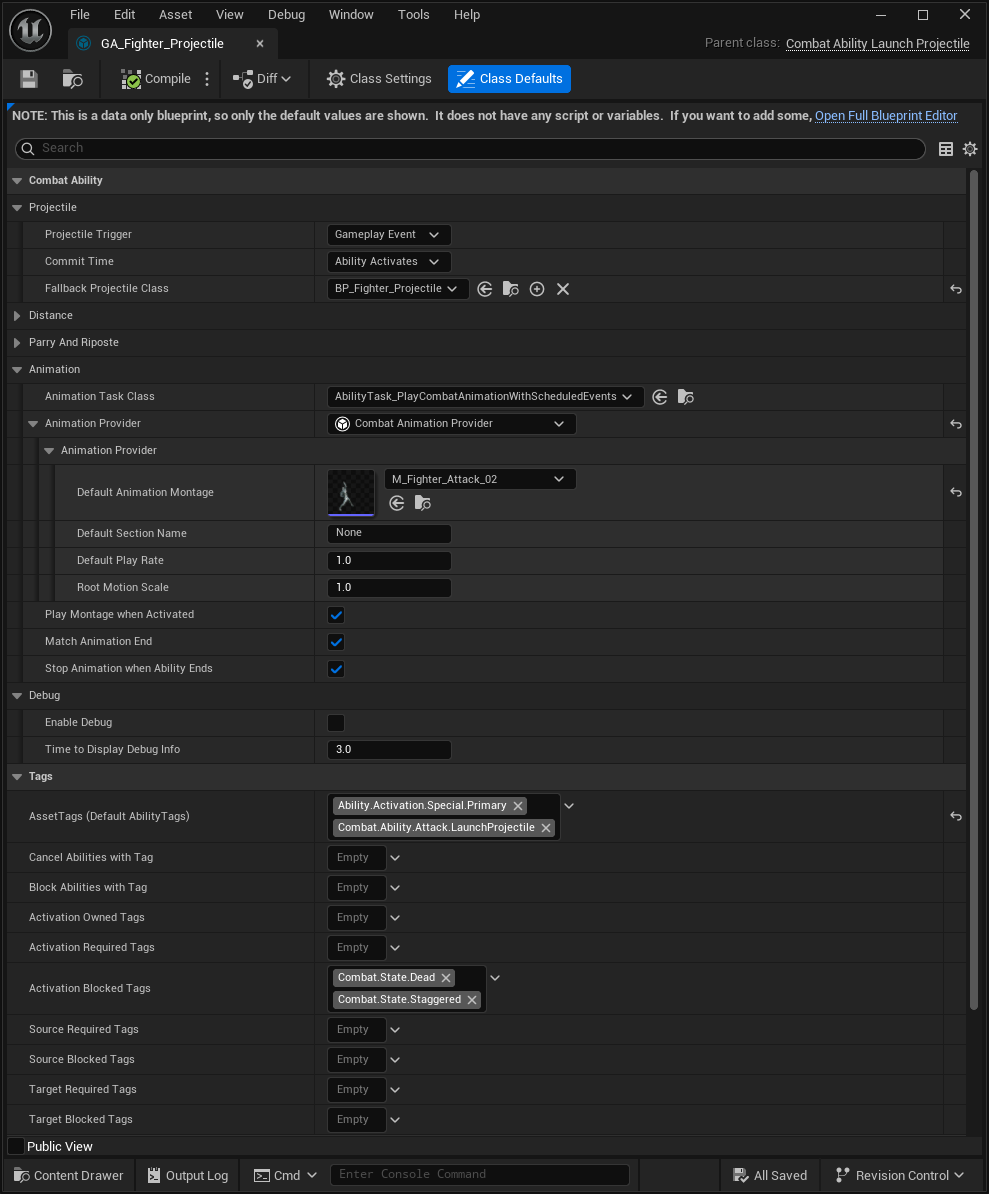
Create a new Gameplay Ability using
CombatAbility_LaunchProjectileas the base class.Configure the Projectile Ability with the following values:
Projectile Trigger: Gameplay Event
Commit Time: Ability Activates
Fallback Projectile Class: the Projectile Blueprint
Add any Gameplay Tags required to activate the ability.