Configuring Firearms
The Firearms Module allows you to design weapons that operate using hitscans or projectiles. For more information, check the Firearms documentation.
This guide covers hitscan-based weapons. Projectile-based firearms follow the same general setup, but use projectile definitions instead of hitscan impact handling, similar to ranged combat.
Surfaces for Hitscans
Hitscan firearms use an Impact Table to represent surface impacts. This table defines the particles and sounds used for each surface configured in your project.
For more information, check the setup for Physical Materials.
Configure the Impact Table
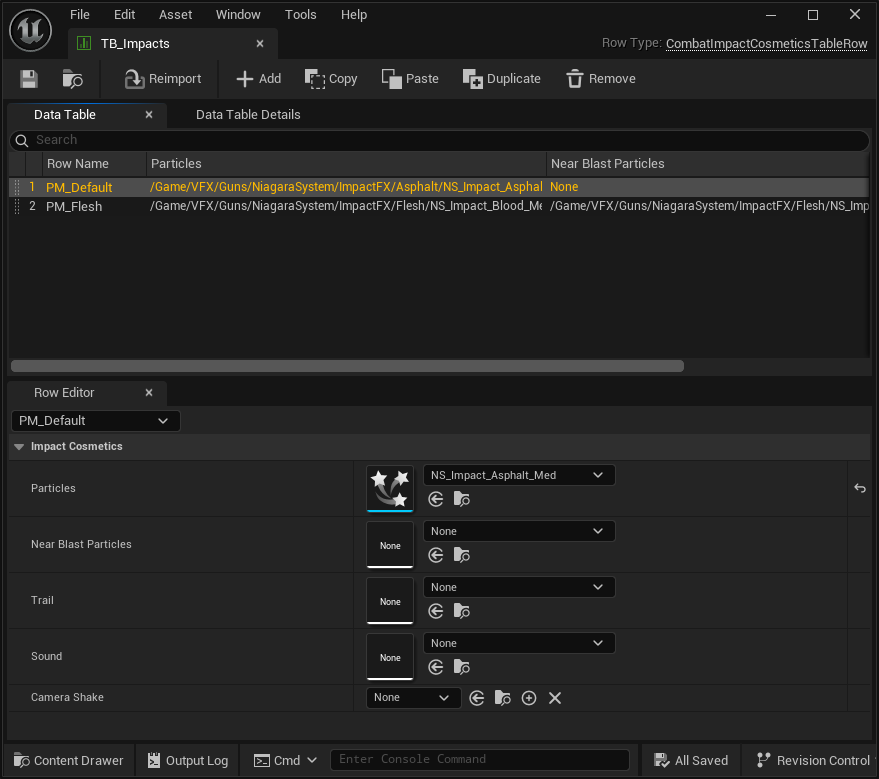
Create a new Data Table based on
CombatImpactCosmeticsTableRow.Add a new row for each Physical Material relevant to your project.
Name each row after the corresponding Physical Material Data Asset.
Configure Particles and Sound Effects as needed.
Rifle Design
Rifles can be configured as single-shot, burst-fire, or fully automatic weapons. You can also extend the Firearm Component to switch between fire modes dynamically.
In this example, we will configure a fully automatic rifle.
Create the Rifle Data Asset
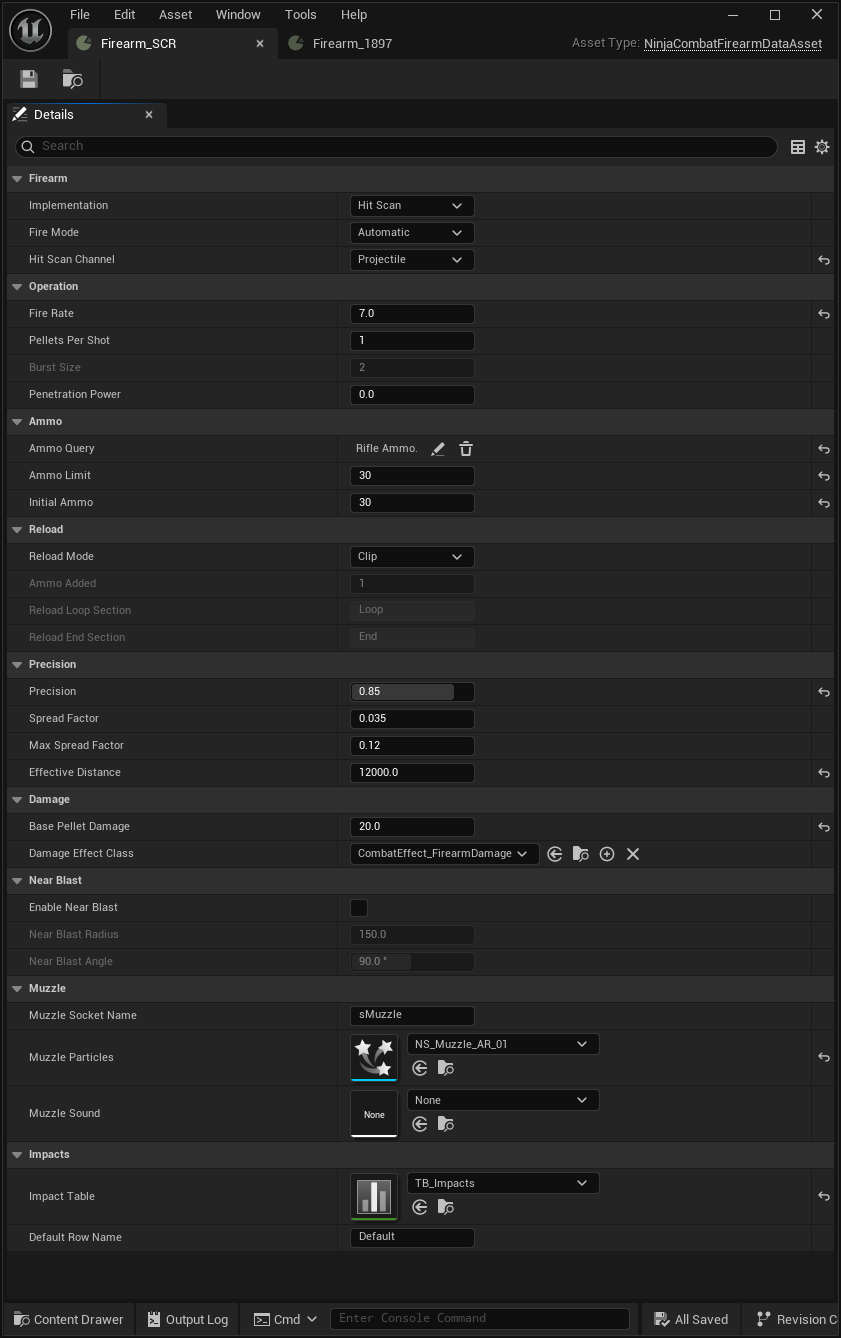
In your Firearm Data folder, create a new Firearm Data Asset using the Content Browser contextual menu: Ninja Bear Studio → Ninja Combat → Firearm Definition.
Configure the main properties for the rifle.
Set the Implementation to
Hit Scan.Set the Fire Mode to
Automatic.Set the Hit Scan Channel to
Projectile.Set the Fire Rate to a fast value, such as
7.Set the Precision to
0.85.Set the Base Pellet Damage to
20. This value is applied to the Firearm Damage Effect.
Configure the Ammo Query to match the proper ammo in the Ammo Storage Component.
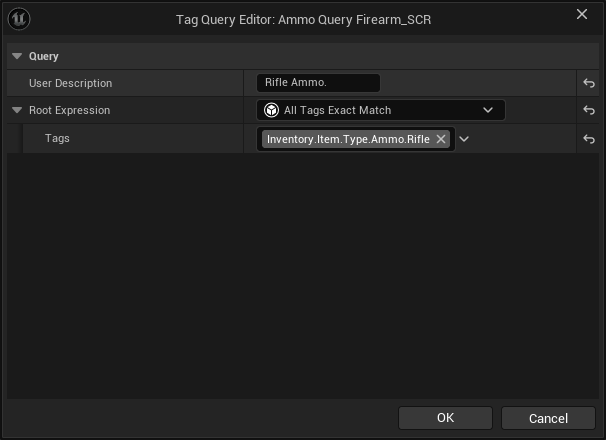
Set both Ammo Limit and Initial Ammo to
30.Configure the Muzzle Socket Name if it is different from the default value.
Add the muzzle particles and sound used when the weapon fires.
Add the previously configured Impact Table.
Configure the Shoot Montage
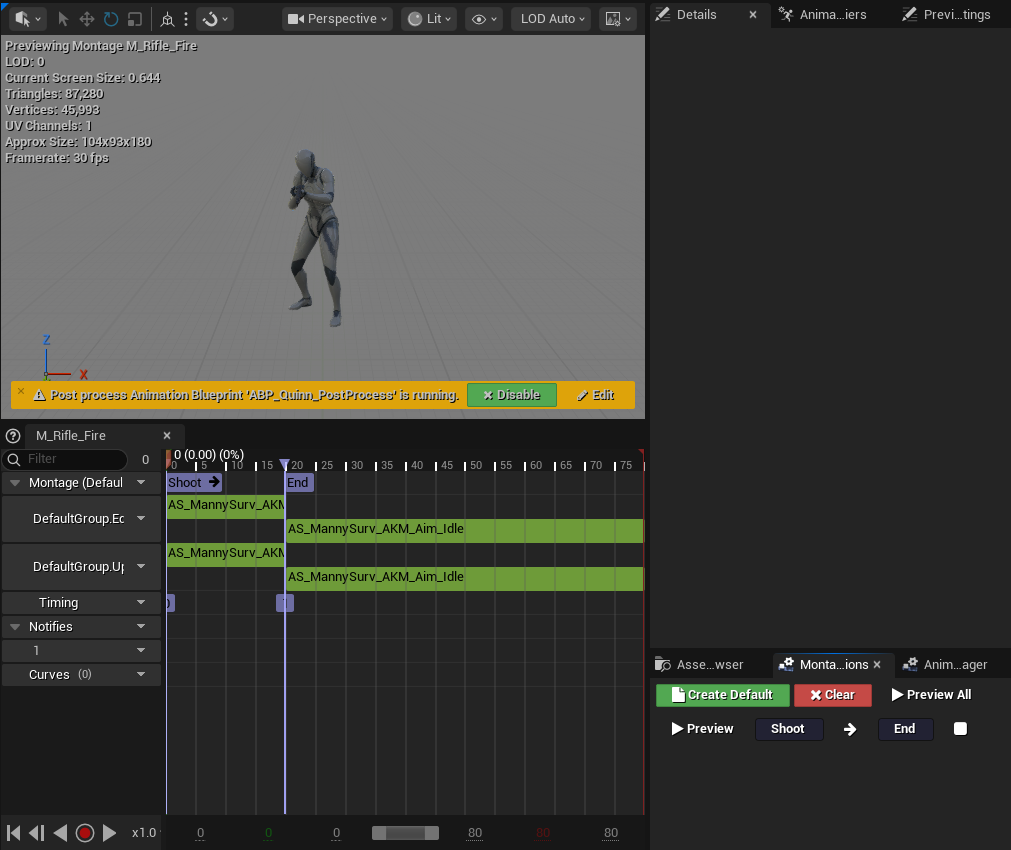
Create or open the Shoot Animation Montage used by the rifle.
Add a section named
Shoot. This section is used when the firearm plays its shooting animation.Keep this section short, only including the actual shooting part of the animation.
Add the firing animation to the montage slots.
Use an Upper Body slot for shooting while the character is moving.
Use a Full Body slot for shooting while the character is standing still.
Configure a short Blend-In Time, such as
0.05.
Configure the Reload Montage
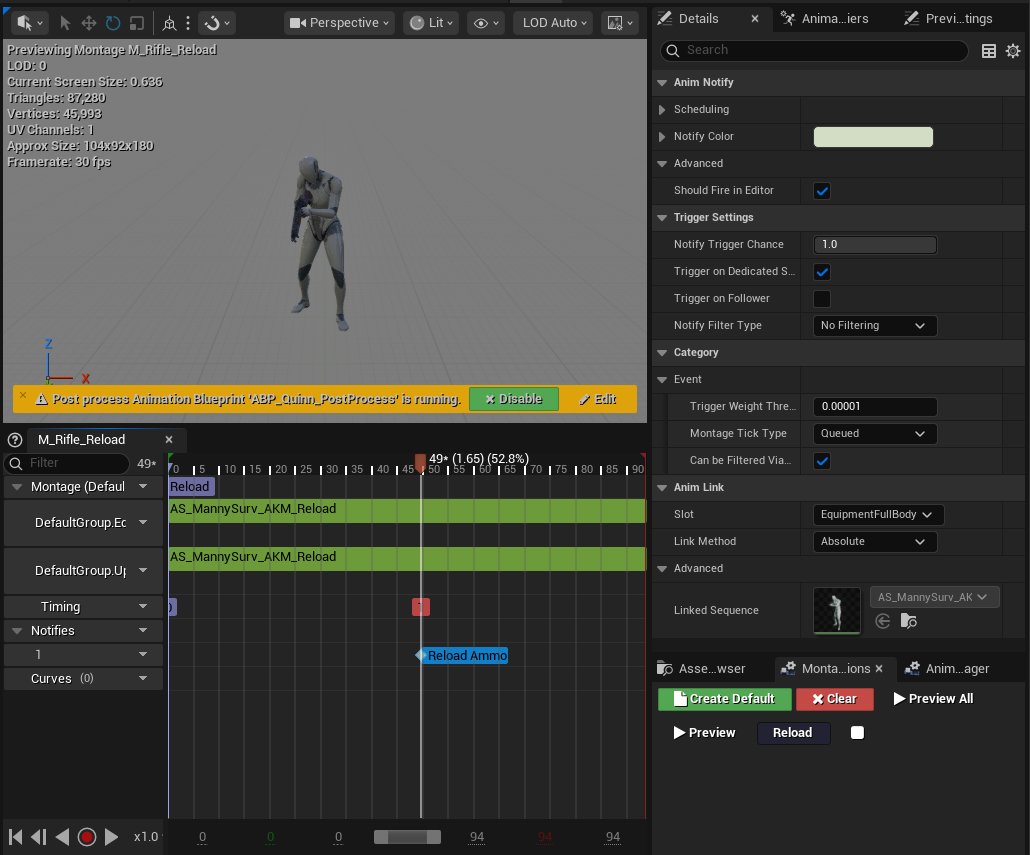
Create or open the Reload Animation Montage used by the rifle.
Add a section named
Reload. This section is used when the firearm plays its reload animation.Add the reload animation to the montage slots.
Use an Upper Body slot for reloading while the character is moving.
Use a Full Body slot for reloading while the character is standing still.
Add the
Reload AmmoAnimation Notify at the point where ammo should be restored.
Shotgun Design
A shotgun is also a hitscan-based weapon. It is configured as a single-shot firearm that fires multiple pellets per shot and uses a reload mode that adds one shell per animation loop.
Create the Shotgun Data Asset
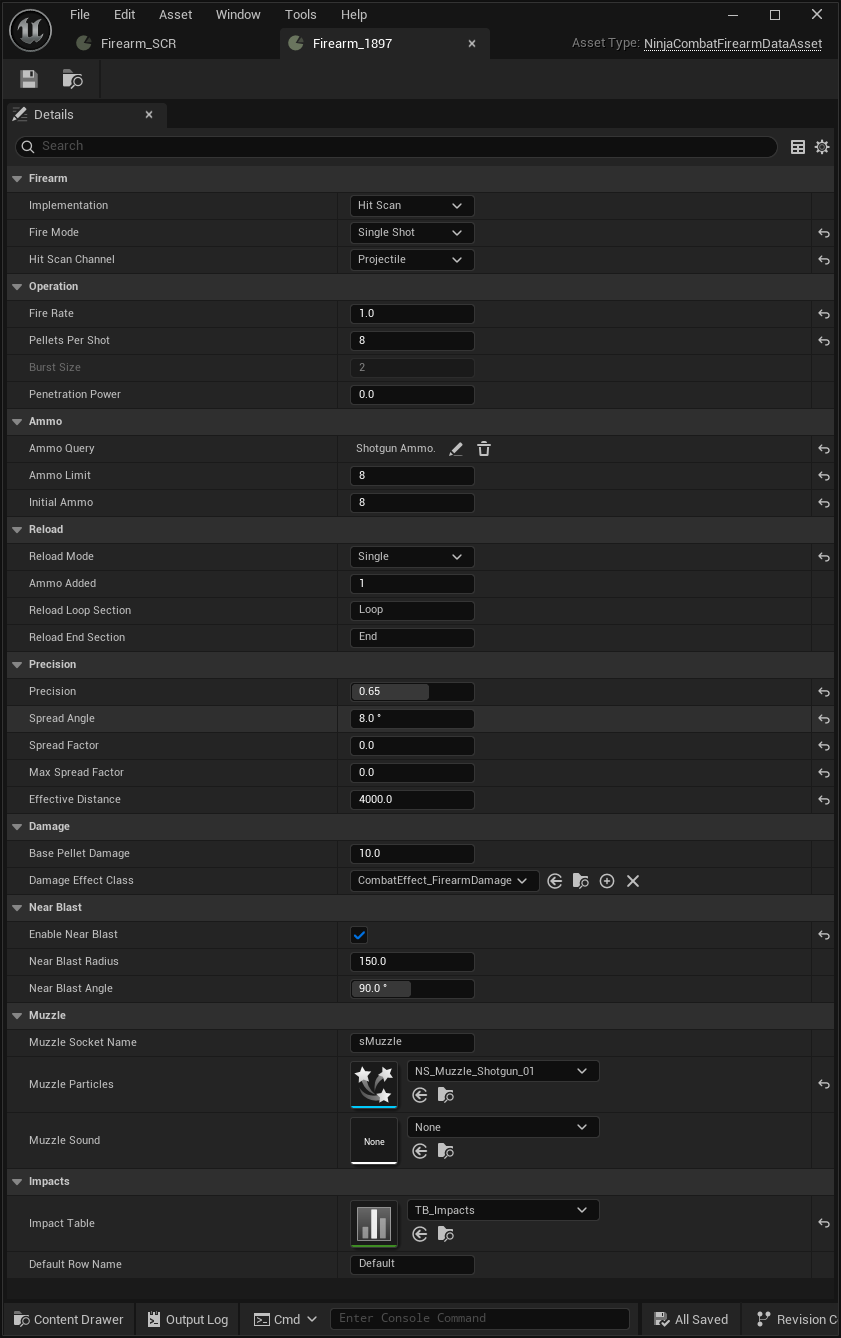
In your Firearm Data folder, create a new Firearm Data Asset using the Content Browser contextual menu: Ninja Bear Studio → Ninja Combat → Firearm Definition.
Configure the main properties for the shotgun.
Set the Implementation to
Hit Scan.Set the Fire Mode to
Single Shot.Set the Hit Scan Channel to
Projectile.Set the Fire Rate to
1.Set the Pellets Per Shot to
8.Set the Base Pellet Damage to
10. This value is applied to the Firearm Damage Effect.
Configure the Ammo Query to match the proper shotgun ammo in the Ammo Storage Component.
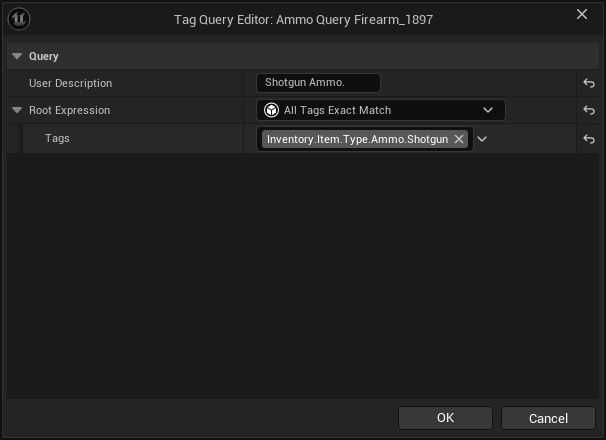
Set both Ammo Limit and Initial Ammo to
8.Configure the reload settings.
Set the Reload Mode to
Single.Set Ammo Added to
1.Set the Reload Loop Section to
Loop.Set the Reload End Section to
End.
Configure the shotgun spread.
Set the Precision to
0.65.Set the Spread Angle to
8.
Configure the Muzzle Socket Name if it is different from the default value.
Add the muzzle particles and sound used when the weapon fires.
Add the previously configured Impact Table.
Configure the Shoot Montage
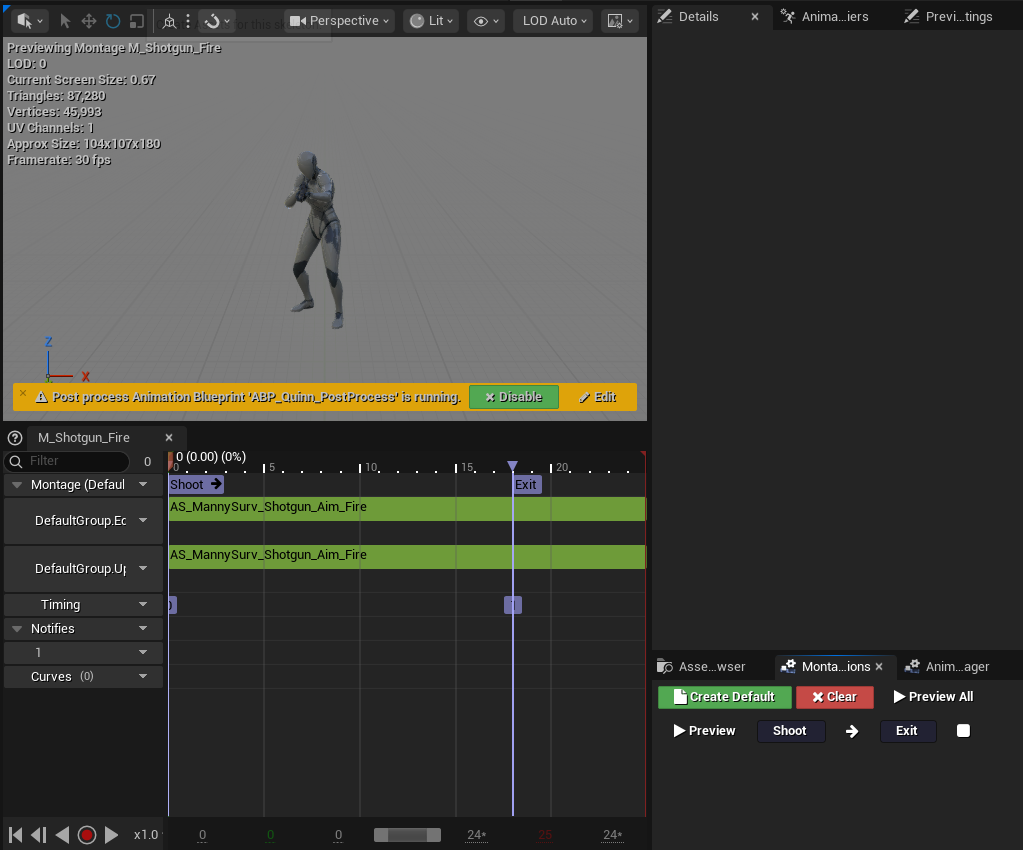
Create or open the Shoot Animation Montage used by the shotgun.
Add a section named
Shot. This section is used when the firearm plays its shooting animation.Add a section named
Exit. This section allows the montage to finish cleanly after the shot is fired.Add the firing animation to the montage slots.
Use an Upper Body slot for shooting while the character is moving.
Use a Full Body slot for shooting while the character is standing still.
Configure a short Blend-In Time, such as
0.05.
Configure the Reload Montage
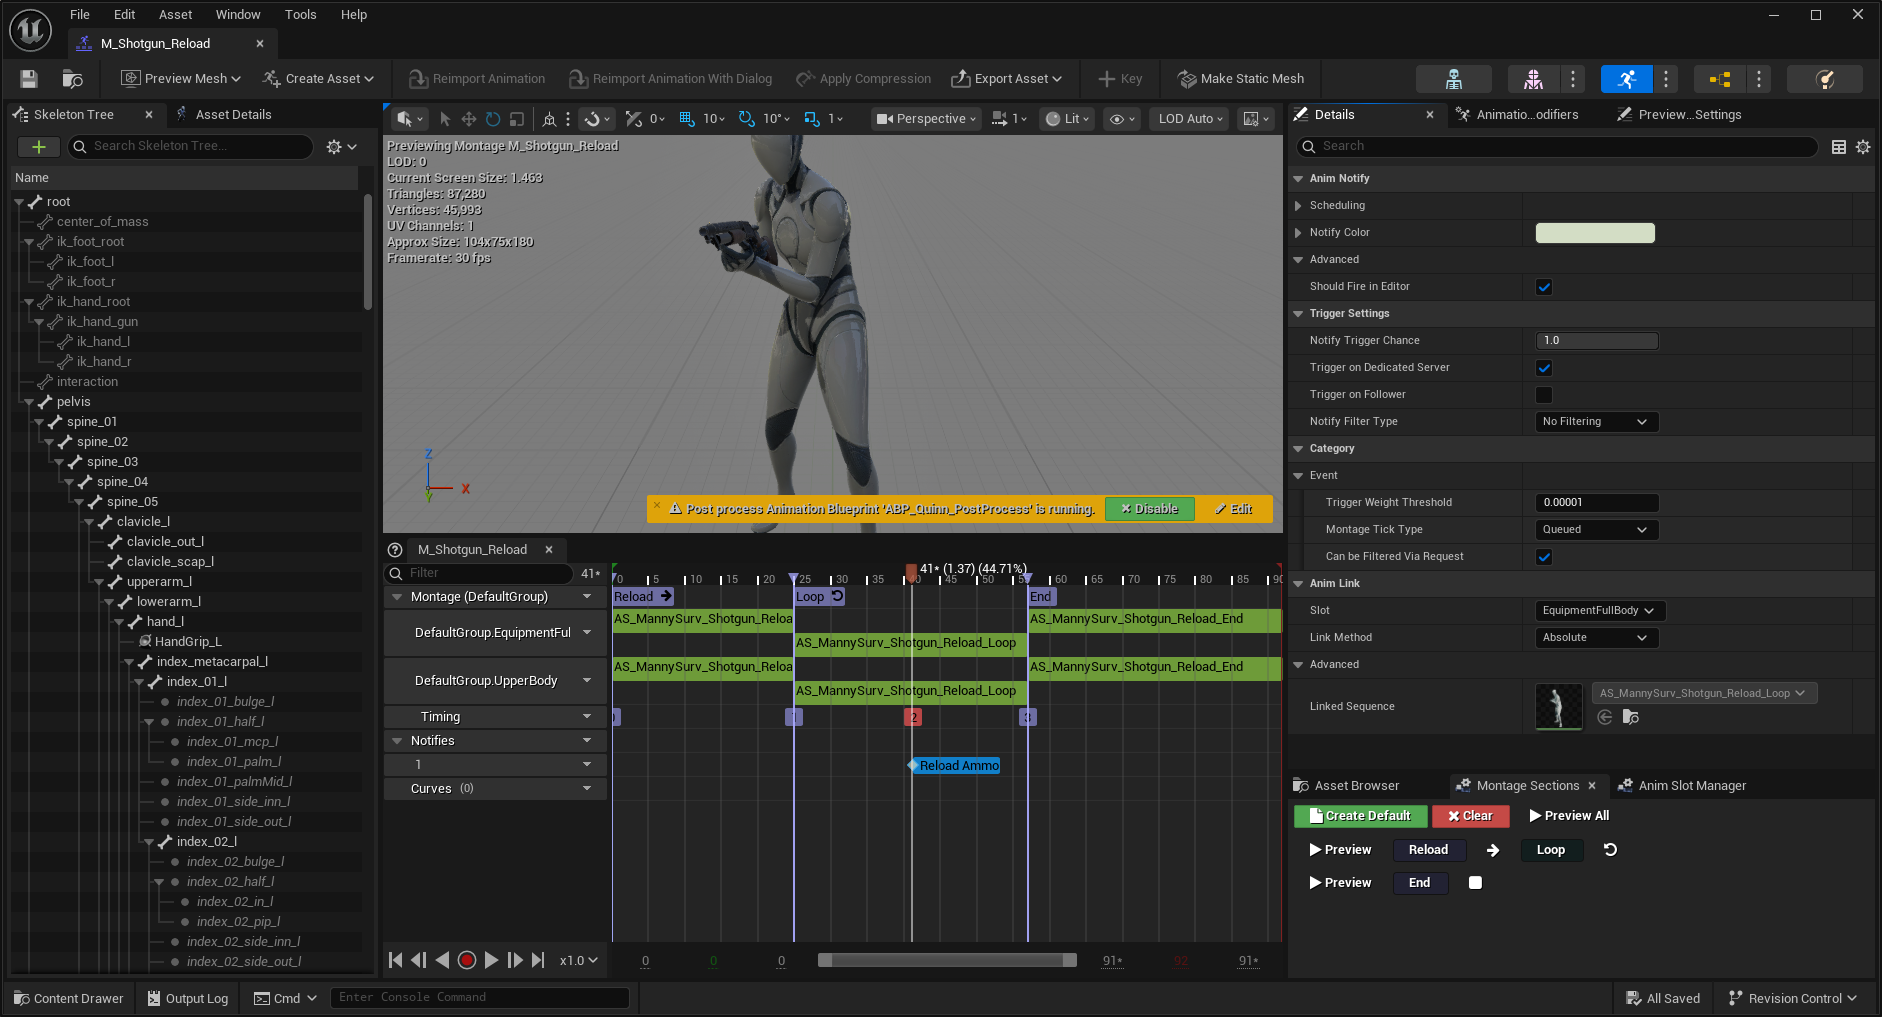
Create or open the Reload Animation Montage used by the shotgun.
Add a section named
Reload. This section starts the reload animation.Add a section named
Loop. This section is repeated while shells are being added to the firearm.Add a section named
End. This section is played when the reload finishes.Add the reload animations to the montage slots.
Use an Upper Body slot for reloading while the character is moving.
Use a Full Body slot for reloading while the character is standing still.
Add the
Reload AmmoAnimation Notify in theLoopsection, at the point where one shell should be added.Since this shotgun uses a single-shell reload, this notify is triggered once per reload loop.
Firearm Operation
Firearm operation is split between two parts: Gameplay Abilities that execute weapon actions and Firearm Components that manage and update weapon data.
Ammo storage can also be integrated with Ninja Inventory. For more information, check the related Inventory Integration Guide.
Create the Shoot Ability
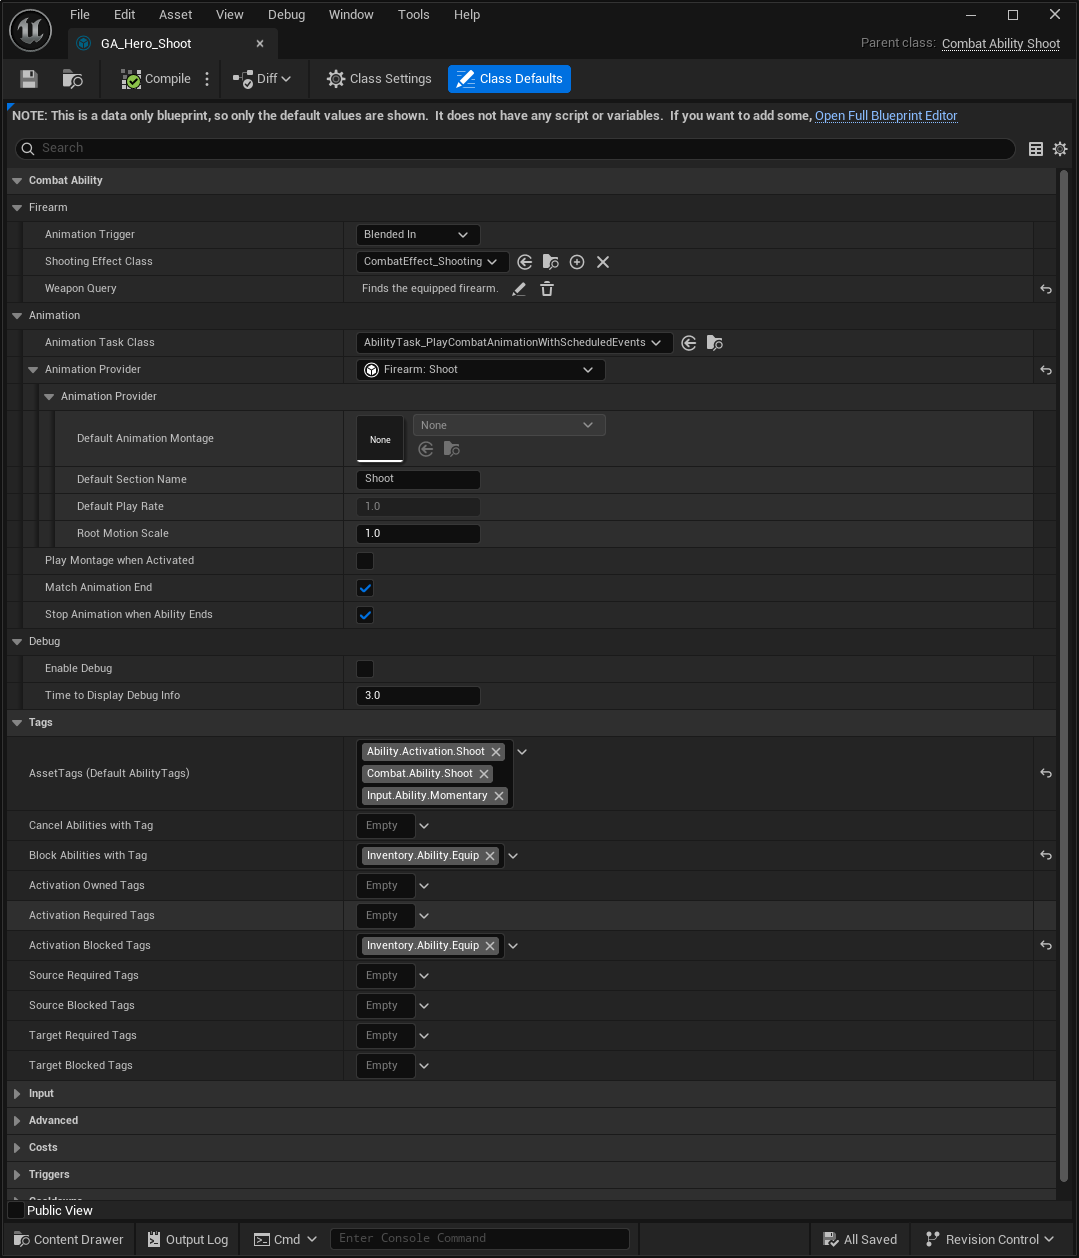
Create a new Gameplay Ability based on
CombatAbility_Shoot.Set the Animation Trigger to
Blended In.Review the animation settings.
Set the Animation Provider to
Firearm: Shoot. This provider retrieves the correct animation from the Firearm Component.Set the Default Section Name to
Shootto match the montage section.
Create the Reload Ability
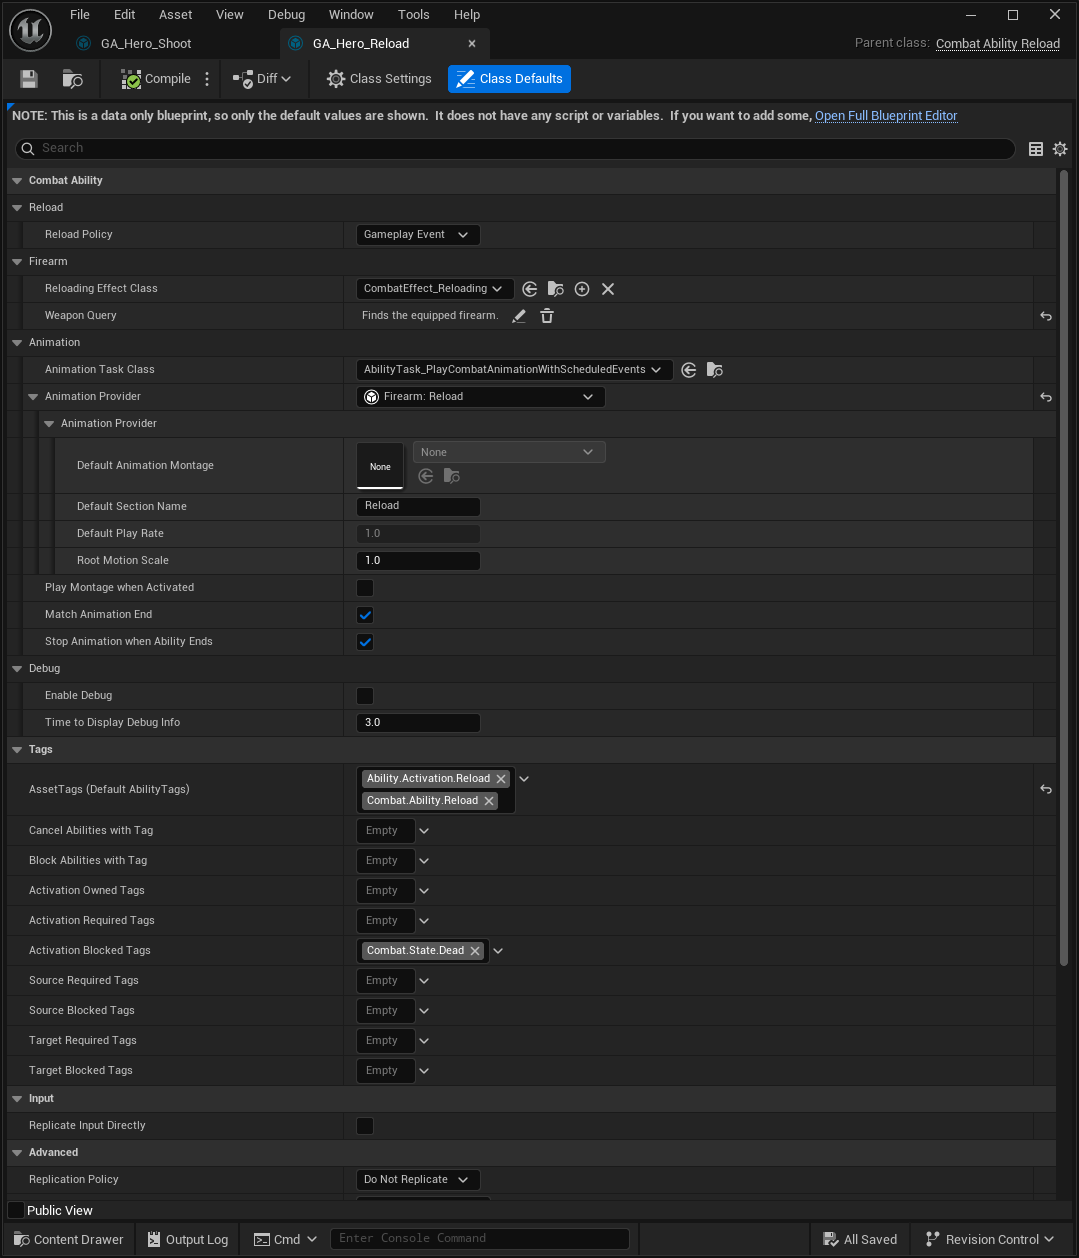
Create a new Gameplay Ability based on
CombatAbility_Reload.Configure the reload settings.
Set the Reload Policy to
Gameplay Event.Set the Reloading Effect Class to your reload effect, such as
CombatEffect_Reloading.Configure the Weapon Query to find the equipped firearm.
Review the animation settings.
Set the Animation Provider to
Firearm: Reload. This provider retrieves the correct animation from the Firearm Component.Set the Default Section Name to
Reloadto match the montage section.
Add
Ability.Activation.Reloadso your input handling or AI can activate this ability by tag.
Add the Firearm Component
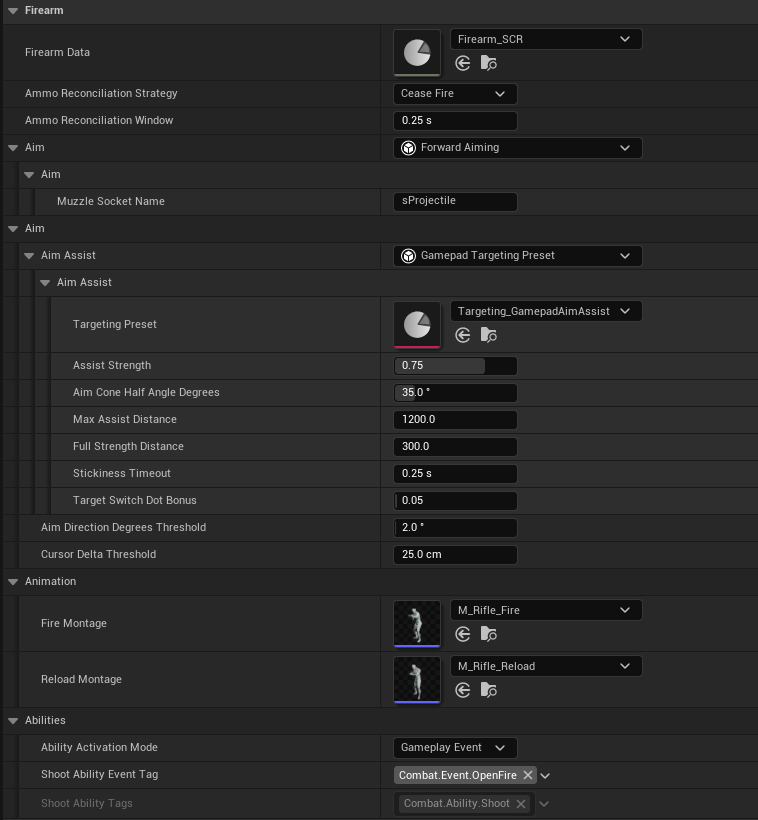
Open your Base Firearm Actor and browse to its Firearm Component.
Assign the correct Aim based on your project's needs.
Optionally, configure Aim Assist using the Gamepad Aim Assist implementation provided by the system.
You need to provide a Targeting Preset that collects nearby targets for aim assist.
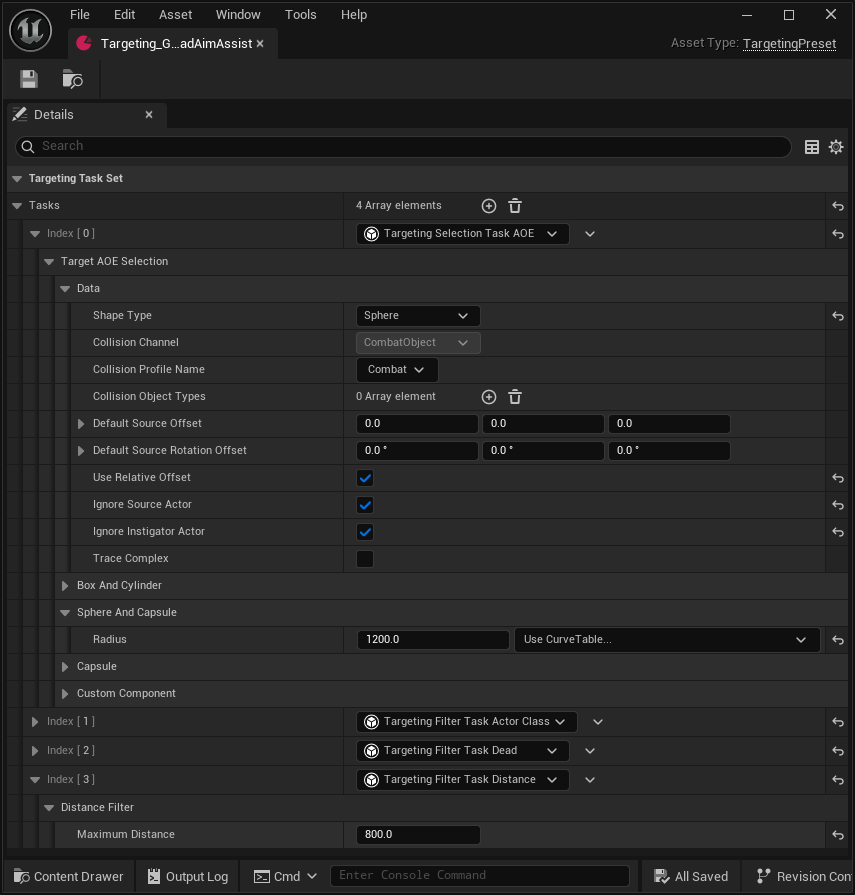
Open your Firearm Actor, such as the rifle or shotgun, and browse to its Firearm Component.
Assign the correct Firearm Data Asset and Firearm Animations for shooting and reloading.
Add the Ammo Storage Component
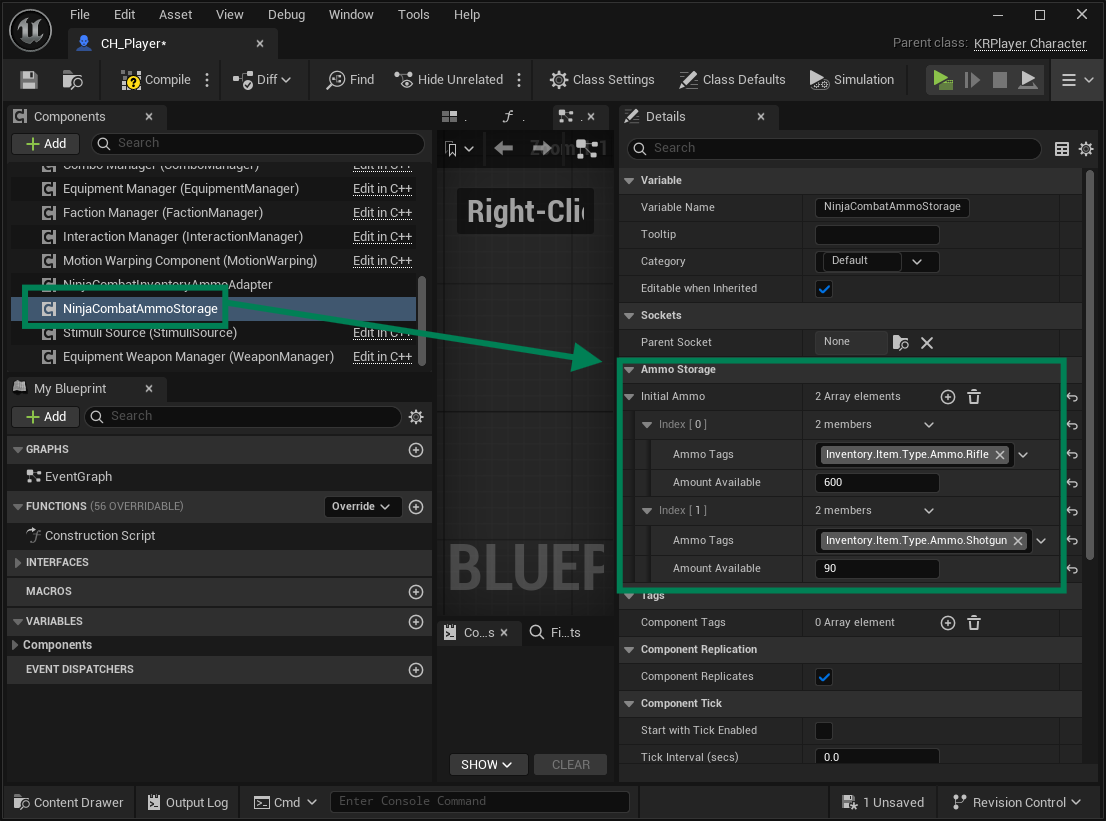
Open your base character and add the Ammo Storage Component.
Browse to the Initial Ammo section and configure your Ammo Types and current amounts.