Inventory Manager
Last modified: 05 December 2024This component is the core of the Inventory System.
It manages Containers and Items assigned to an Inventory Owner.
Provides multiple query methods for Containers and Items along with functions to perform operations on them.
It may be added to Pawns or to the Player State.
Classes with an Inventory Manager must also implement
InventoryManagerProviderInterface.The Inventory Manager needs to access an Ability System Component.
The Inventory Manager is the central component that manages Containers and Items available to a Pawn or Player State.
Setup
The Inventory Manager can be added to Pawns or a Player State. Its only pre-requisite is that its owner is able to provide an Ability System Component.
The owner of an Inventory Manager should also implement InventoryManagerProviderInterface. This interface has a few methods, but the only one should always be implemented is GetInventoryManager.
If the Inventory Manager is added to a Player State, its Pawn should also implement that interface and either provide the Inventory Manager directly from the state, or store and provide a local copy.
Initialization
The Inventory Manager is self-contained, and it will initialize itself. It requires a valid Pawn (Inventory Avatar) and an Ability System to initialize. This is particularly relevant in the following scenarios:
When the Inventory Manager is added to a Player State, it will retrieve the avatar from it.
In Network Scenarios, the Inventory will wait for the Pawn and ASC to replicate so it can initialize.
tip
Asynchronous Initialization
Waiting for these elements happens asynchronously and won't lock your game thread. For more information, please check
NinjaInventoryAction_WaitForAbilitySystem.
You can fine tune how the polling process happens by adjusting the following properties:
AbilitySystemPollInterval: How often it will check for the Ability System's presence.AbilitySystemMaxWait: Maximum amount of time the inventory will wait for the ASC to replicate.
Issues during this process will be added to your Inventory Log.
Once fully initialized, the Inventory will notify any classes waiting for it, via the OnInventoryInitialized. You can also query the initialization state by calling IsInventoryInitialized.
Default Objects
The Inventory can receive a Layout and Default Items directly, via its properties. However, if you need to have more flexibility, allowing each avatar to define their own Layout or Default Items, you can do so using the InventoryManagerProviderInterface.
This interface has the following functions that can be used to customize the initialization:
GetInventoryLayout: Provides the Layout that will be used when the Inventory Manager initializes.GetDefaultItems: Provides all default items granted when the Inventory Manager initializes.
note
Default Items
If the Inventory Manager has Default Items, these will be consolidated with the ones obtained from the interface.
Query Methods
There are many read-only operations available to query Containers and Items added to the Inventory, which are presented as multiple Getter and Count functions.
tip
Caching
The Inventory Manager contains caching structures for Items and Containers, to avoid constantly iterating over arrays.
These transparent structures will perform many Item and Container lookups with an O(1) time-complexity.
Operations
The following operations can add or remove Containers and Items. Items in particular can be added from a few different sources. The Inventory Manager is also a gateway for Fragment Operations.
note
Network Authority
For networked games, all add and remove operations must be performed in the authoritative version.
Managing Containers
Containers are added by the AddContainer function, like so:
void UInventoryExamples::AddContainer(const UNinjaInventoryContainerDataAsset* ContainerData, UNinjaInventoryItem* SourceItem)
{
    FInventoryContainerContext ContainerContext, ResultContext;
    ContainerContext.SetContainerData(ContainerData);
    ContainerContext.SetOwningItem(Item);

    UNinjaInventoryManagerComponent* InventoryManager = GetInventoryManager();
    InventoryManager->AddContainer(ContainerContext, ResultContext);

    if (ResultContext.IsSuccessful())
    {
        UE_LOG(LogTemp, Log, TEXT("Container added!"));
    }
}
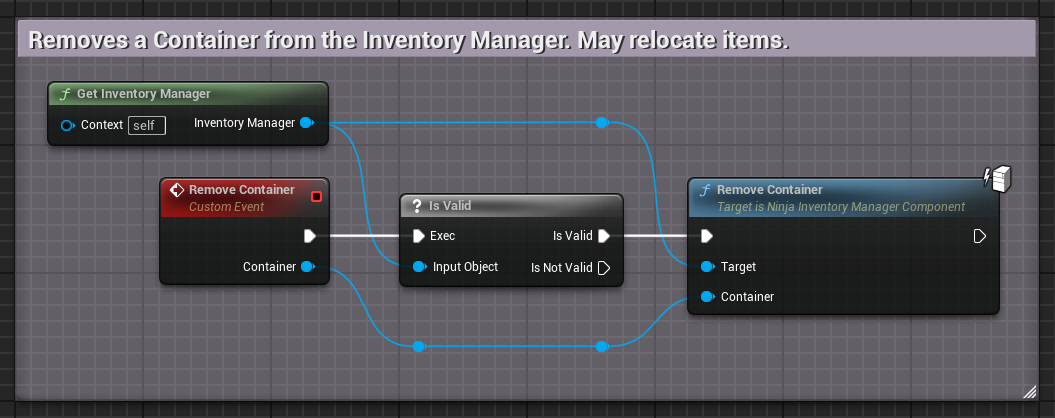
Containers are removed by the RemoveContainer function. You can also remove a container by its unique identifier, using the RemoveContainerById function.
void UInventoryExamples::RemoveContainer(UNinjaInventoryContainer* Container)
{
    UNinjaInventoryManagerComponent* InventoryManager = GetInventoryManager();
    InventoryManager->RemoveContainer(Container);
}
tip
Relocating Items
The Inventory will attempt to relocate Items stored in the container being removed. You can check beforehand to make sure that items can be relocated, by calling
CanRelocateItemsInContainer.
Managing Items
Items can be added to the inventory in a few different ways:
With an Item Data and optional default memories.
From a Pickup Actor.
From Selected Loot.
Whenever an item is added, a validation process will happen and, based on the fragments configured for the item, and the current state of the Inventory, the item will be accepted or rejected.
tip
Rejection Messages
If an item is rejected, check your logs. You will find details on what fragment has rejected the item. This entry will be displayed under
LogNinjaInventorywith aVerboselevel.Make sure to enable that visibility in your
DefaultEngine.ini, with the following lines:[Core.Log] LogNinjaInventory=Verbose
Add Item Data
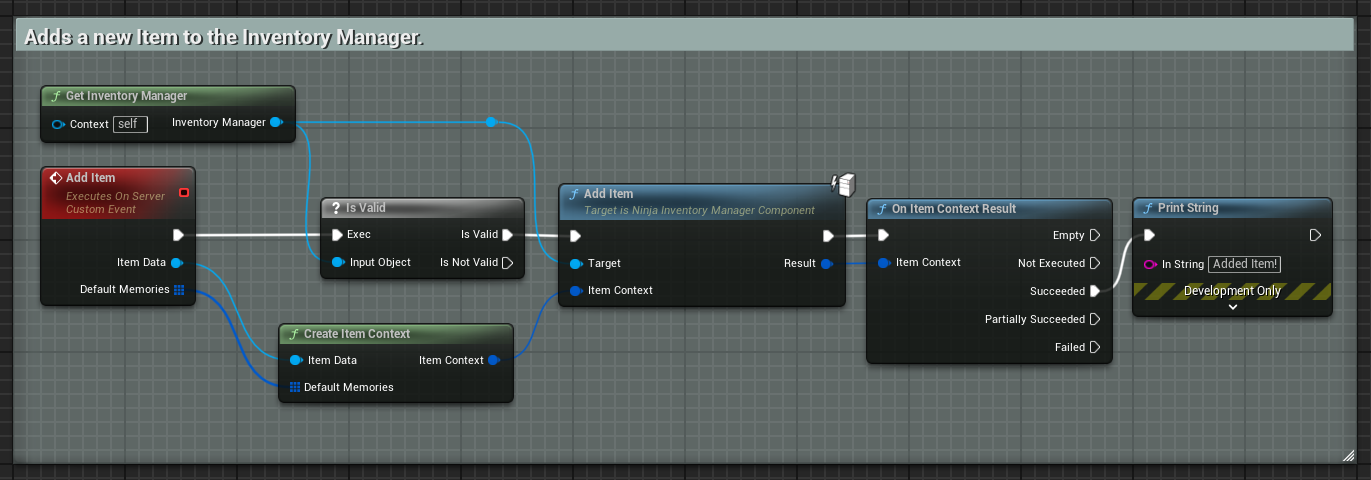
First, by the AddItem function, which allows you to set optional default memories to the item.
void UInventoryExamples::AddItem(const UNinjaInventoryItemDataAsset* ItemData, const TArray<FInventoryDefaultItemMemory>& DefaultMemories)
{
	FInventoryItemContext ItemContext, ResultContext;
	ItemContext = UNinjaInventoryFunctionLibrary::CreateItemContext(ItemData, DefaultMemories);

	UNinjaInventoryManagerComponent* InventoryManager = GetInventoryManager();
	InventoryManager->AddItem(ItemContext, ResultContext);

	if (ResultContext.IsSuccessful())
	{
		UE_LOG(LogTemp, Log, TEXT("Item added!"));
	}
}
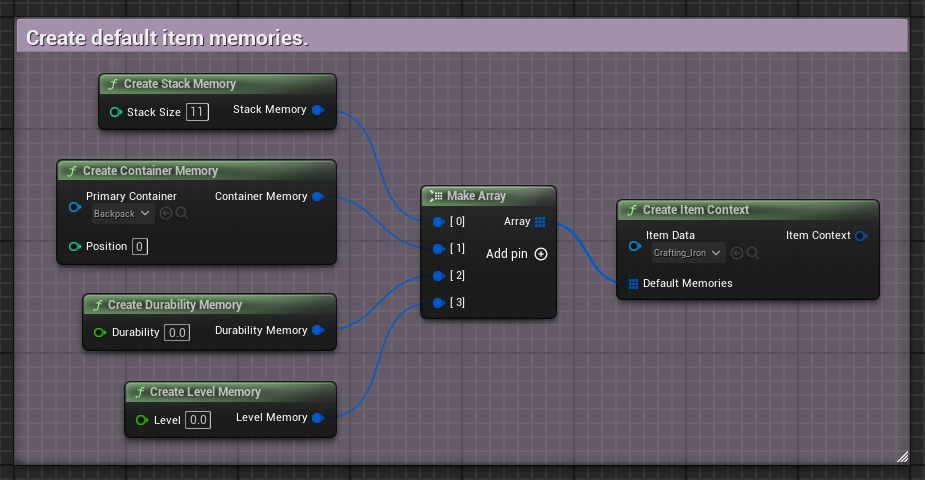
If you want to create default memories, similar to what you can do when adding default items to the inventory, then you can use the provided functions:
void UInventoryExamples::CreateDefaultMemories(const UNinjaInventoryItemDataAsset* ItemData)
{
    // First, create memories using the Gameplay Function Library, where we can find high level functions (i.e. fragments).
    TArray<FInventoryDefaultItemMemory> Memories;

    const int32 StackSize = 10;
    FInventoryDefaultItemMemory StackMemory = UNinjaInventoryGameplayFunctionLibrary::CreateStackMemory(StackSize);
    Memories.Add(StackMemory);

    const UNinjaInventoryContainerDataAsset* PrimaryContainer = GetBackpackContainerData();
    const int32 Position = 5
    FInventoryDefaultItemMemory ContainerMemory = UNinjaInventoryGameplayFunctionLibrary::CreateContainerMemory(PrimaryContainer, Position);
    Memories.Add(ContainerMemory);

    const float Durability = 10.f;
    FInventoryDefaultItemMemory DurabilityMemory = UNinjaInventoryGameplayFunctionLibrary::CreateDurabilityMemory(Durability);
    Memories.Add(DurabilityMemory);

    const float Level = 20.f;
    FInventoryDefaultItemMemory LevelMemory = UNinjaInventoryGameplayFunctionLibrary::CreateLevelMemory(Level);
    Memories.Add(LevelMemory);

    // Using the core Inventory Function Library, where we can find functions for Items and Containers.
    FInventoryItemContext ItemContext = UNinjaInventoryFunctionLibrary::CreateItemContext(ItemData, Memories);
}
Add Pickup Actors
Another way to add an item directly from a pickup, via the AddPickup function. The PickupActor parameter must be a valid actor that implements InventoryPickupInterface.
void UInventoryExamples::AddPickup(AActor* ItemPickup)
{
	FInventoryItemContext ResultContext;

	UNinjaInventoryManagerComponent* InventoryManager = GetInventoryManager();
	InventoryManager->AddPickup(ItemPickup, ResultContext);

	if (ResultContext.IsSuccessful())
	{
		UE_LOG(LogTemp, Log, TEXT("Pickup added!"));
	}
}
Add Selected Loot
You can also add items that were selected by a Loot Manager, via the AddLoot function.
void UInventoryExamples::AddLoot(TArray<UNinjaInventoryLoot*> Loot)
{
	FInventoryItemContext ResultContext;

	UNinjaInventoryManagerComponent* InventoryManager = GetInventoryManager();
	InventoryManager->AddLoot(Loot);

	if (ResultContext.IsSuccessful())
	{
		UE_LOG(LogTemp, Log, TEXT("Loot added!"));
	}
}
Remove Items
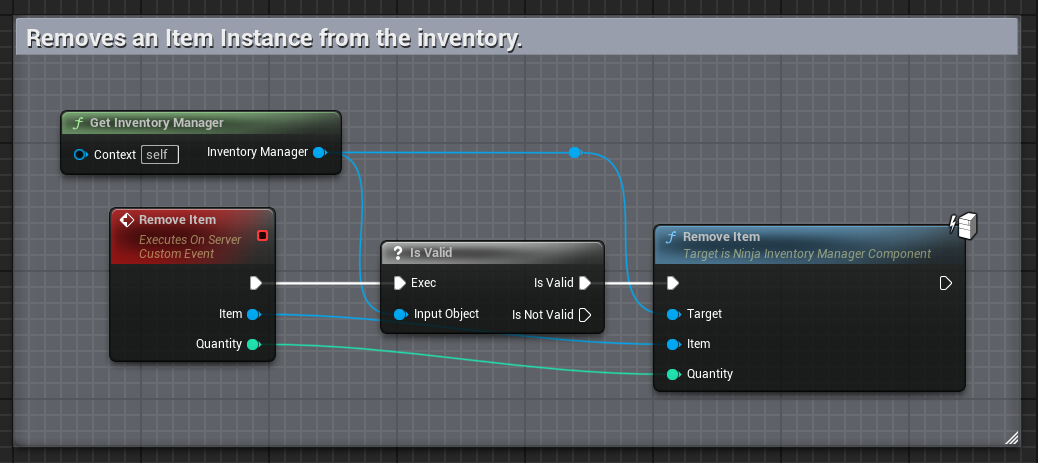
Items are removed by the RemoveItem function. You can also remove an item by its unique identifier, using the RemoveItemById function.
Additionally, you can set an amount of items to remove from the item's stack. A value of zero will always remove the entire stack.
Replication
Inventory Items only replicate from the authoritative component to the local client. You won't be able to query items and containers in simulated proxies.
Delegates
The Inventory Manager will broadcast its events using the following delegates listed in the table below.
They will broadcast on both the authoritative and local client versions.
Delegate | Event |
|---|---|
Inventory Initialized | The inventory has been initialized. |
Container Added | A container was added to the inventory. |
Container Removed | A container was removed from the inventory. |
Item Added | An item was added to the inventory. |
Item Storage Changed | An item's storage has changed. |
Item Removed | An item has been removed from the inventory. |
Loot Received | Loot has been made available to the inventory. |
Loot Dismissed | Loot has been dismissed for the inventory. |


