Setup
Installing the Plugin
Once acquired, the plugin can be installed via the Epic Games Launcher. As with any Code Plugin, it can be installed to any compatible engine version.
Once installed, create or open your project and navigate to Edit and then Plugins. In the search bar, type gas and the Ninja G.A.S. plugin should appear. Tick the checkbox and restart the engine.
C++ Libraries
If you plan to work with C++ and use classes from the GAS System, ensure you add the following modules to your Build.cs file:
Asset Manager
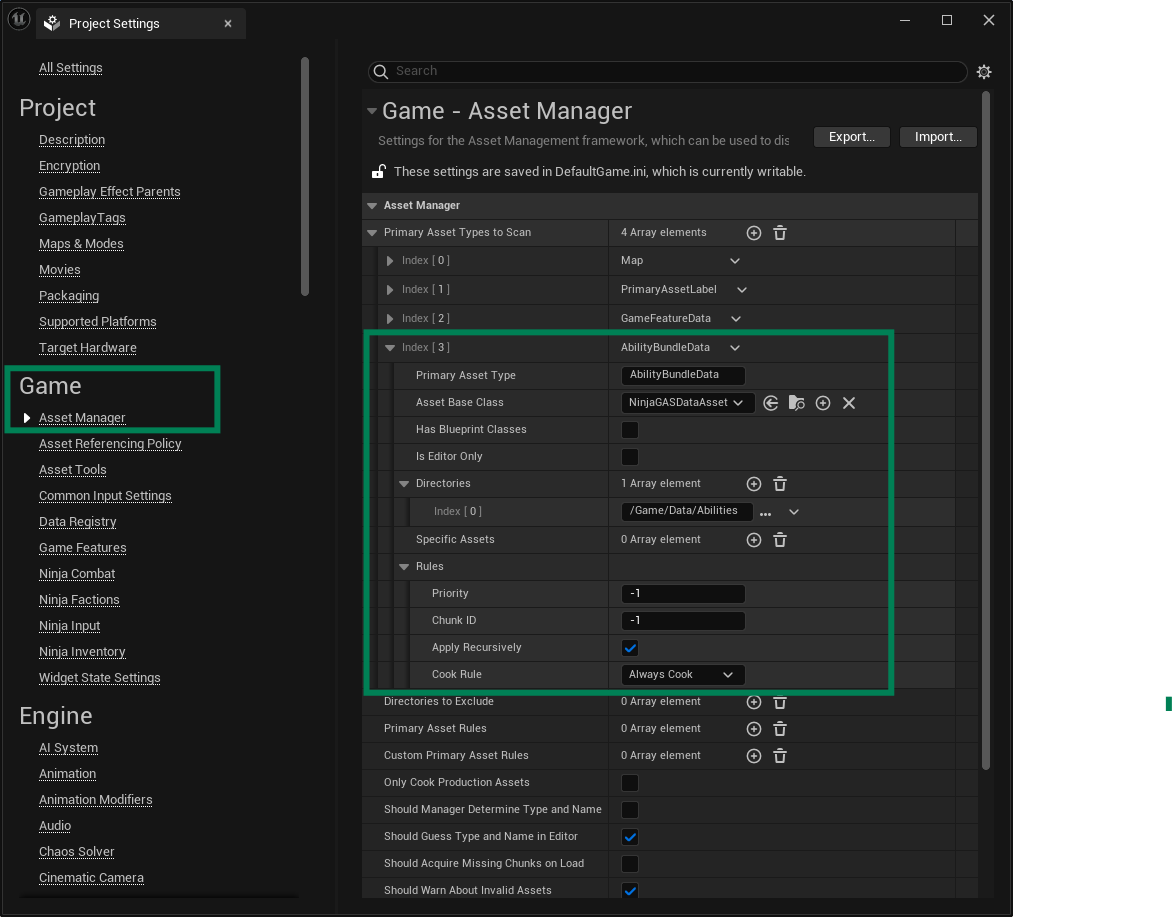
The GAS System uses a Primary Data Asset and soft references to initialize common abilities elements for actors, and you need to register this Primary Data Asset to the Asset Manager.
In the Editor, configure the Asset Manager by navigating Edit > Project Settings > Asset Manager, and then adding the following asset.
Asset Name | Base Class | Description |
|---|---|---|
|
| Bundles all Attribute Sets, Effects and Abilities to give. |
Once configured, your entry in the Asset Manager should look like this:

Ability System Initialization
Projects using the Gameplay Ability System must initialize the Global Data. This framework will automatically do that, when its Subsystem initializes. No additional steps are necessary.