Opportunity System
Last modified: 05 December 2024Orchestrates Animation Montages and Gameplay Effects played on the Attacker and Victim.
Requires the Contextual Anim Scene Actor Component on both participants and the Motion Warping Component on the attacker.
Uses the Contextual Animation plugin to prepare the scene between attacker and victim.
The attack and reaction are configured using a Contextual Anim Scene Asset.
The Opportunity System is used to implement abilities that can only execute under certain conditions and will pair animations between the attacker and victim.
Opportunity Attack Ability
An Opportunity Attack starts with the Opportunity Attack Ability.

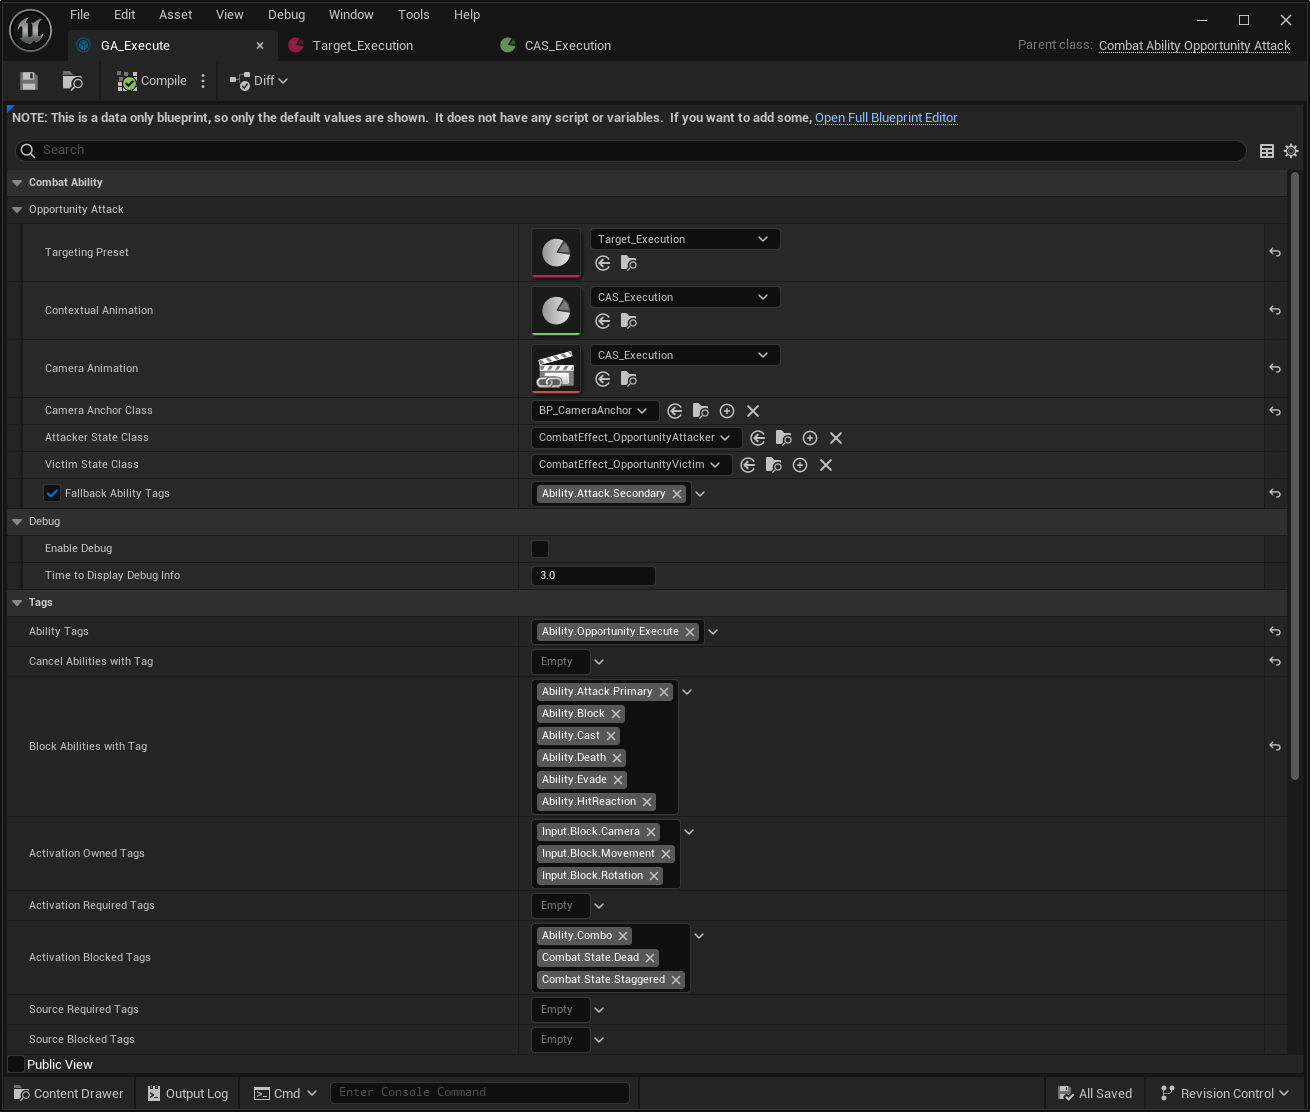
Within the Opportunity Attack category, you can set many relevant aspects of the attack, here's a breakdown of these properties.
Property | Description |
|---|---|
Targeting Preset | Targeting Preset data used to collect the appropriate target. |
Contextual Animation | The Contextual Animation Asset pairing both attacker and victim animations. |
Camera Animation | The optional Camera Animation played while the Opportunity Attack executes. |
Camera Anchor Class | An Actor with a Camera, used as focus point for the Camera Animation. |
Attacker State Class | Gameplay Effect applied to the attacker, while executing the attack. |
Victim State Class | Gameplay Effect applied to the victim, while receiving the attack. This is not the damage. |
Fallback Ability Tags | An optional Gameplay Ability to execute, if the Opportunity Attack cannot be triggered. |
Finding the Victim
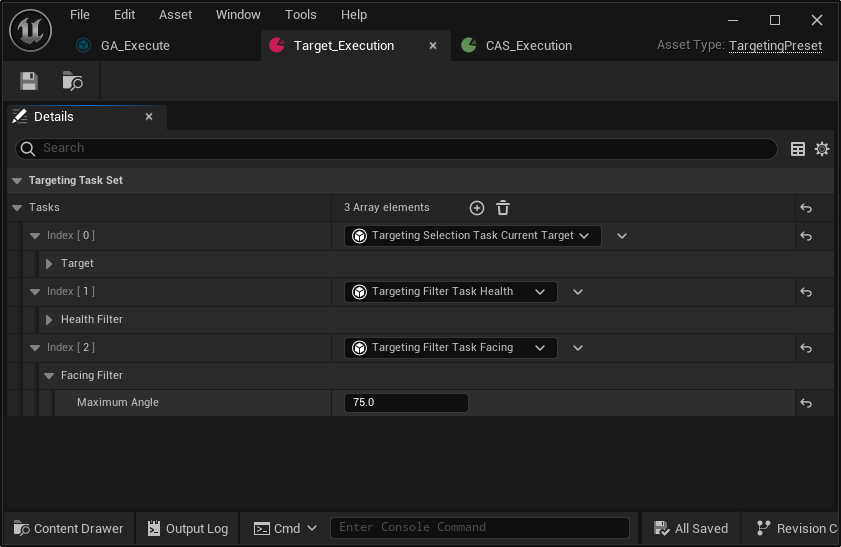
Selecting the victim also uses the Gameplay Targeting System. You can provide a Targeting Preset that can select the appropriate target for the Opportunity Attack.
This is very flexible, since you can use any of the Tasks currently available, but also create your own for some complex situations, such as checking certain collisions with a trigger box, for example.

In the example above, you can see the following selection logic:
The current target, from the Target Lock, is selected. This could be any other selection mode that you prefer.
It checks if the health is below a certain threshold.
It checks if the angle between targets is mostly a "facing angle". You could also use back angles for things like backstabs.
Contextual Animations
Contextual Animations are a new feature in Unreal Engine, that can be used to pair animations between multiple roles. To get started with it, please check this great article by Alvaro Jover-Alvarez (Vorixo).

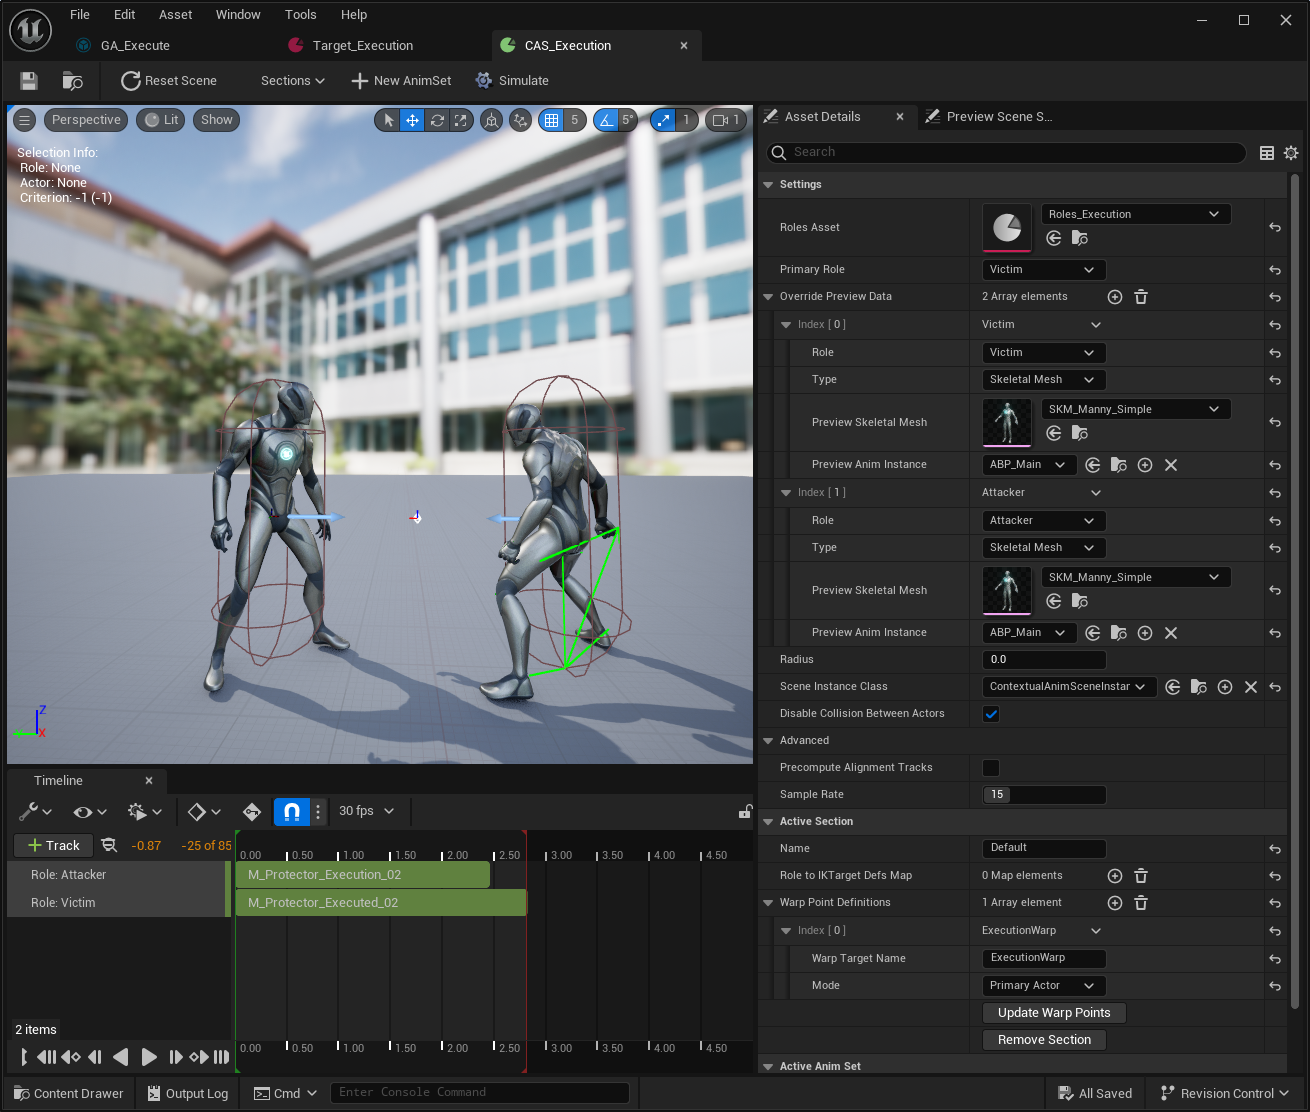
In summary, you need to execute the following steps:
Add
ContextualAnimSceneActorComponentto characters that will initiate the attack (or just add it to your base character).Create a role asset based on
ContextualAnimRolesAsset, and define your Victim and Attacker roles. Adjust each participant's rotation as necessary. In the example above, both actors are rotated at-90on theyawaxis.Create a new Contextual Animation Scene, from the Animation menu, set the appropriate Role Asset to it.
Set your primary actor as the Victim and configure the example actors for all participants.
Add a new AnimSet and set the correct Animation Montages. Make sure that both Animation Montages have Root Motion and that it is enabled.
Click on the Attacker Animation Montage in the timeline and adjust its position.
Add a Warp Point Definition, set it as Primary Actor and provide a name, such as
ExecutionWarp.Click Update Warp Points.
At any moment, you can hit Play and check how the animations will play together. Whenever you make changes, you might need to click Reset Scene.
You can also configure multiple animations on the same scene and define a Selection Logic for each one of them.
Motion Warping
The Contextual Animation uses Motion Warping to place the targets correctly. That means that you need to:
Add the Motion Warping Component to all characters, or even better, add the Combat Warping Manager Component.
Add the Motion Warping Animation Notify State to your Animation Montages, and make sure to set the correct Warp Name for them.
Handling Different Targets
If you want to reuse the same Contextual Animation between different targets, with the same skeleton but different proportions, then you might need to use Sockets as a Warp Point Definition, instead of the Primary Actor.
Camera Animations
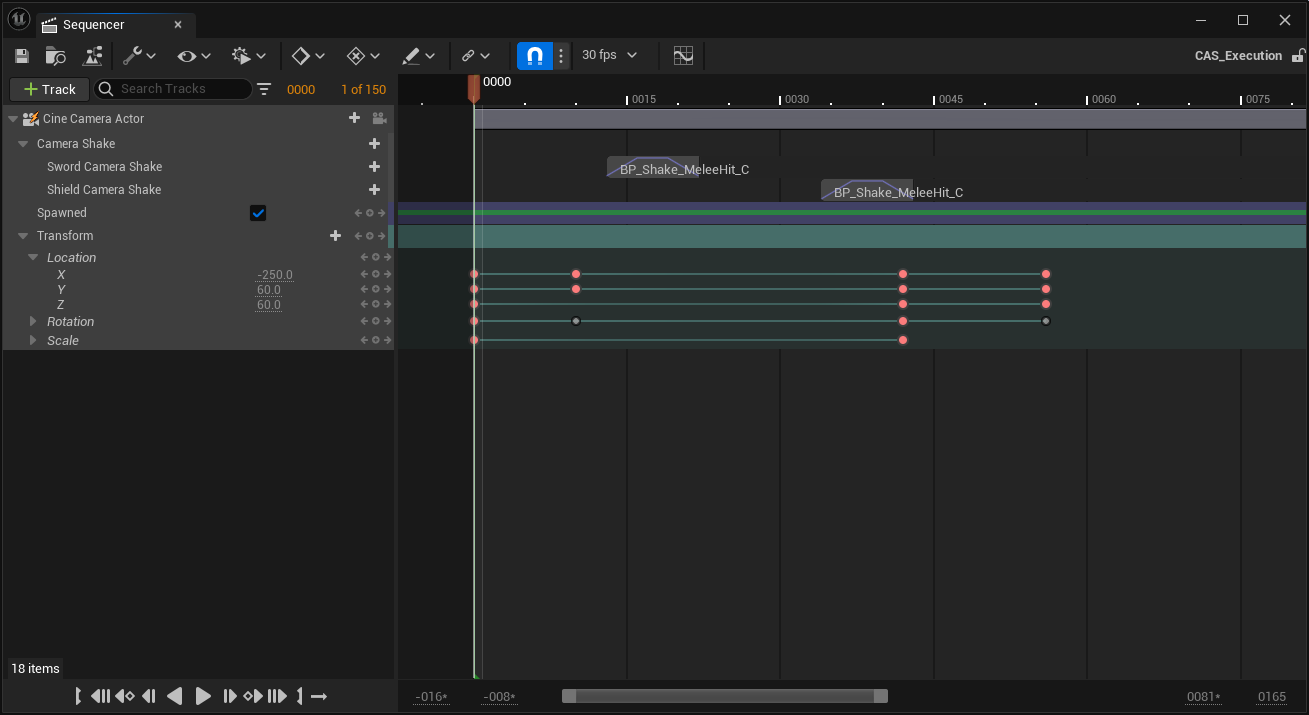
You can optionally add Camera Animations to an Opportunity Attack to make it more cinematic! For that, you need to create your Camera Animation in the Sequencer and set it to the ability.

For this feature, you have a few additional pre-requisites:
Set
NinjaCombatPlayerCameraManageras the Player Controller's Camera Manager, or any other Camera Manager that implementsCombatCameraManagerInterface.Set a Camera Anchor Actor to your Ability, this actor must have a Camera Component (or a Cine Camera Component). You can use
NinjaCombatCameraAnchorActoror subclasses of it.
Applying Damage
As usual, damage is applied using Gameplay Effects. You have two Animation Notifies that can be used with this:
Melee Scan: The same Animation Notify State used by Melee Attacks can be used here as well.
Opportunity Damage: This Animation Notify can be used to apply immediate damage, regardless of weapon collisions.