Creating Weapons
The Combat System uses weapons for melee scans, projectile launches, and firearms. Weapons are accessed through the Weapon Manager, which makes them available to abilities and other combat systems through Weapon Queries.
This guide shows how to create common weapon actors and register them with a character.
For more information, check Weapon Management.
Melee Weapon
Melee weapons are actors that implement CombatMeleeInterface, either directly or through a base class such as NinjaCombatWeaponActor. They usually provide a mesh with a socket used as the source for melee scans.
Configure a Sword Mesh
Open the skeletal mesh or static mesh that represents your melee weapon. In this example, we'll use a sword.
Add a socket at the center of the blade and name it
sScan. This socket will be used by melee scans.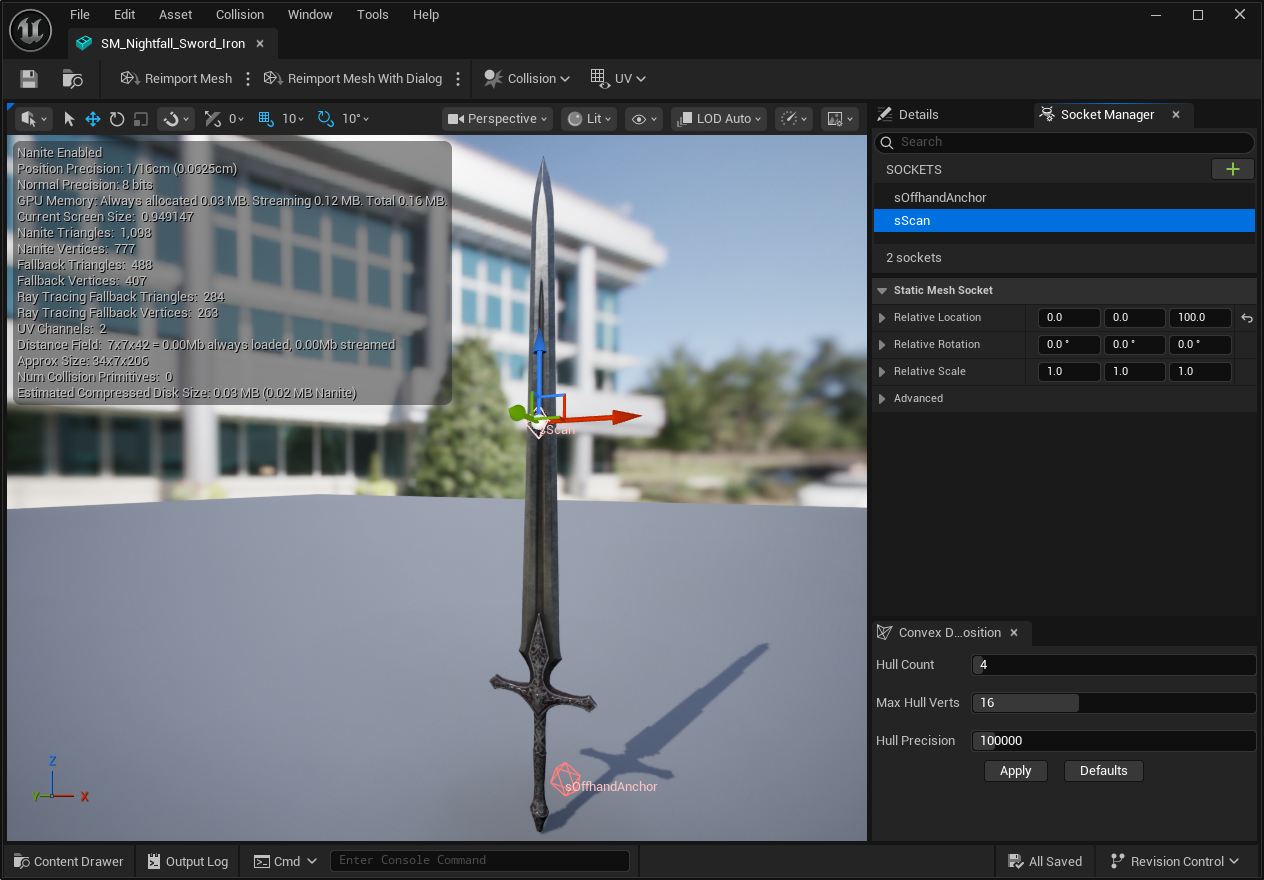
Make sure the mesh asset has no collision, since regular mesh collision can interfere with gameplay collision and scan results.
Create the Sword Actor
Create a new Weapon Actor based on
NinjaCombatWeaponActor.Add a Static Mesh Component or Skeletal Mesh Component, depending on the mesh type used by the weapon.
Implement
GetMeleeMesh, returning the mesh component used by melee scans.Save this Blueprint as your base melee weapon.
Create a Child Blueprint from the base melee weapon, and set the sword mesh configured earlier.
Add
Combat.Weapon.Sword, or any other identifying tags, to the list of Weapon Tags.Make sure the tag collection uniquely identifies this specific weapon.
Ranged Weapon
Ranged weapons are actors that implement CombatRangedInterface, either directly or through a base class such as NinjaCombatWeaponActor. They usually provide a mesh with a socket used as the source for projectile launches.
Configure a Bow Mesh
Open the skeletal mesh or static mesh that represents your ranged weapon. In this example, we'll use a bow.
Add a socket at the projectile launch point and name it
sProjectile.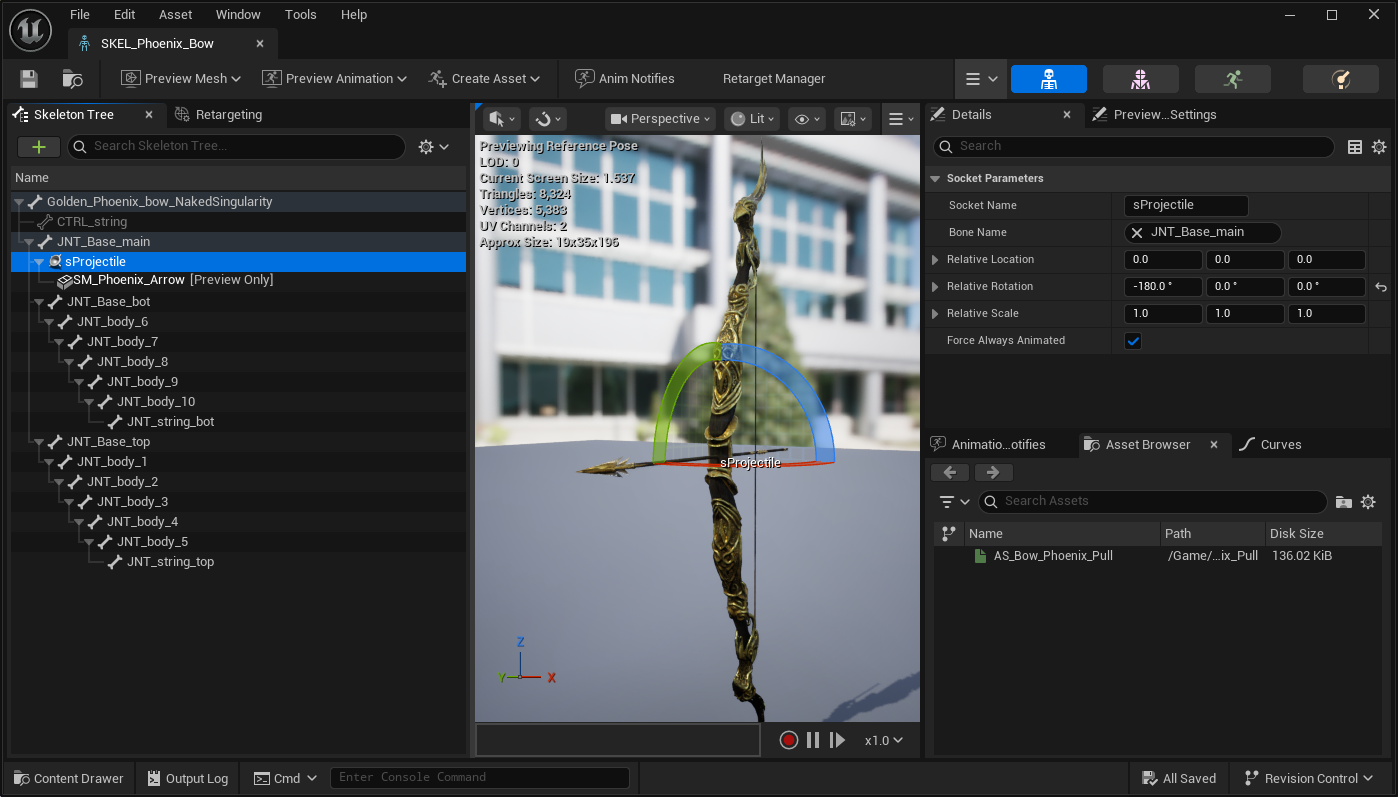
Create the Bow Actor
Create a new Weapon Actor based on
NinjaCombatWeaponActor.Add a Static Mesh Component or Skeletal Mesh Component, depending on the mesh type used by the weapon.
Implement
GetProjectileSourceMesh, returning the mesh component used to launch projectiles.Save this Blueprint as your base ranged weapon.
Create a Child Blueprint from the base ranged weapon, and set the bow mesh configured earlier.
Add
Combat.Weapon.Bow, or any other identifying tags, to the list of Weapon Tags.Make sure the tag collection uniquely identifies this specific weapon.
Firearm
Firearms are weapon actors with a Firearm Component (NinjaCombatFirearmComponent). They usually provide at least one socket used as the source for hitscan or projectile fire, and may also provide sockets for cosmetics such as muzzle flashes and tracers.
Configure a Rifle Mesh
Open the skeletal mesh or static mesh that represents your firearm. In this example, we'll use a rifle.
Add a socket just after the end of the barrel and name it
sProjectile. This socket will be used as the fire source.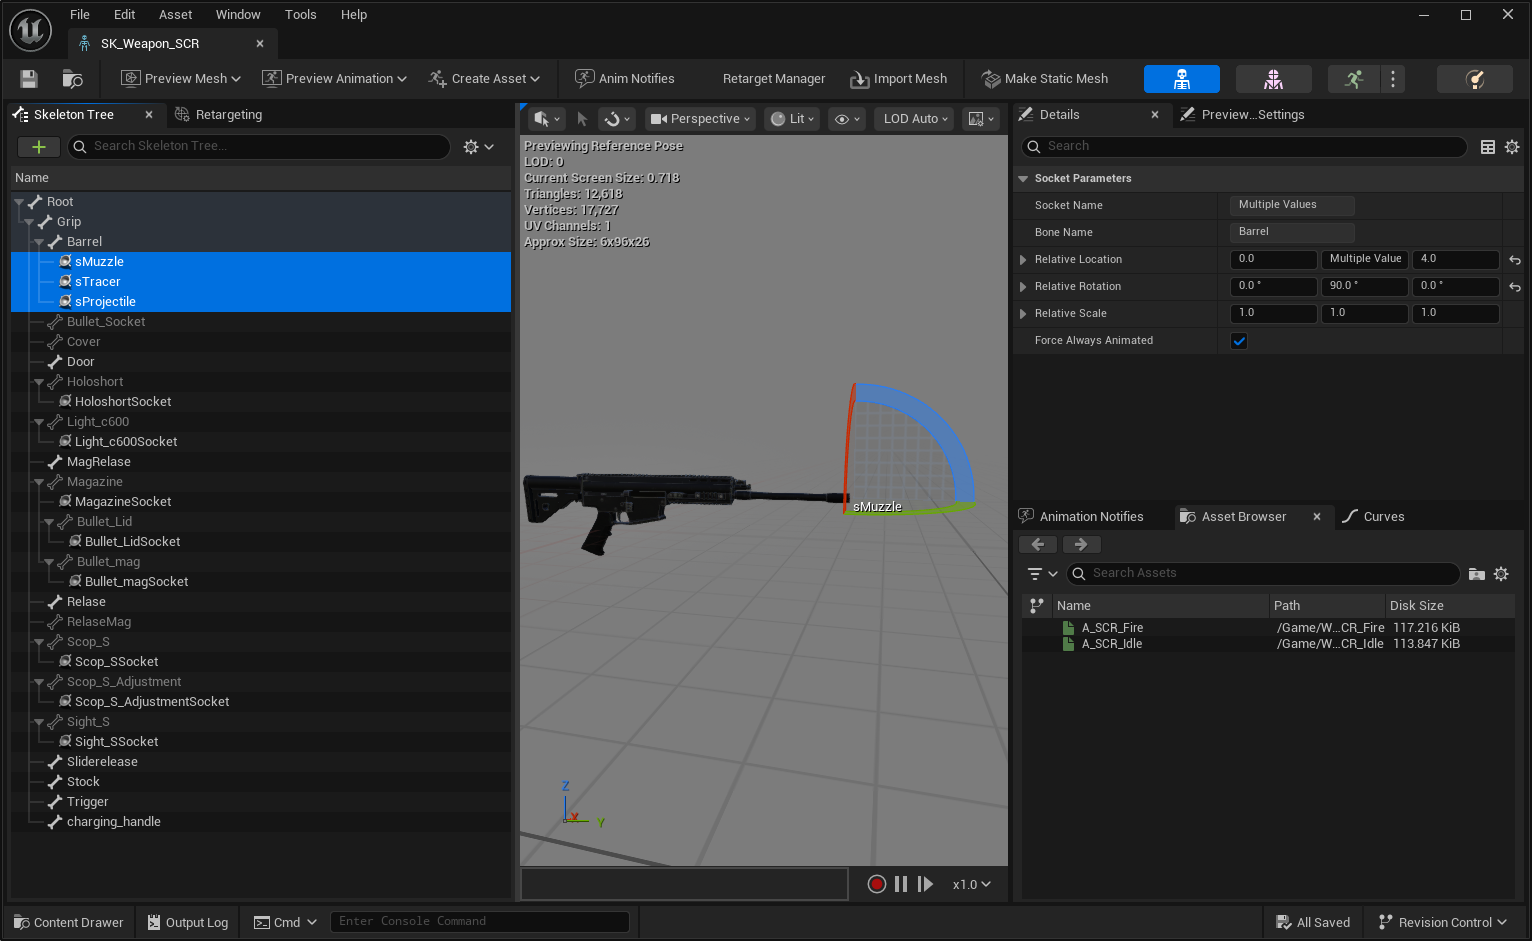
Create the Rifle Actor
Create a new Weapon Actor based on
NinjaCombatWeaponActor.Add a Static Mesh Component or Skeletal Mesh Component, depending on the mesh type used by the weapon.
Add
NinjaCombatFirearmComponentto the list of Actor Components.Save this Blueprint as your base firearm.
Create a Child Blueprint from the base firearm, and set the rifle mesh configured earlier.
Add
Combat.Weapon.Rifle, or any other identifying tags, to the list of Weapon Tags.Make sure the tag collection uniquely identifies this specific weapon.
Register Weapons
The default Weapon Manager manages the weapons available to an owner. These weapons are accessed through Weapon Queries, which are matched against the Weapon Tags assigned to each weapon.
Add the Weapon Manager Component
In your Character Blueprint or base class, add
NinjaCombatWeaponManagerComponent.Implement
GetWeaponManagerComponentfromCombatSystemInterface, returning your Weapon Manager Component.Add your weapon Blueprints to the list of Default Weapon Classes. These weapons will be available to Weapon Queries.
You can also use Ninja Inventory to define weapons through Inventory Items. In that setup, weapons are provided to the Combat System through the Combat and Inventory Integration.