First Steps with Ninja Factions
This page guides you through the first steps for Ninja Factions. Make sure to check the Factions Setup instructions before continuing.
This page has no plugin assumptions, but it can also support projects using Ninja Bot, since both systems can integrate through Unreal Engine's AI and Team framework.
The following steps aim to provide an initial setup with two factions: one representing the player and another representing enemies. These factions will be assigned to controllers so they can participate in team and attitude resolution.
Faction Assets
The most important faction-related asset introduced by Ninja Factions is the Faction Data Asset. It defines how factions are supposed to react to each other, including special exception cases established by an Attitude Matrix.
Most importantly, each faction is defined by a unique identifying Gameplay Tag and a Team ID used by Unreal Engine's Team and Attitude framework.
Create the Faction Assets
Create a new Faction Data Asset named Players in the Factions folder configured in the Asset Manager.
You can do so by right-clicking an empty area in the Content Browser, then navigating to Ninja Bear Studio → Ninja Factions → Faction.
Set
Factions.ID.Playersas the Faction Tag and1as the Team ID.Notice that Team Attitude Towards My Faction is Friendly and Team Attitude Towards Other Factions is Neutral.
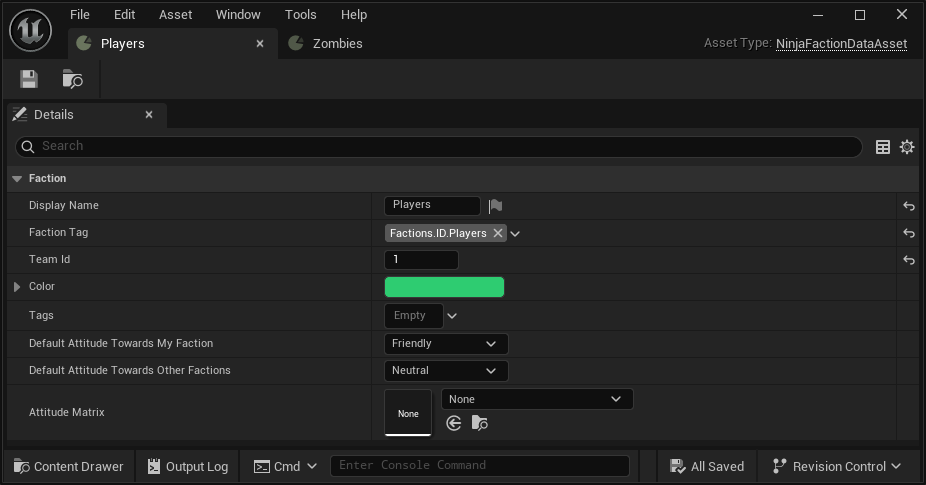
Create another Faction Data Asset named Zombies, or another relevant enemy type.
Set
Factions.ID.Enemies.Zombiesas the Faction Tag and10as the Team ID.Set Team Attitude Towards My Faction to Neutral and Team Attitude Towards Other Factions to Hostile.
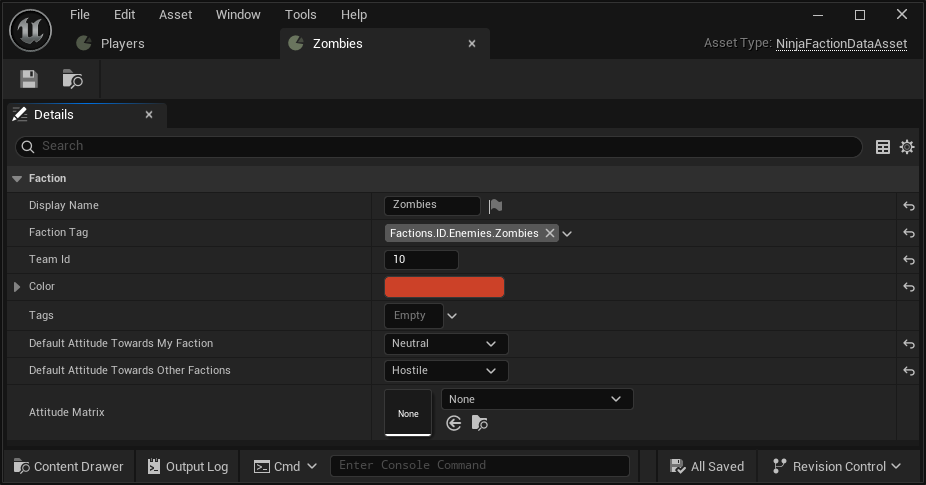
Faction Members
Faction Members are possessed Pawns or Characters that own a Faction Component (NinjaFactionComponent). This component is responsible for managing memberships and reputations (if applicable).
Add the Faction Component and Membership
Add the Faction Component,
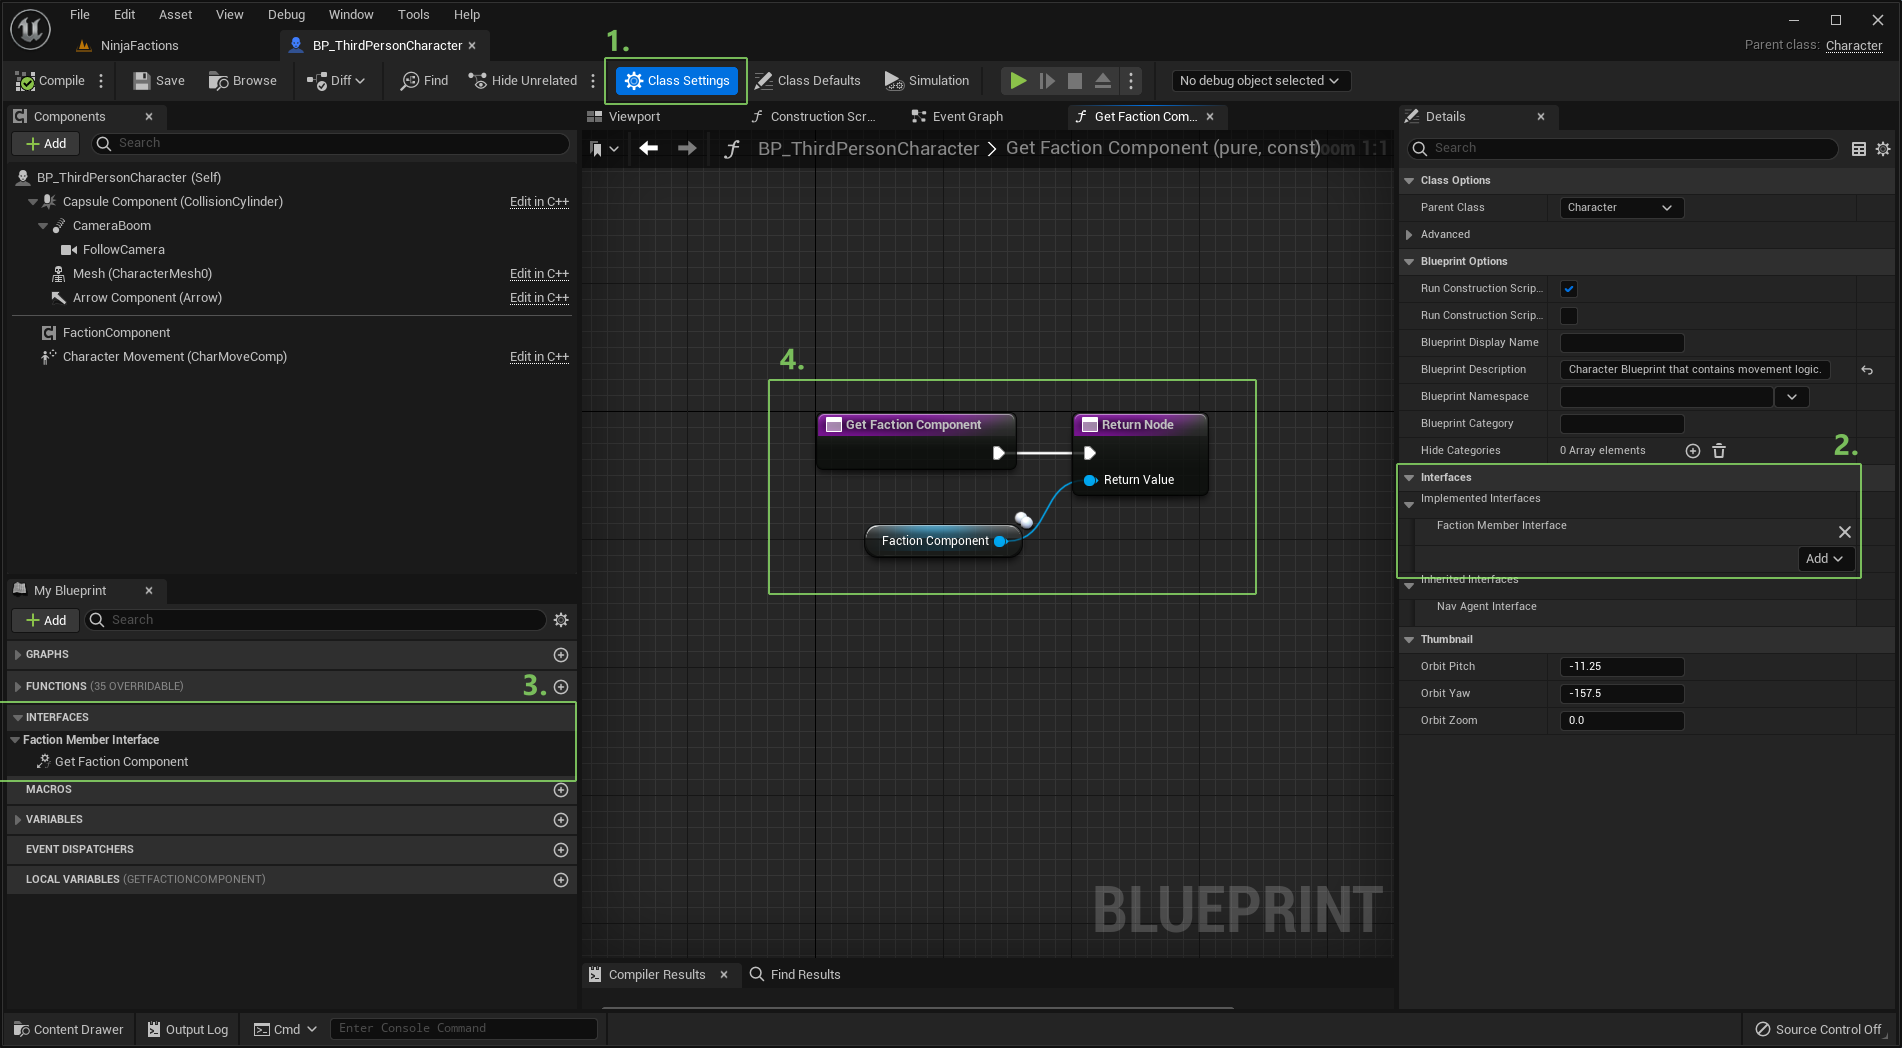
NinjaFactionComponent, to your base Pawn or Character (Blueprint or C++).Add the Faction Member Interface,
FactionMemberInterface, as well.Implement/override the interface function,
GetFactionComponent, so it returns the Faction Component.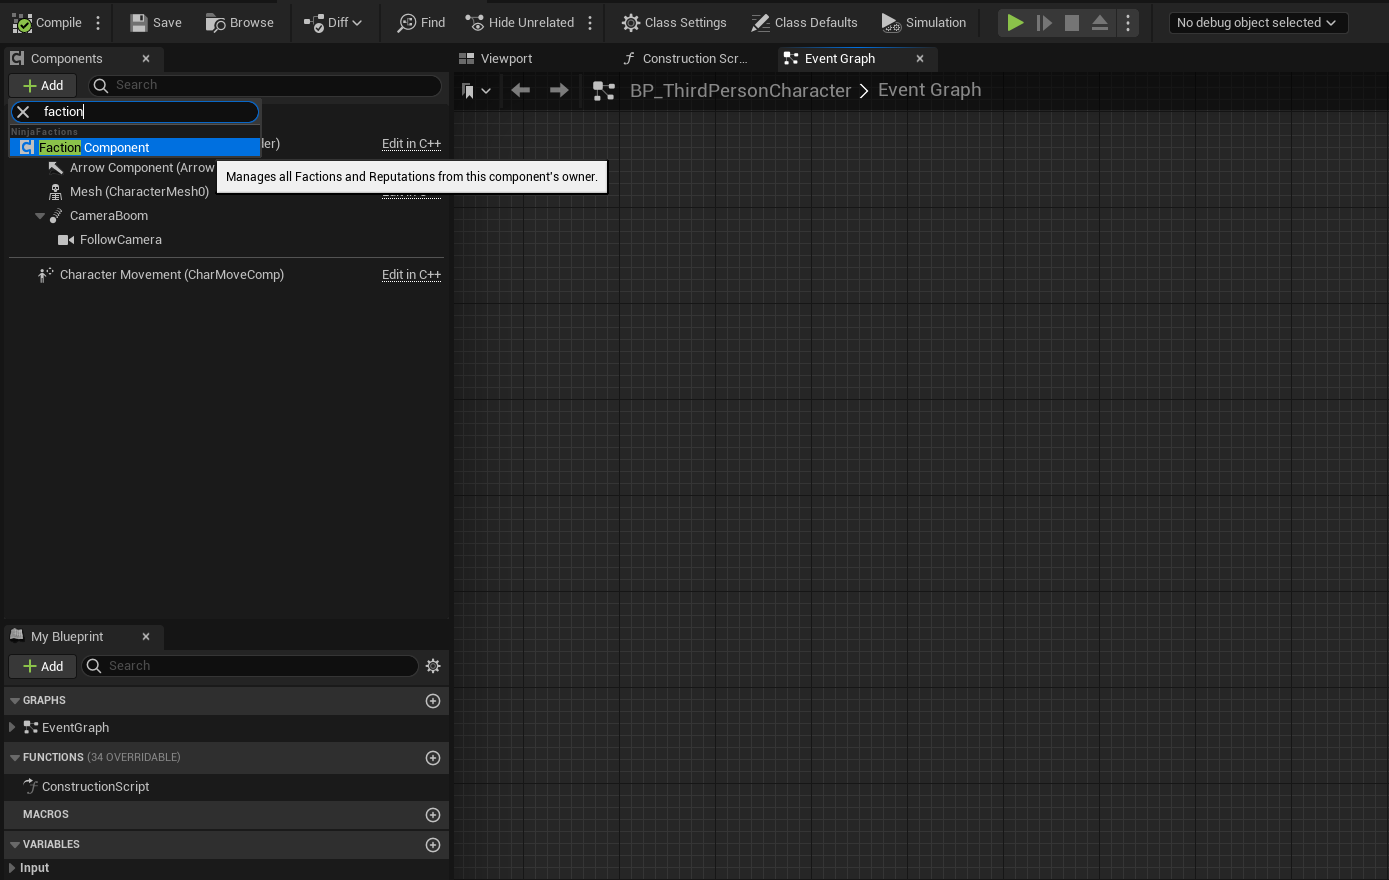
 #pragma once #include "CoreMinimal.h" #include "GameFramework/Character.h" #include "Interfaces/FactionMemberInterface.h" #include "PluginLabsPlayerState.generated.h" class UNinjaFactionComponent; UCLASS() class PLUGINLABS_API APluginLabsCharacter : public ACharacter, public IFactionMemberInterface, { GENERATED_BODY() public: APluginLabsCharacter(const FObjectInitializer& ObjectInitializer = FObjectInitializer::Get()); // -- Begin Faction Member implementation virtual UNinjaFactionComponent* GetFactionComponent_Implementation() const override; // -- End Faction Member implementation private: UPROPERTY(EditDefaultsOnly, BlueprintReadOnly, Category = "Components", meta = (AllowPrivateAccess = true)) TObjectPtr<UNinjaFactionComponent> FactionManager; };#include "GameFramework/PluginLabsCharacter.h" #include "Components/NinjaFactionComponent.h" APluginLabsCharacter::APluginLabsCharacter(const FObjectInitializer& ObjectInitializer) : Super(ObjectInitializer) { static const FName FactionComponentName = TEXT("FactionManager"); FactionManager = CreateOptionalDefaultSubobject<UNinjaFactionComponent>(FactionComponentName); } UNinjaFactionComponent* APluginLabsCharacter::GetFactionComponent_Implementation() const { return FactionManager; }
In your Player Subclass, navigate to the Faction Component and, in Default Factions, add a new entry for Player Faction data asset.
Mark this as the Main Faction and optionally, set the Reputation to a high value, such as
9999(you can adjust this later if you introduce reputations).In your Enemy Subclass, navigate to the Faction Component and, in Default Factions, add a new entry for Zombie Faction data asset.
Mark this as the Main Faction and optionally, set the Reputation to a high value, such as
9999(you can adjust this later if you introduce reputations).
Controllers
Unreal Engine's Team and Attitude Framework is controller-centric, so your AI and Player Controllers must be able to provide the Faction's Team ID, from their possessed pawn's Main Faction. The AI Module expects this through the GenericTeamAgentInterface.
AI Controller
The AI Controller already implements GenericTeamAgentInterface, so all that is left is to extend the implementation, so it retrieves the Faction from the Pawn's Faction Component. You have two options here, depending on whether you are using Ninja Bot or not.
Standalone
When not using Ninja Bot, the Faction System provides a base AI Controller, NinjaFactionAIController, that can be used as your base AI Controller. This class is able to retrieve the Faction Component from its possessed Pawn and, by using the system's Attitude Provider, determine the correct attitude between the agent and its sensed targets.
Ninja Bot
If you are using Ninja Bot, then you can ignore the AI Controller provided by Ninja Factions and continue to use the one provided by Ninja Bot instead. All you need to do to connect both systems is to select the correct Team Provider Class, in the Ninja Bot's settings.
For more information, check the Bot and Factions Integration Page.
Player Controller
The base Player Controller provided by Unreal Engine does not implement the expected GenericTeamAgentInterface, and this interface is not implementable in Blueprints.
The Faction System provides a base Player Controller, NinjaFactionPlayerController, that is able to retrieve the Faction Component from its possessed Pawn, and use it to determine the Team ID for the AI System. Alternatively, you can use your own variation, as long as you replicate the same behavior.
Next Steps
At this point, you have an initial faction setup with a Player faction and an Enemy faction assigned to faction members, with controllers able to expose team information to Unreal Engine's AI system.
From here, you can:
Create Reputation Tiers to support more dynamic faction relationships.
Integrate Ninja Factions with Ninja Combat to disable or customize Friendly Fire.
Learn more about Factions and Memberships.