First Steps with Ninja Bot
This page guides you through the first steps for Ninja Bot. Make sure to check the Bot Setup instructions before continuing.
The following steps aim to provide a functional AI agent that can roam, detect the player, and chase a sensed target.
This page uses a simple behavior with three states: Idle, Roam, and Chase. The main trigger between these states is whether the player is sensed or not.
It is recommended that your Gameplay Debugger is configured, so you can inspect the Bot's perception data and evaluate its active AI states during gameplay.
Perception Configuration
Ninja Bot uses a Perception Sense Profile to define how bots sense the world. For this first setup, we will create a simple Sight configuration that allows the bot to detect the player.
Create the Perception Configuration
In your Perception Data folder, create a new Perception Sense Profile using the Content Browser contextual menu: Ninja Bear Studio → Ninja Bot → Sense Profile.
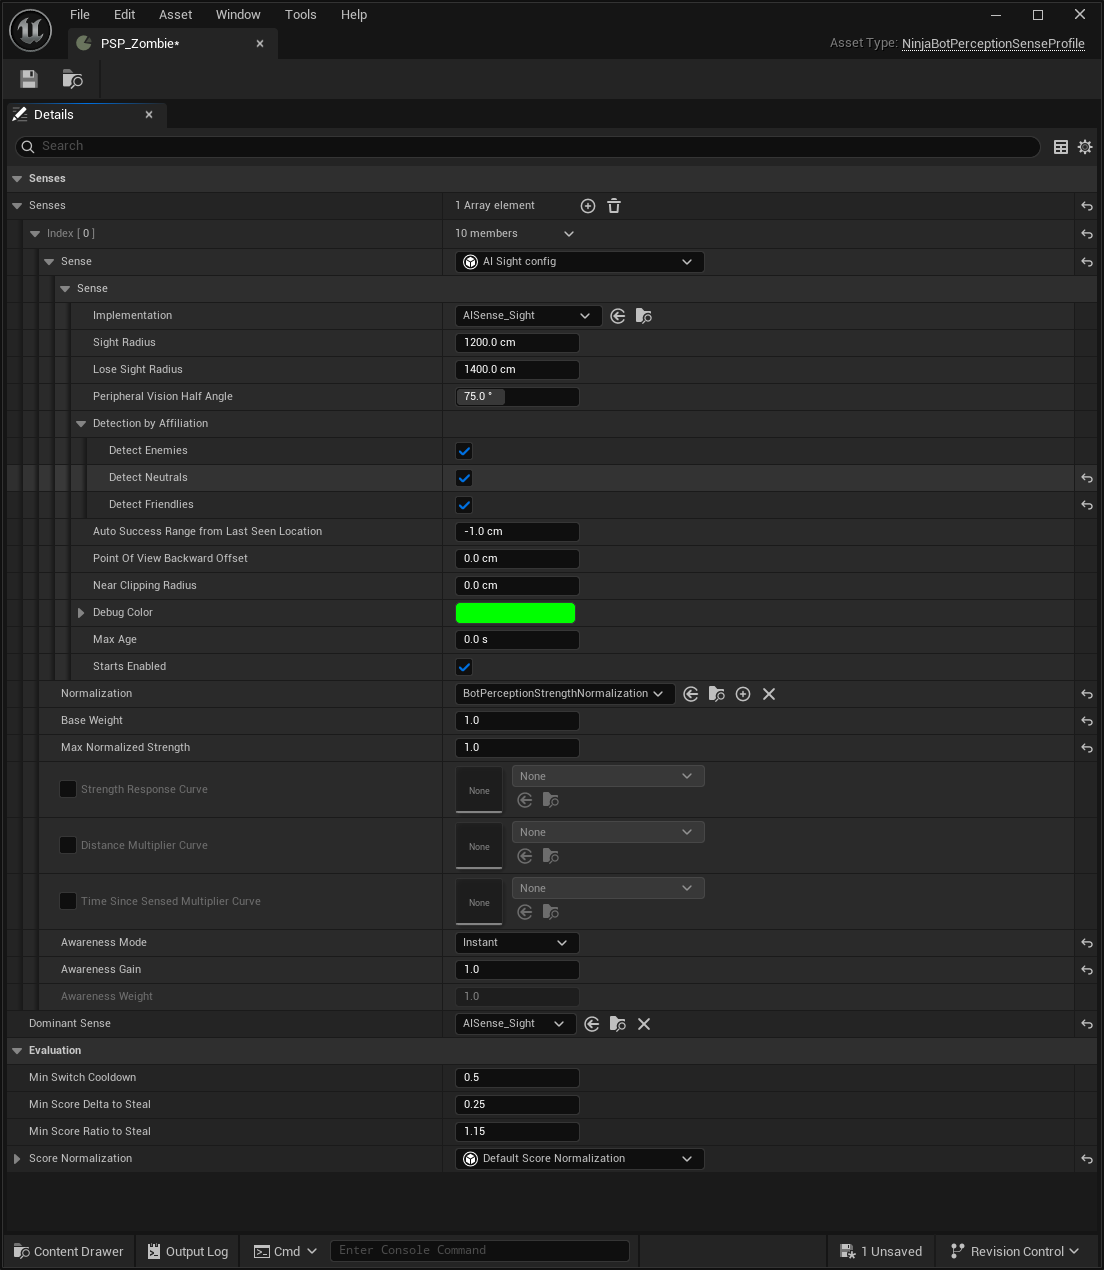
Add the Sight sense to the list of senses. Configure Sight Radius to
1200and Lose Sight Radius to1400.Mark Enemies, Neutrals, and Friendlies in Detection by Affiliation.
Set Sight as the Dominant Sense.
Roaming Query
The roaming behavior uses an Environment Query to find random reachable locations from the Navigation Mesh.
Create the Roaming Environment Query
Create an Environment Query that retrieves random locations from the Navigation Mesh.
Add a Pathing Grid Generator with Grid Half Size set to
1000and Space Between set to100.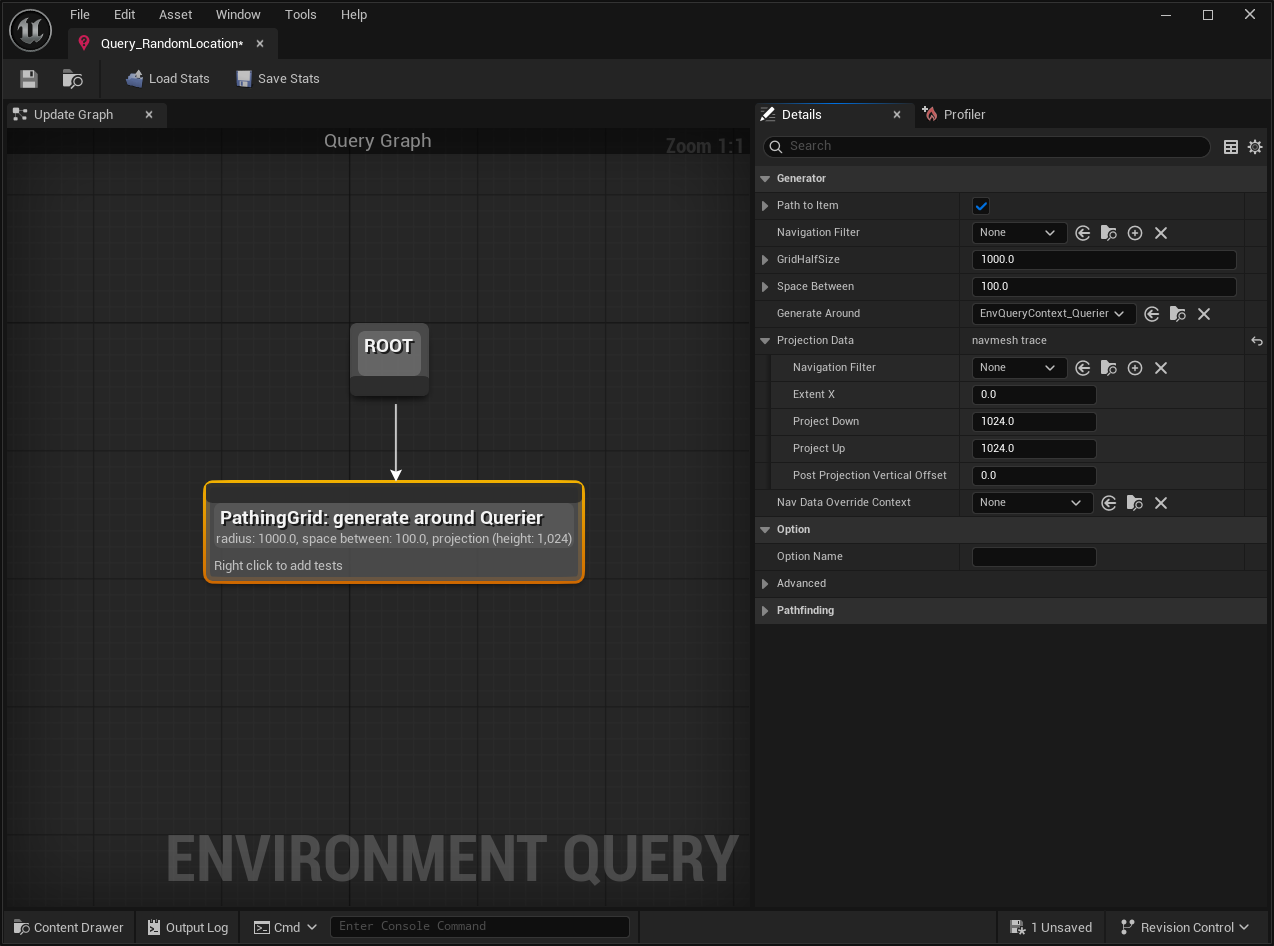
Add a Distance Test with Float Value Min set to
300and Float Value Max set to1200.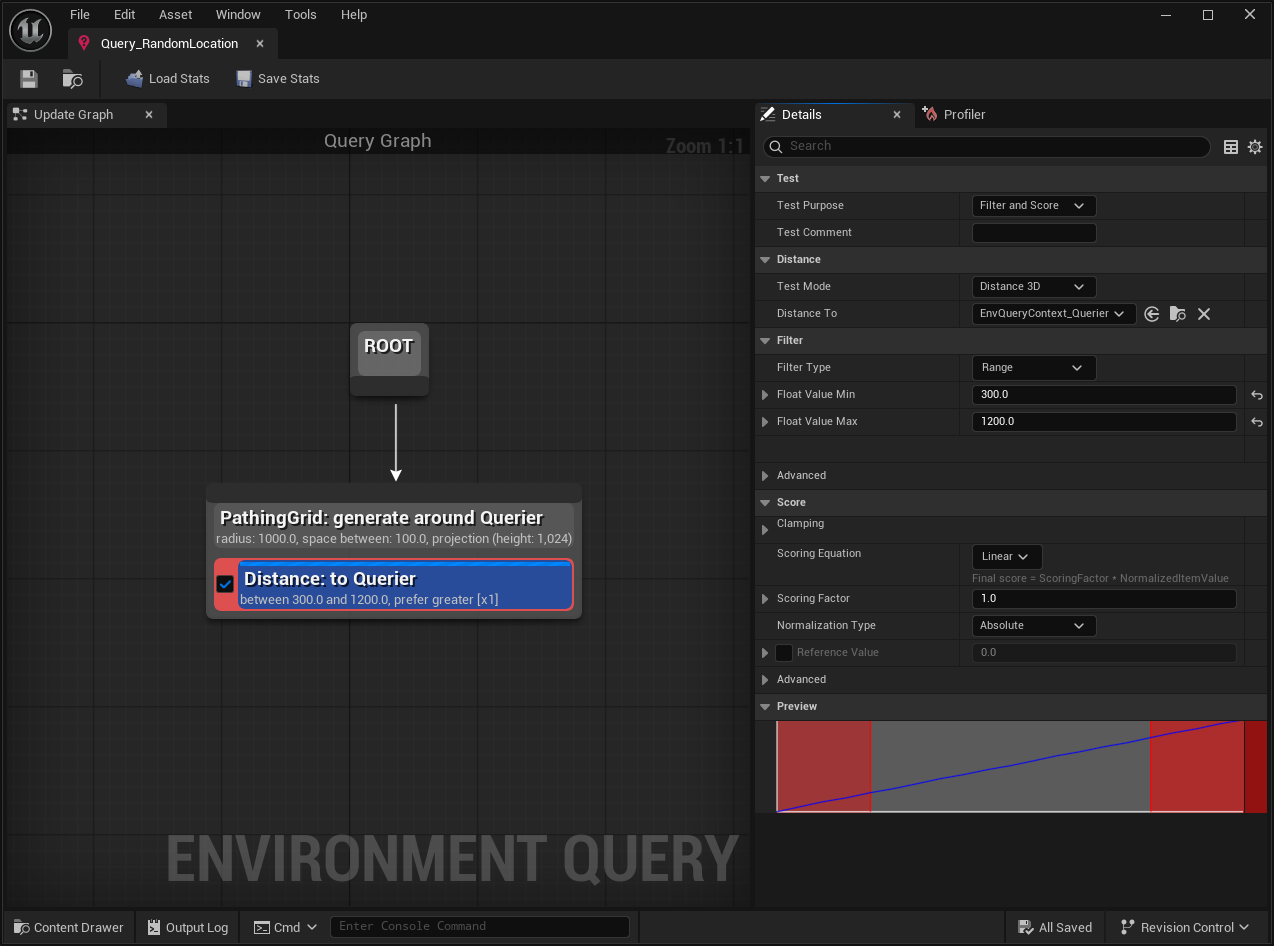
AI Logic
Ninja Bot can expose perception and awareness data to either Behavior Trees or State Trees. Choose the option that matches the decision system used by your project.
Create the Blackboard
In your AI folder, create a new Blackboard that will be used to store contextual data available to the AI agent.
Create an entry for SensedActor, setting the Key Type to
Objectand the Base Class toActor. Create a new Entry Category named Perception.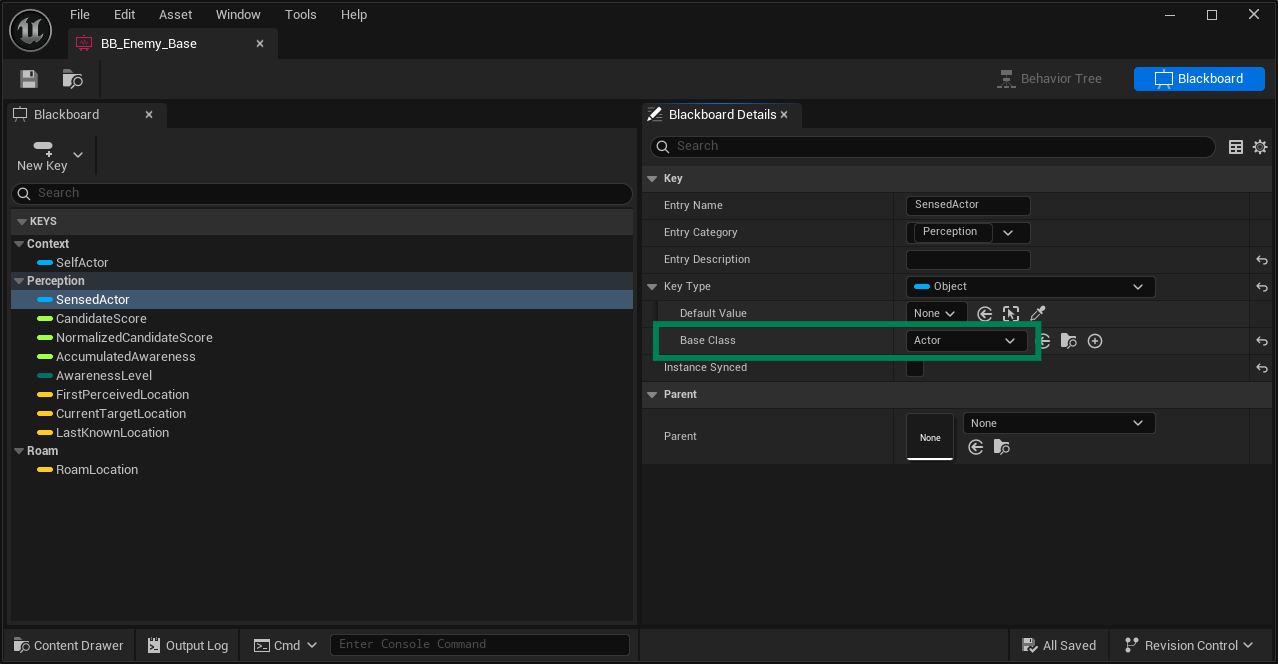
Create three new float Key Types: CandidateScore, NormalizedCandidateScore, and AccumulatedAwareness. Add them to the Perception category.
Create an entry for AwarenessLevel, setting the Key Type to
Enum. Set the Enum Name toEBotPerceptionAwarenessLevel. Add this entry to the Perception category.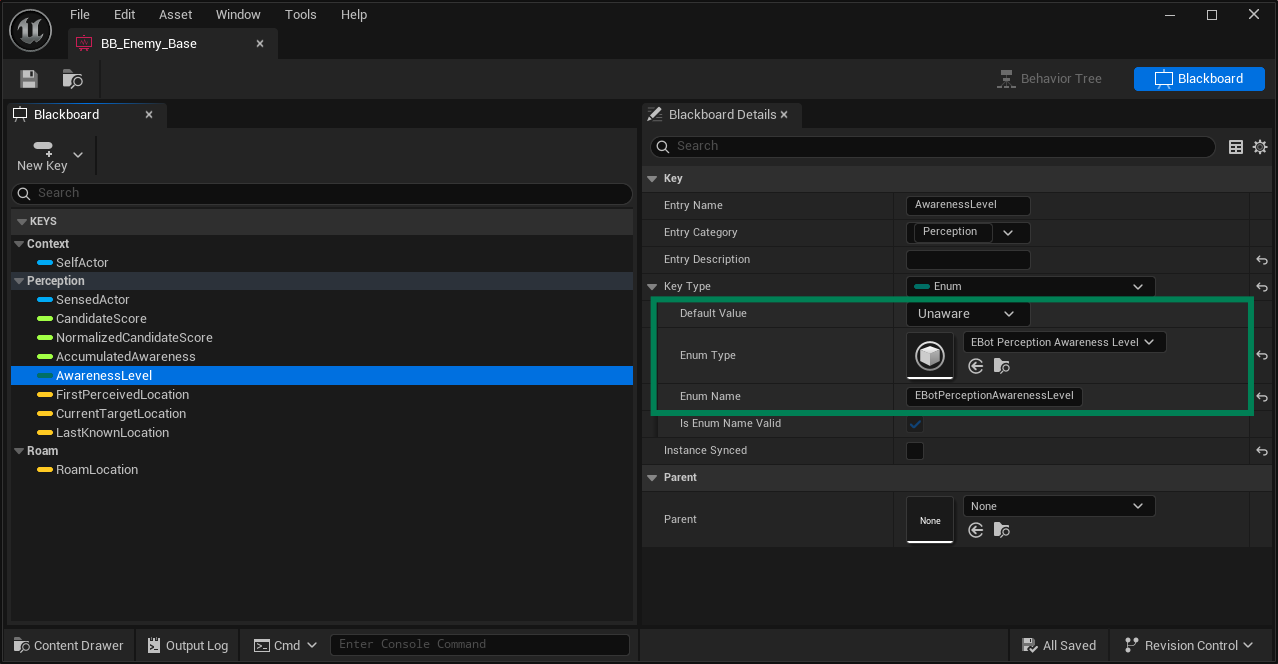
Create three new Vector Key Types: FirstPerceivedLocation, CurrentTargetLocation, and LastKnownLocation. Add them to the Perception category.
Create one additional Vector Key Type, RoamLocation. Add it to a new category named Roam.
Create the Behavior Tree
Create a Behavior Tree and assign the Blackboard to it.
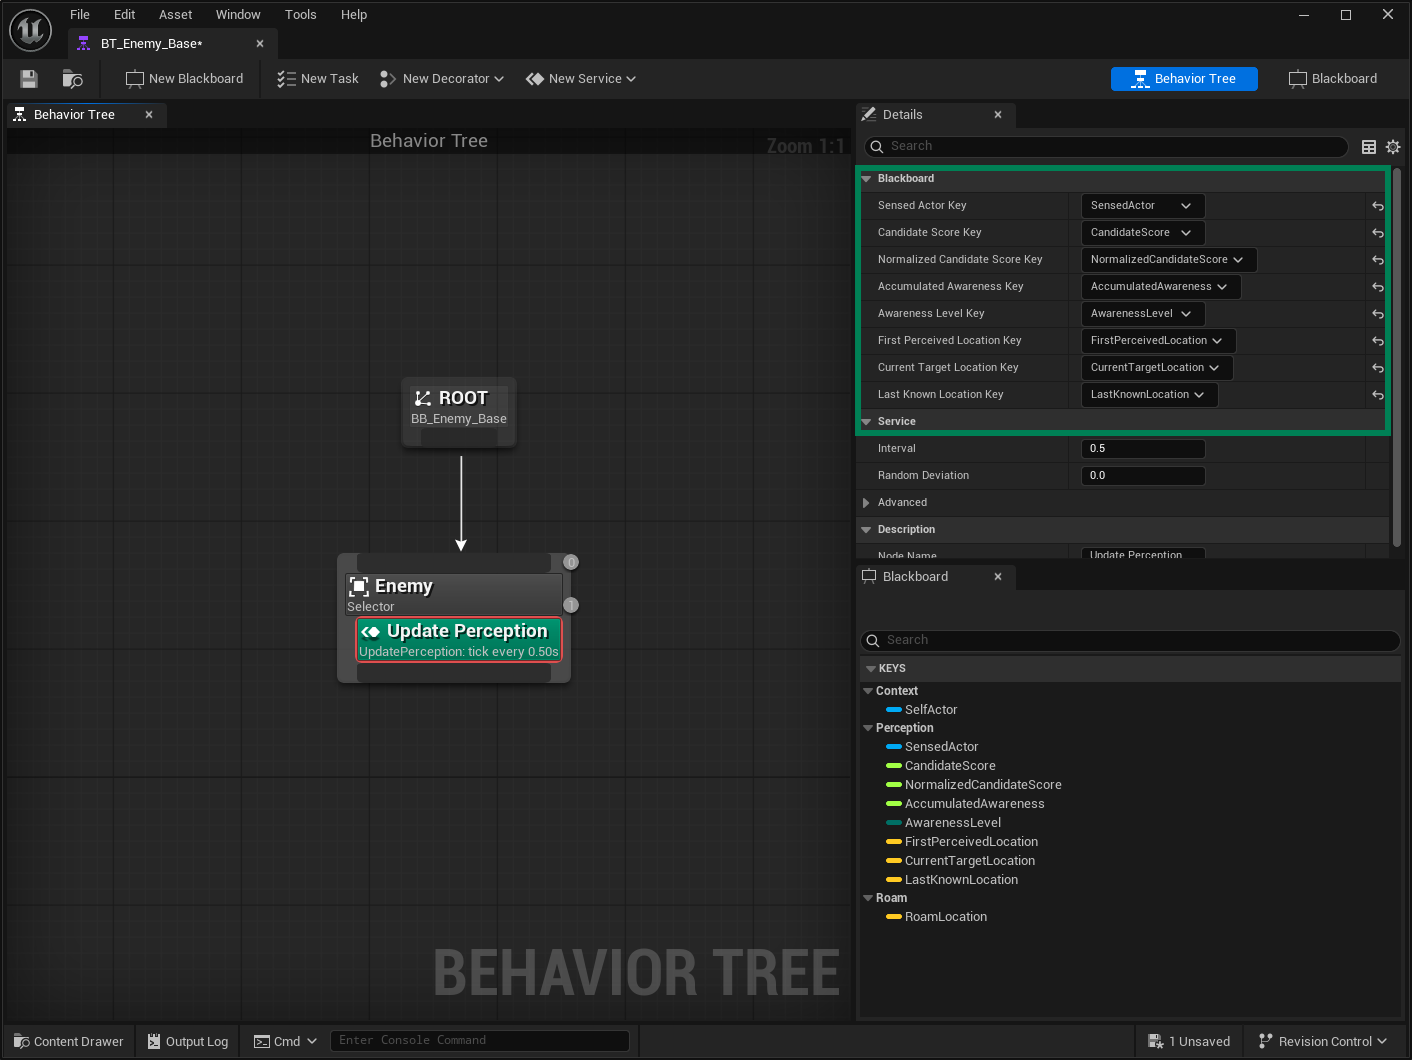
From the Root node, create a Selector composite node and add the Update Perception Service to it. Match each property to the correct blackboard key.
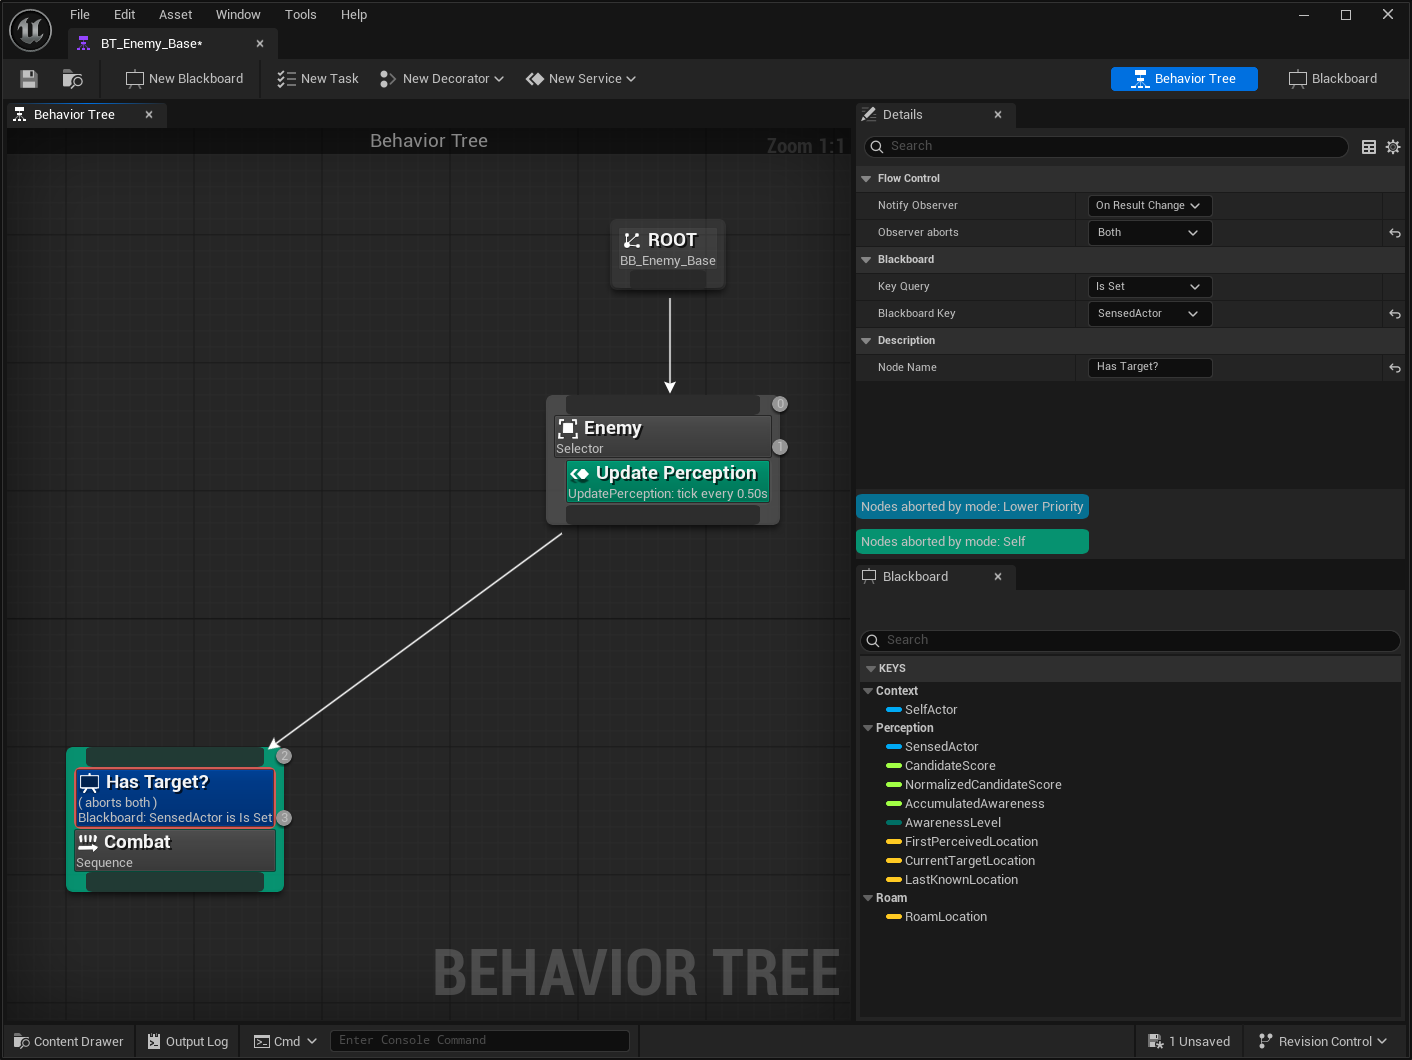
From the top Selector node, create a Sequence composite node for Combat. Add a Blackboard Decorator to check whether the SensedActor key is set. This Decorator should be configured to abort both itself and lower priority nodes.
Add a Move To Task, using the SensedActor key as the Target Location and an Acceptable Radius of
50. Add an Is At Location decorator using the same parameters, followed by a Force Success decorator. Lastly, add a Wait task set to1 secondwith a Random Deviation of0.2.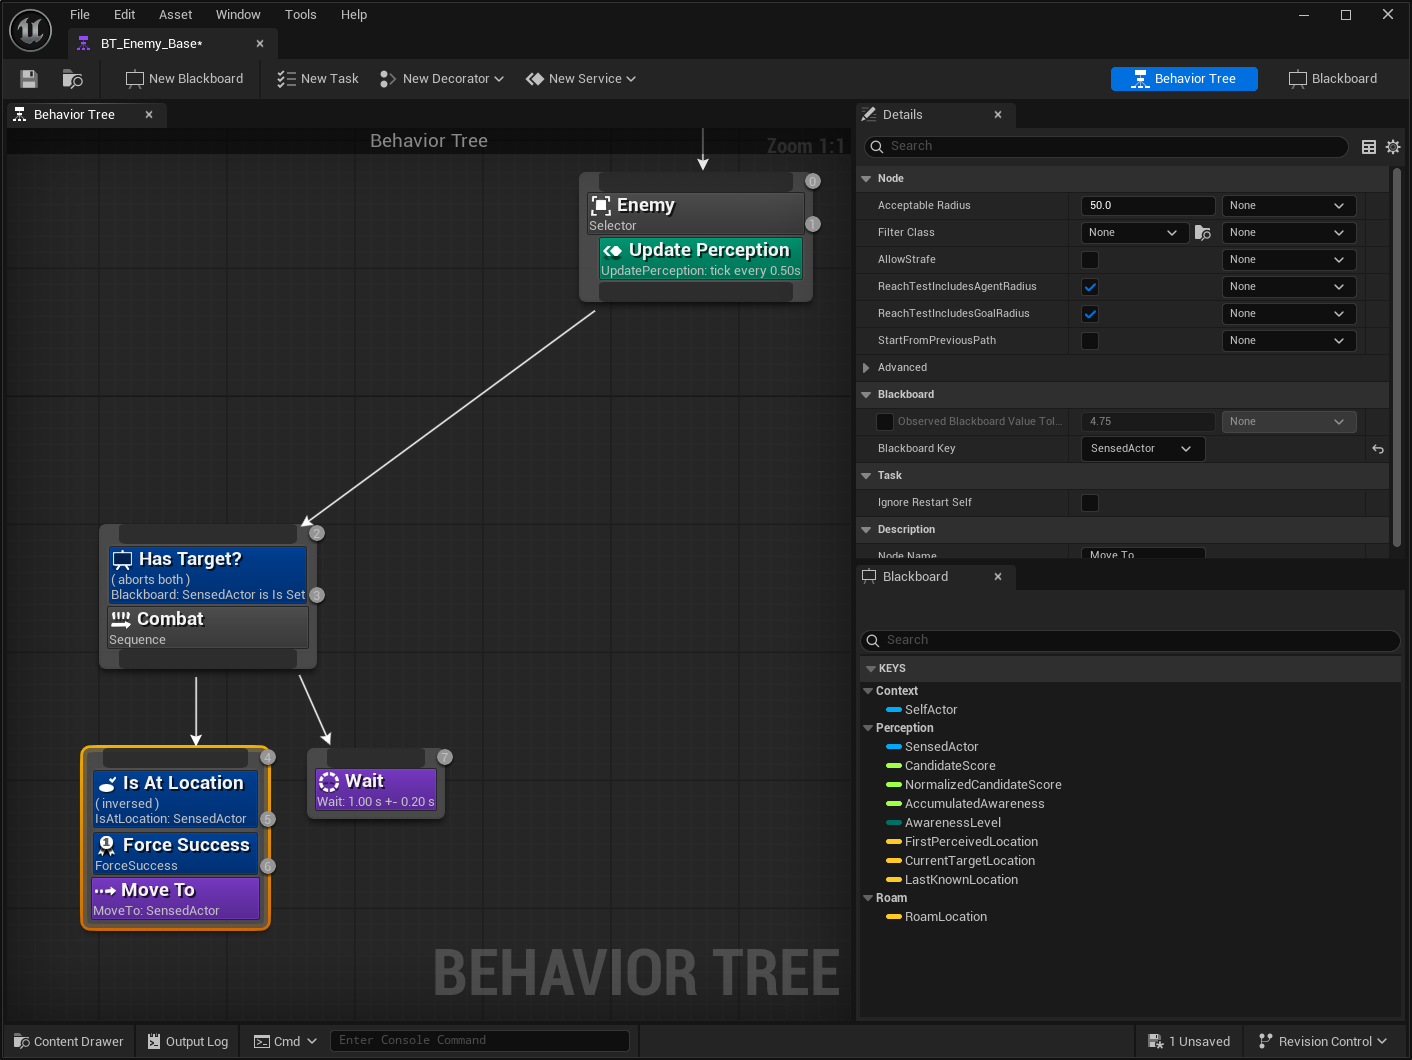
From the top Selector node, create another Sequence composite node for Roam. Add a Run EQS Query task using the Environment Query created earlier, and configure it to write its result to the RoamLocation key. Add another Move To task using the RoamLocation key as the Target Location.
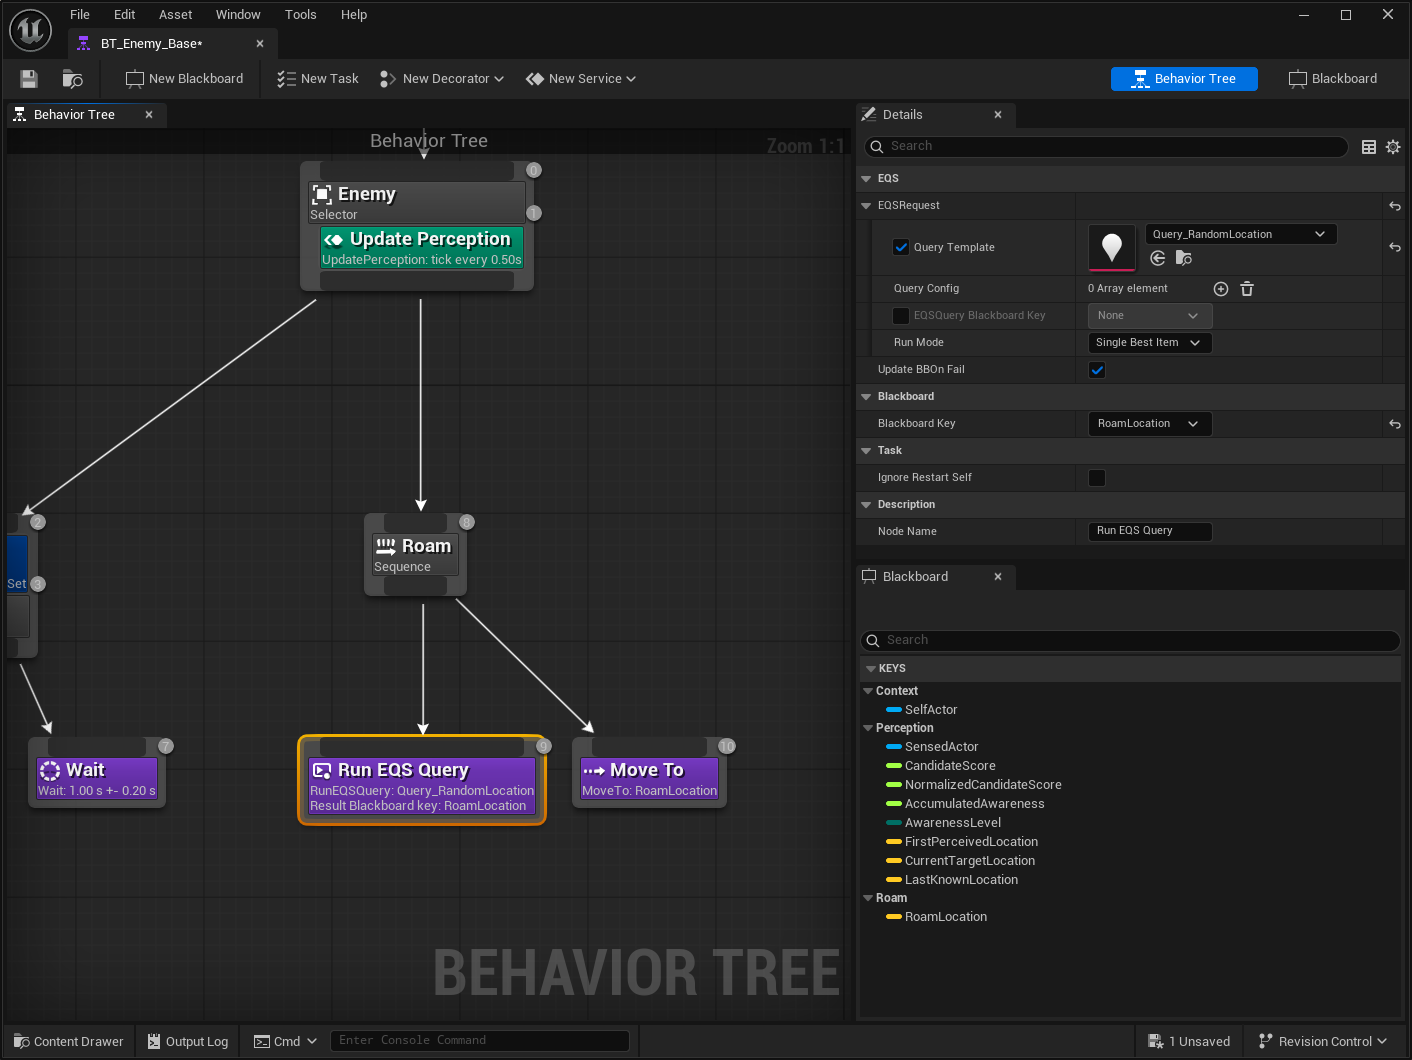
Complete the Behavior Tree with another Sequence composite node for Idle. Add a Wait task set to
5 seconds.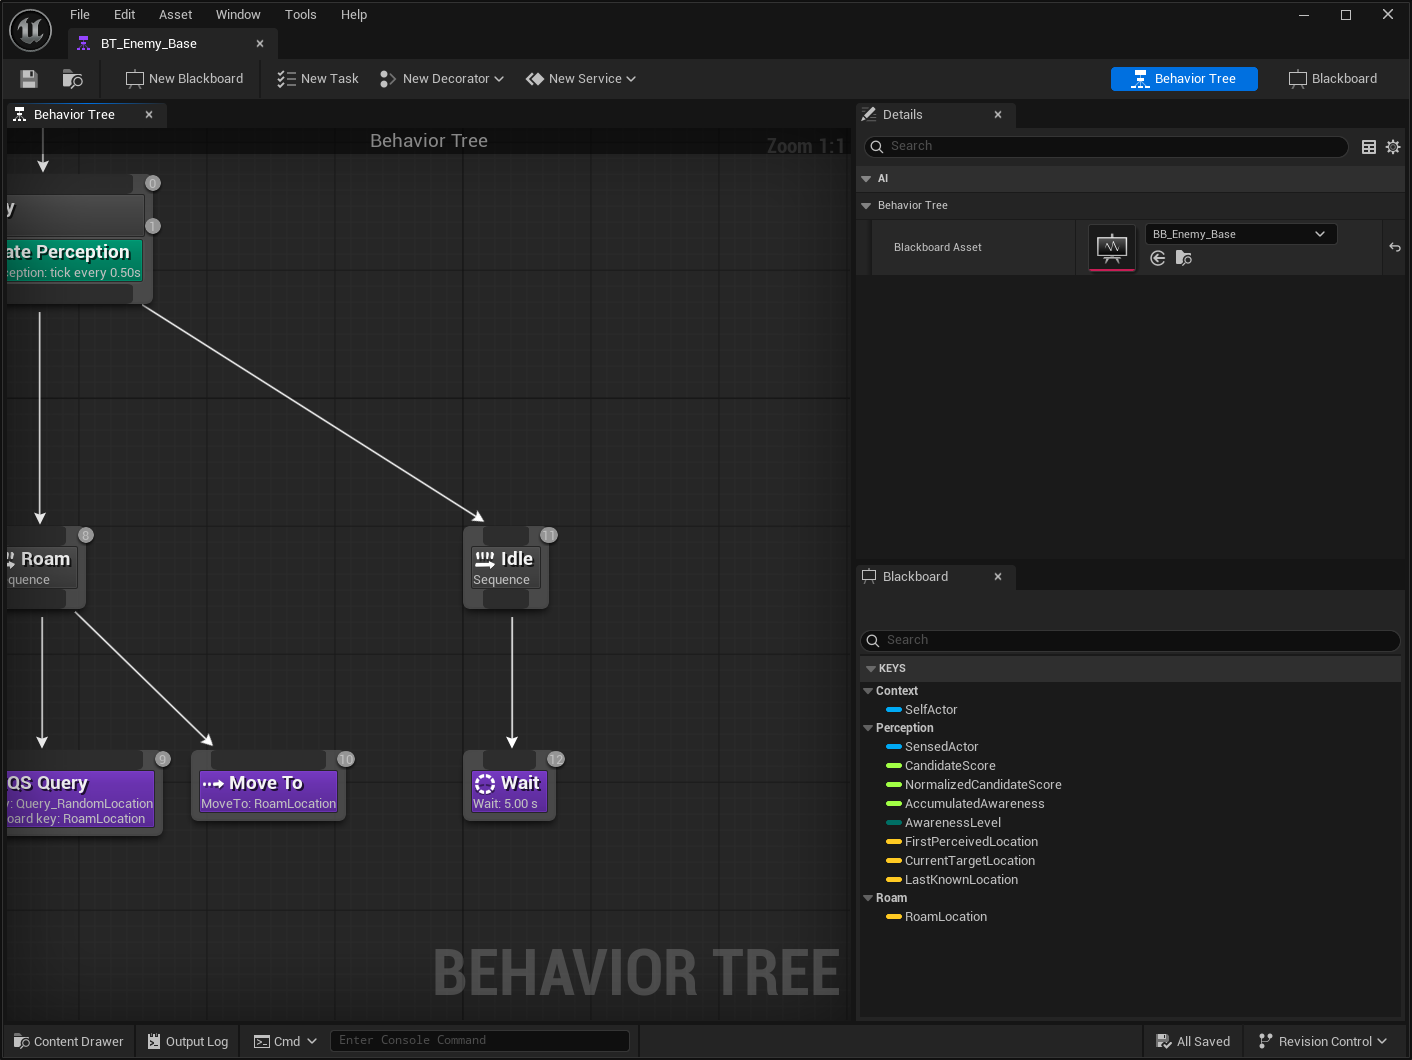
Create the State Tree
Create a State Tree using the State Tree AI Component Schema.
Add the Update Perception evaluator.
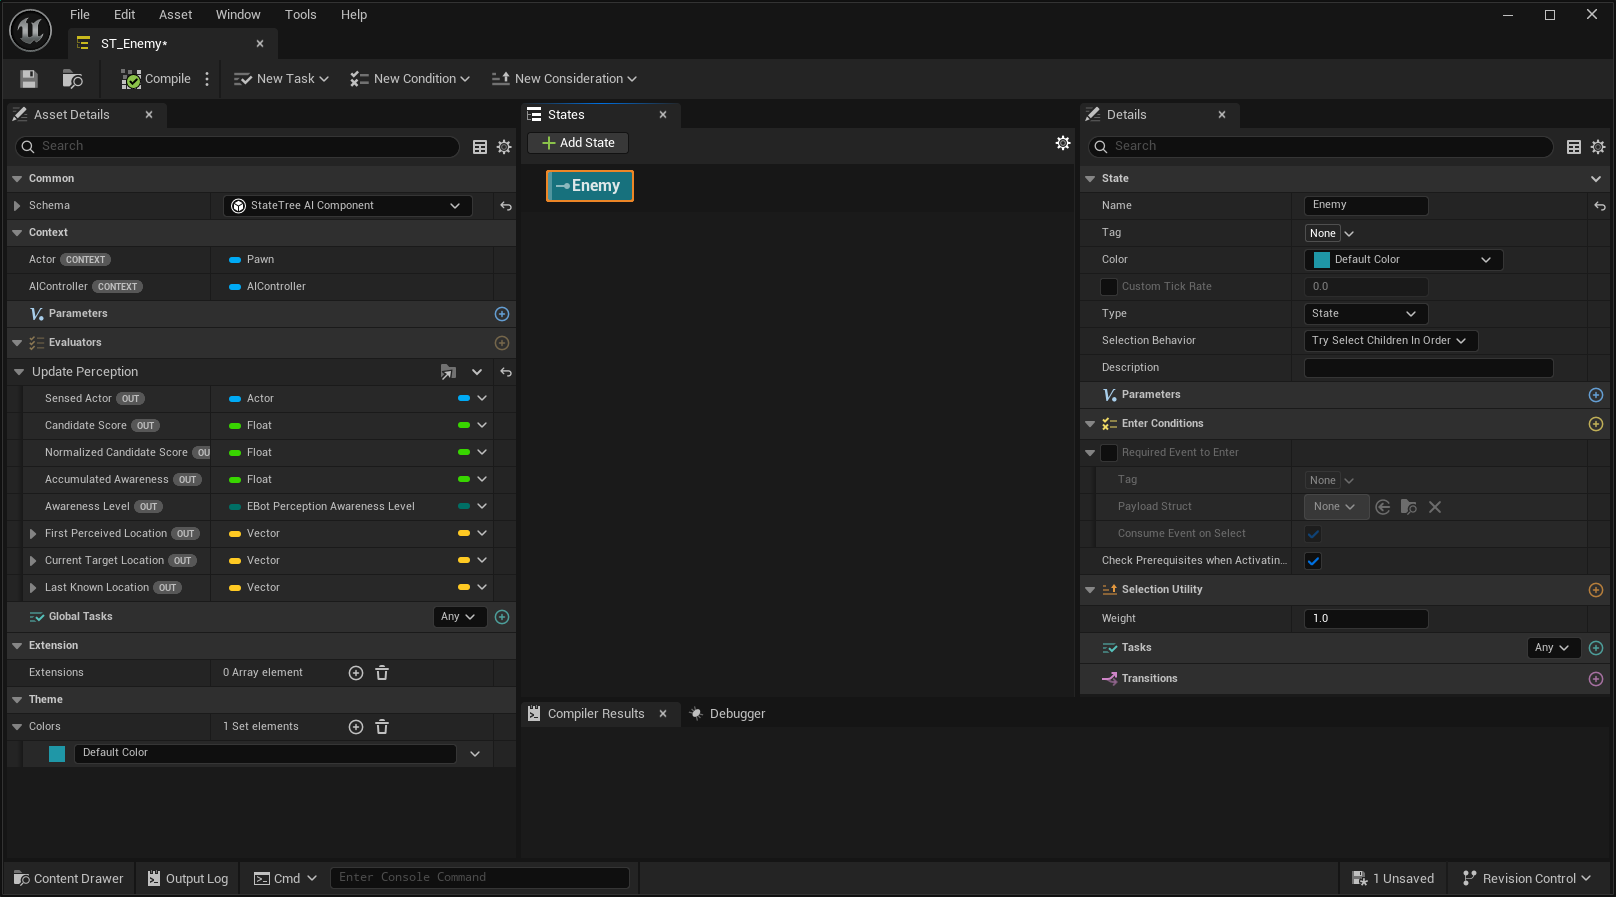
From the Root node, add a Child State named Combat. Add an Object Is Valid Enter Condition, checking
UpdatePerception.SensedActor.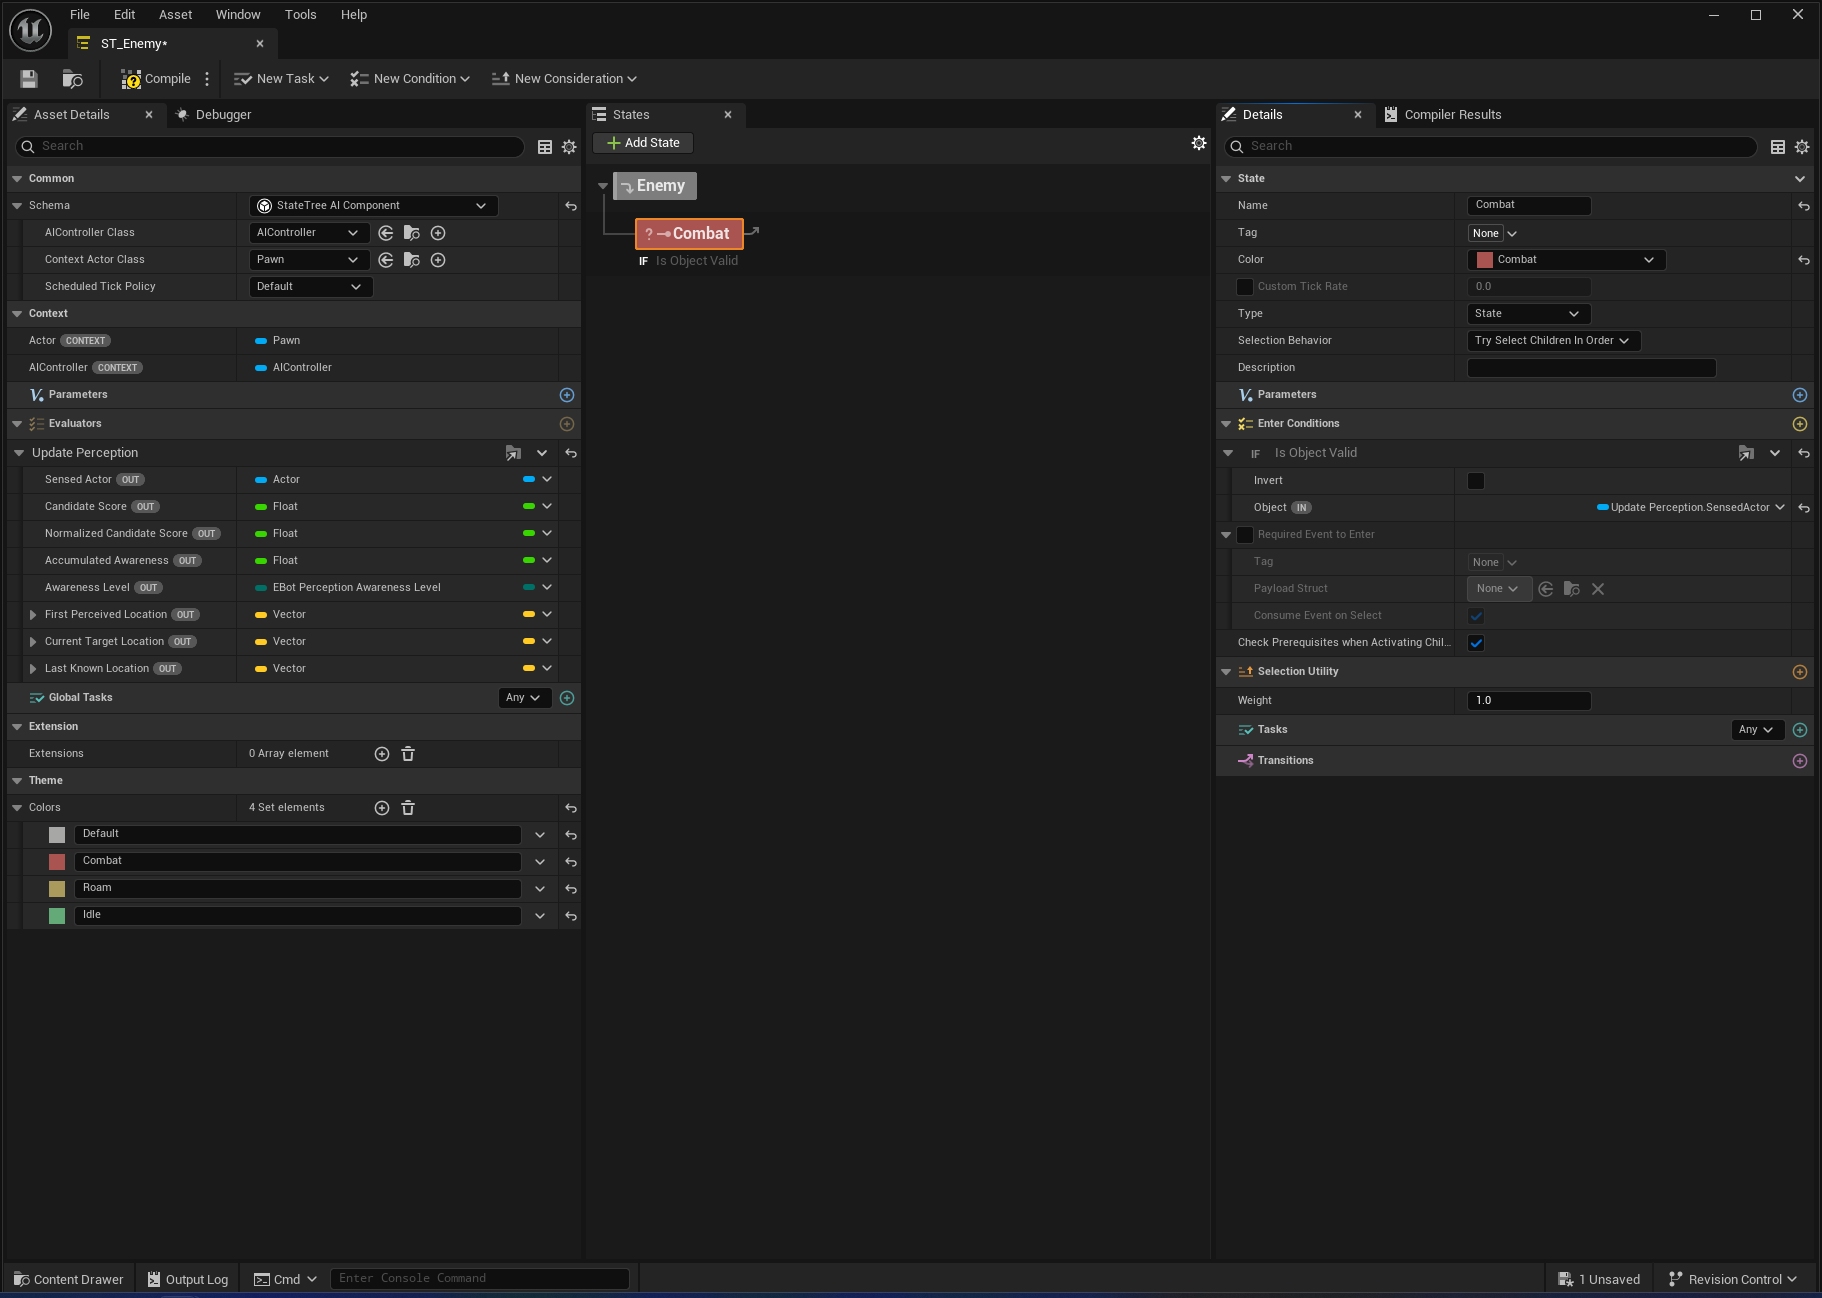
From the Combat state, add a Child State named Move to Target. Add a Distance Compare Enter Condition comparing the Bot and Target locations, a Move To task targeting
UpdatePerception.SensedActor, and a State Completed transition to the Next State.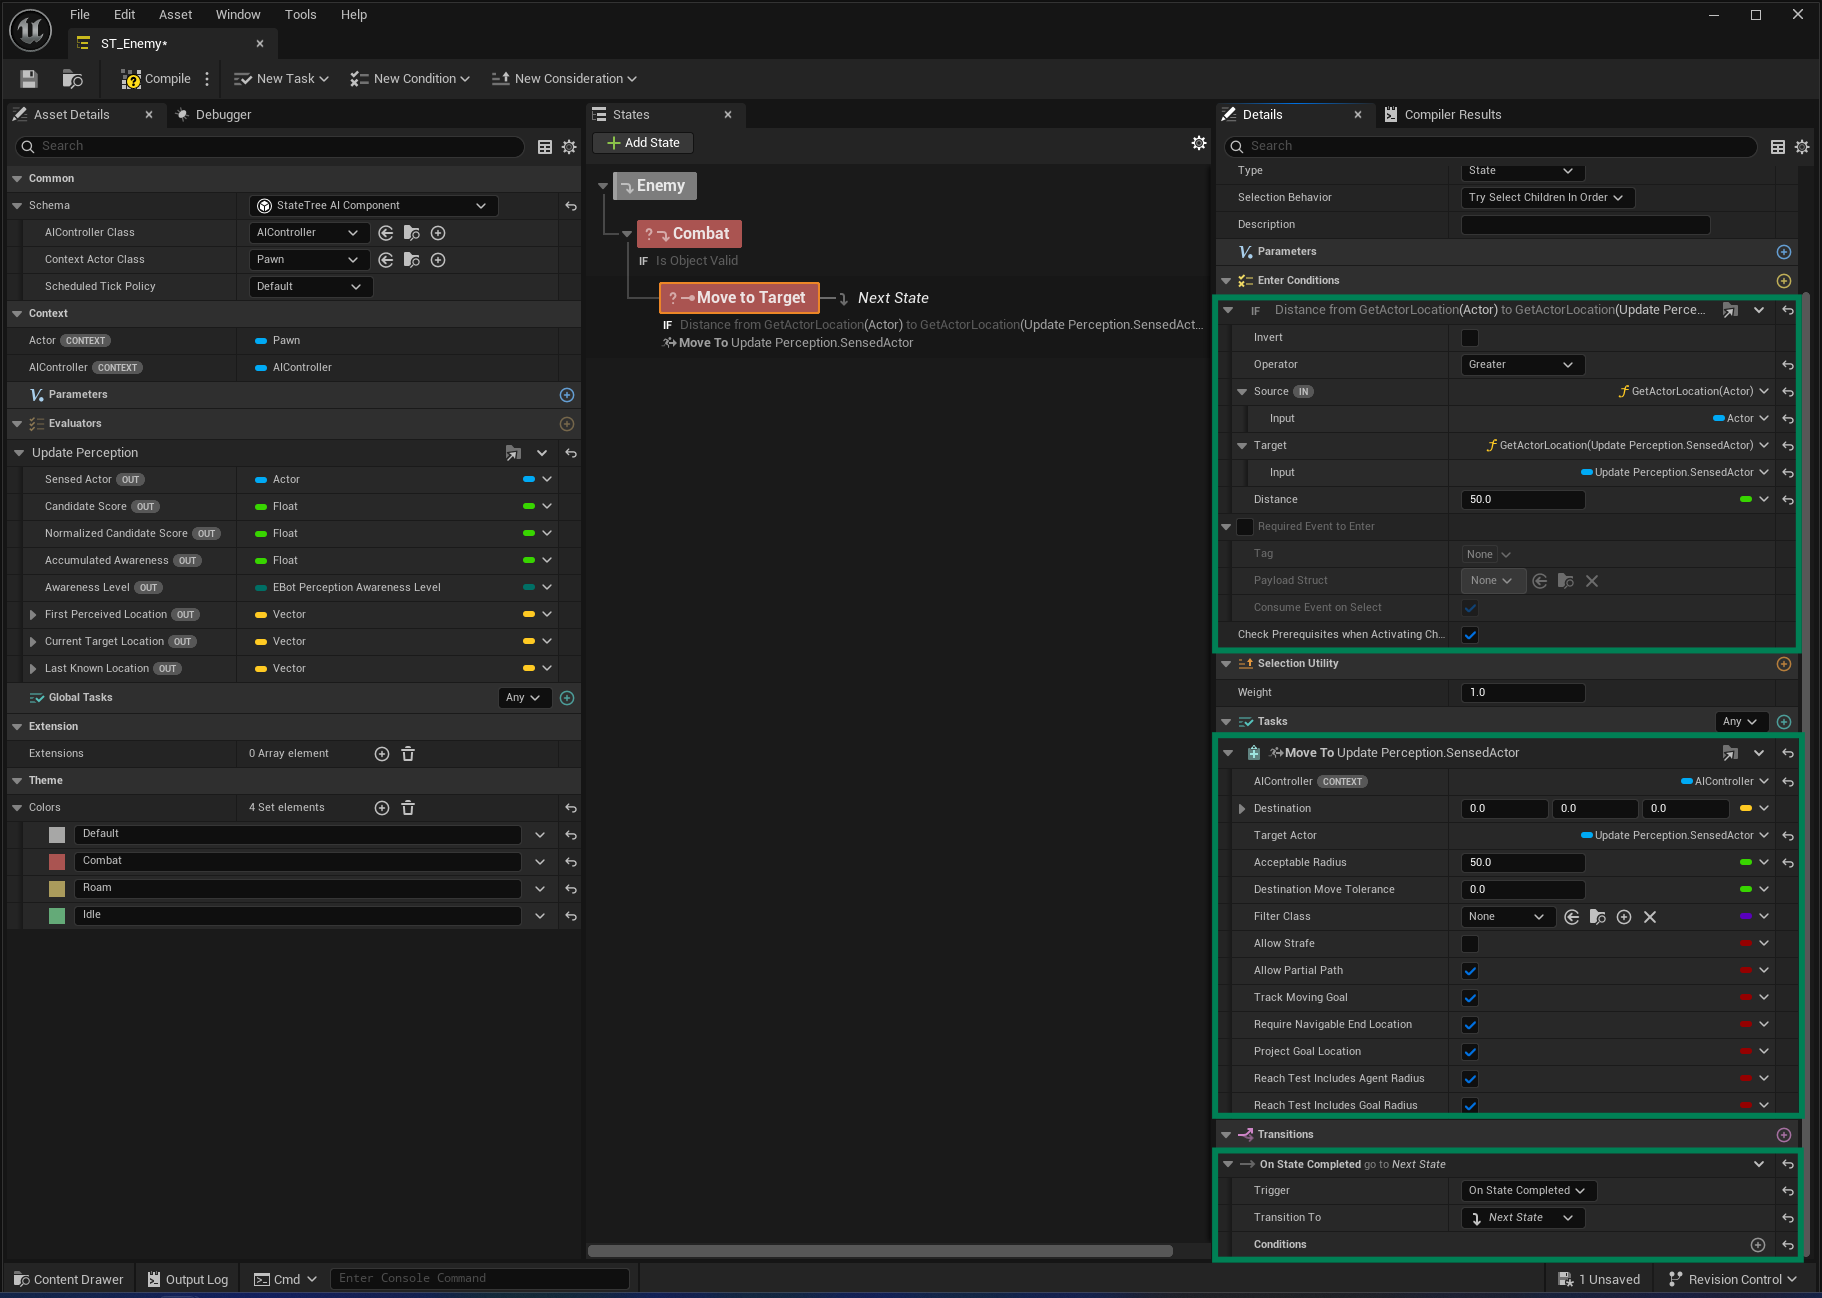
Add another state named Wait. Add a Delay task with a Duration of
1.0and a Random Deviation of0.2.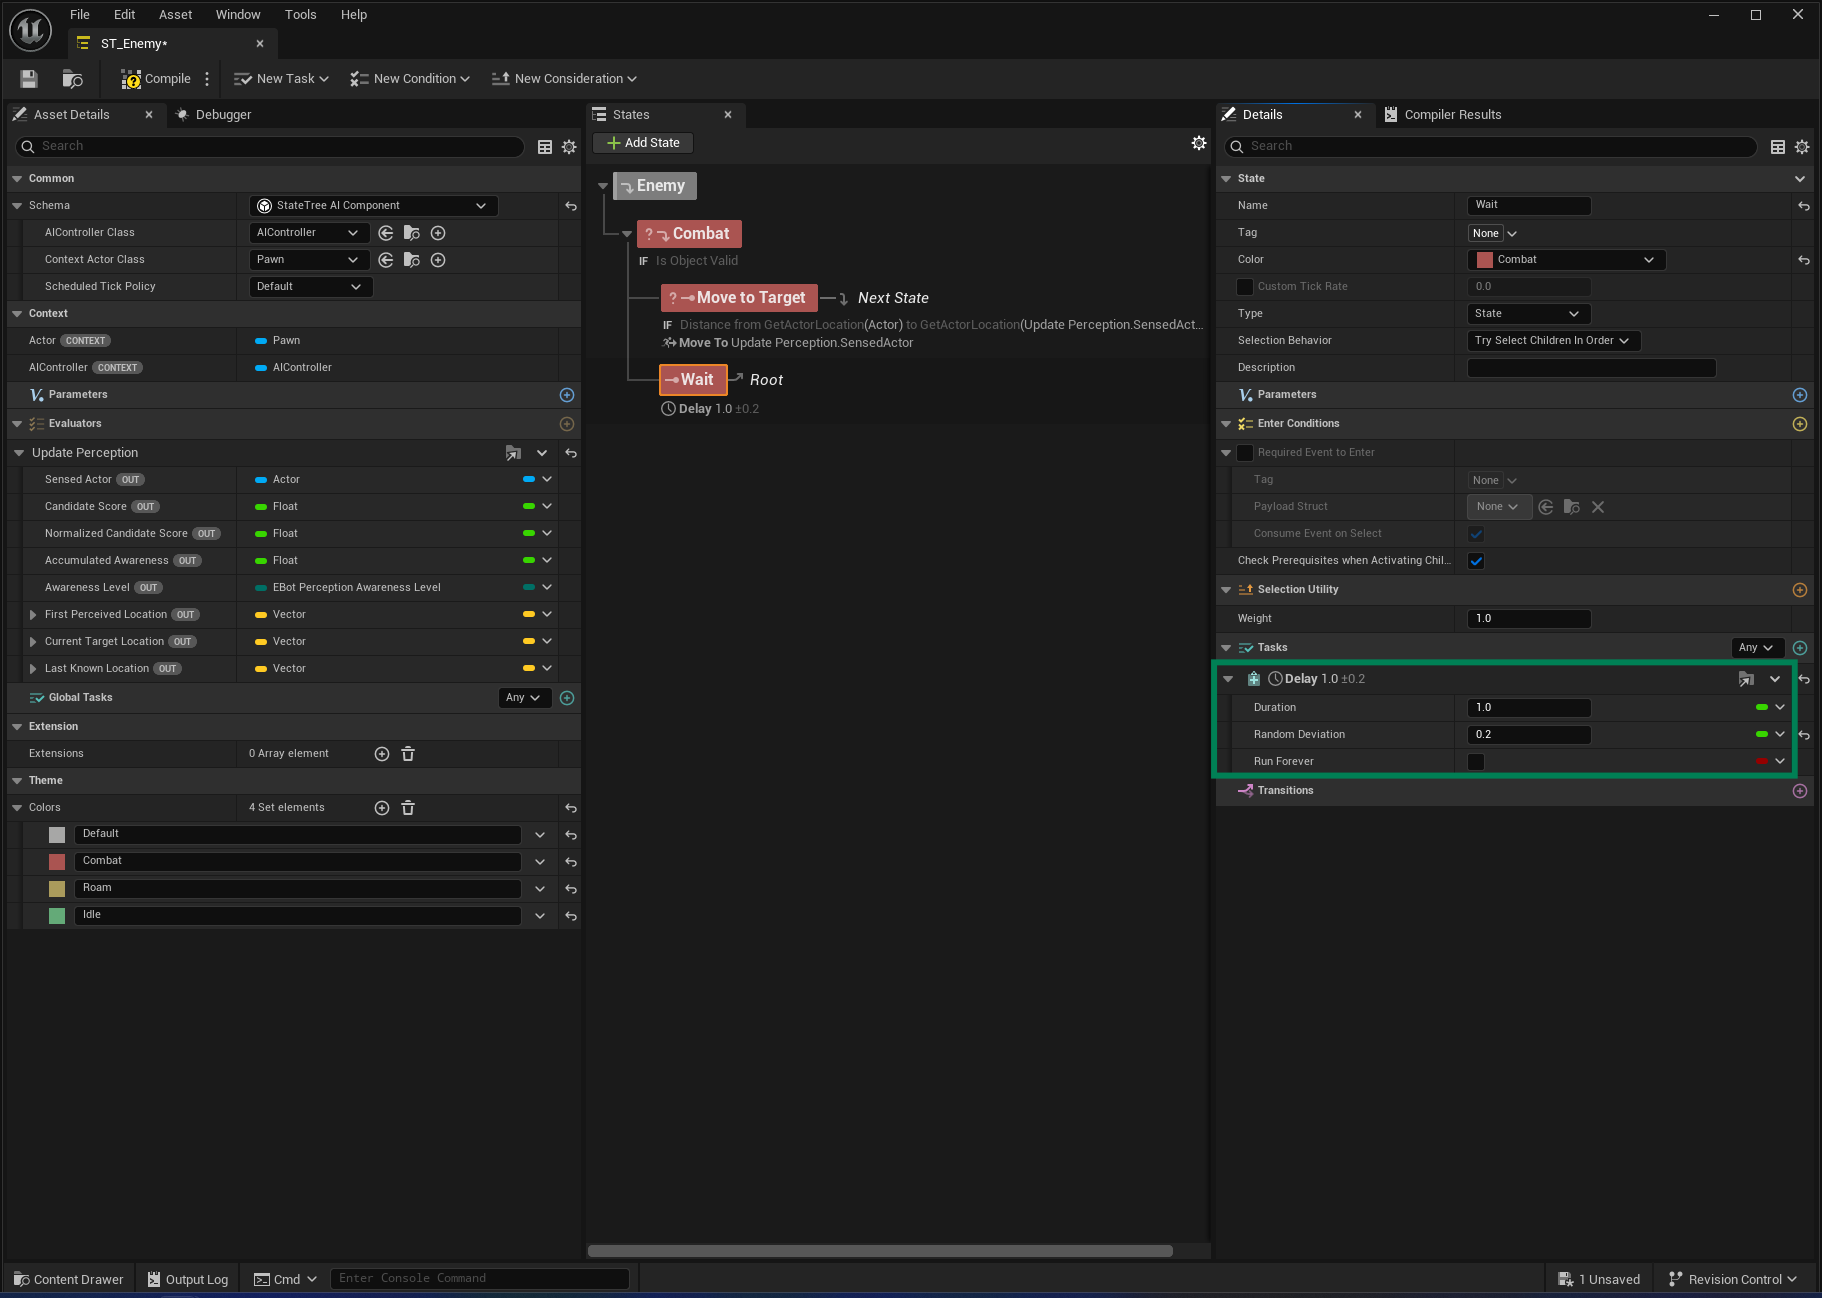
From the Combat state, add a Sibling State named Roam. Create a Vector Parameter named Roam Location.
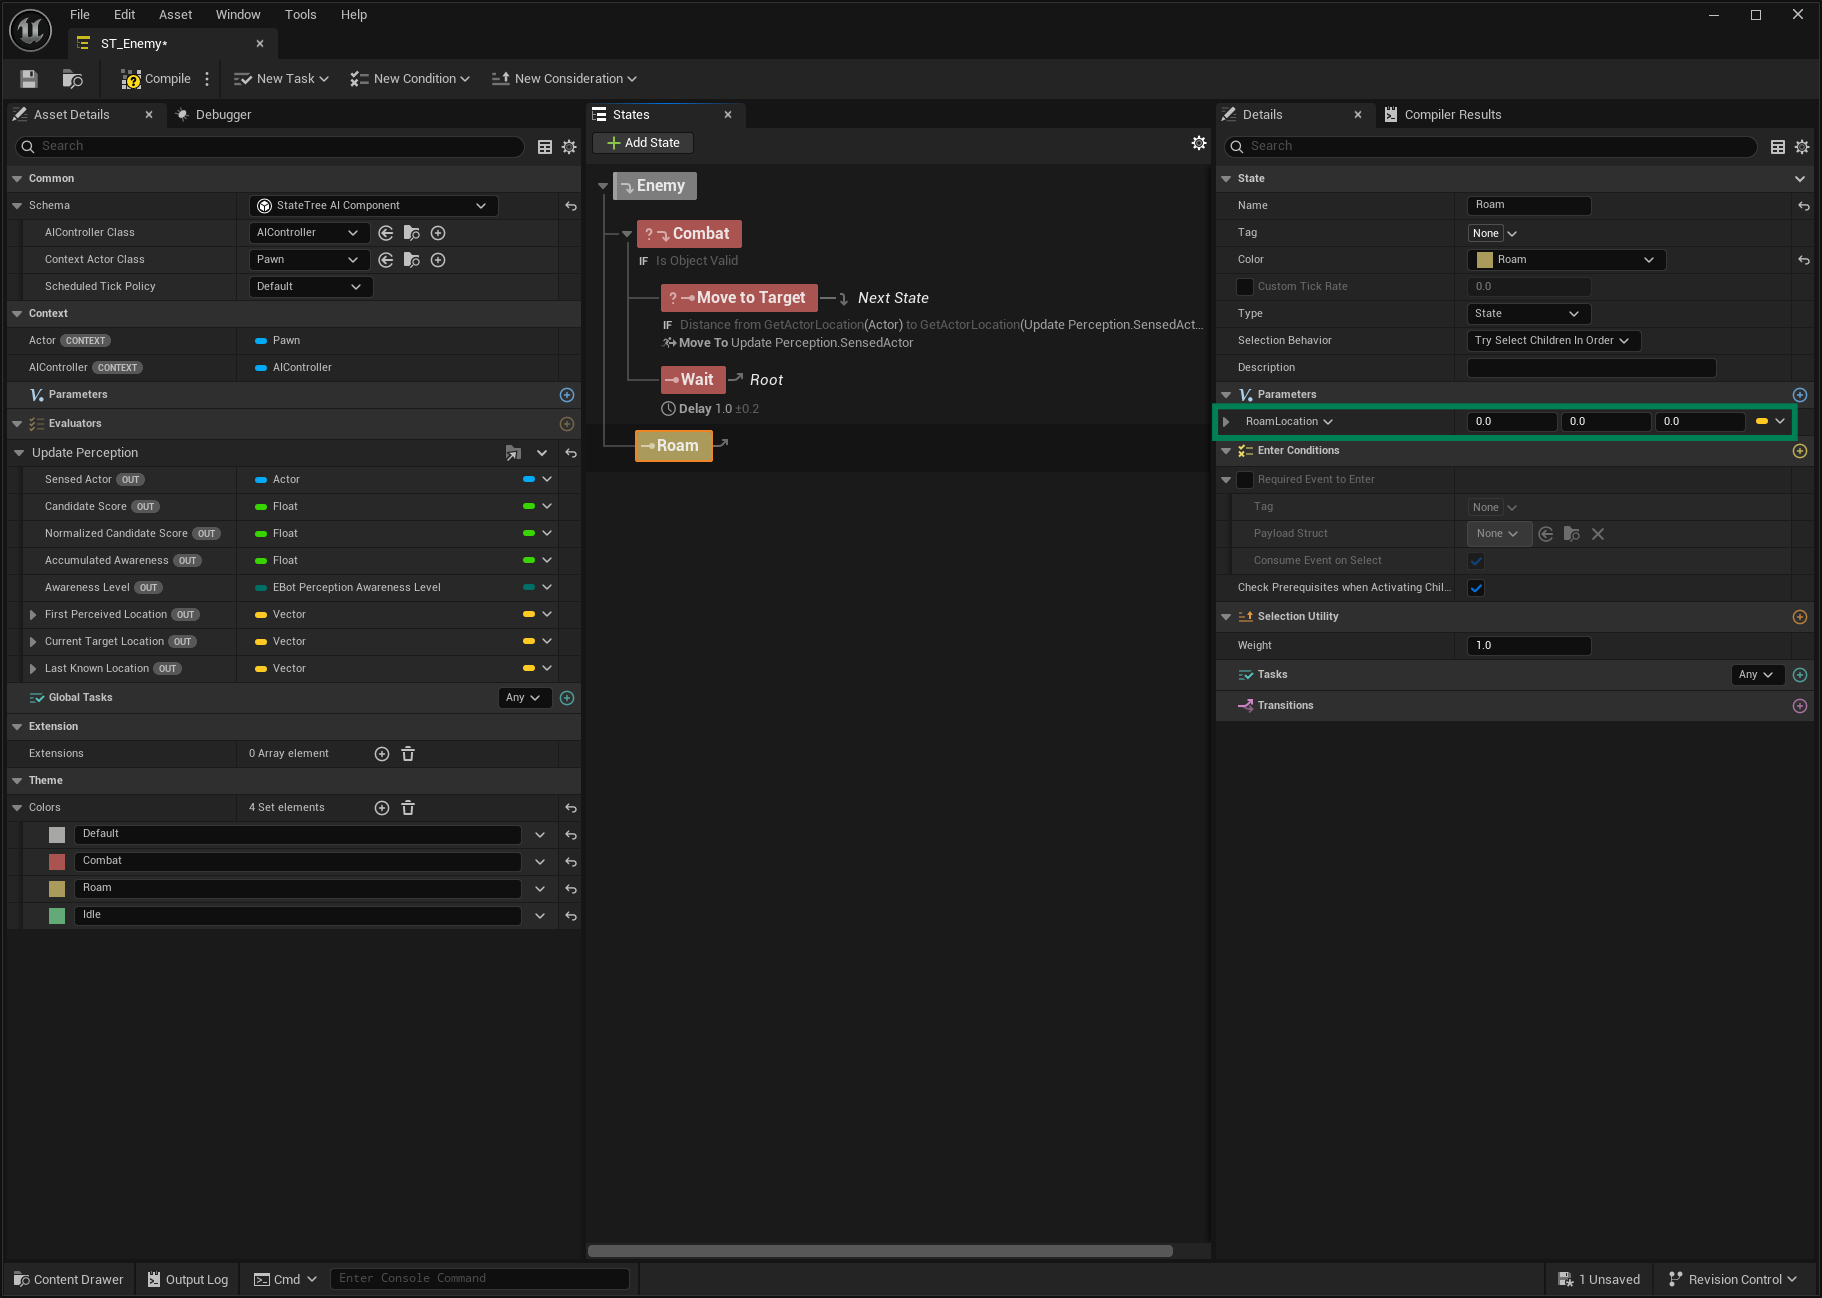
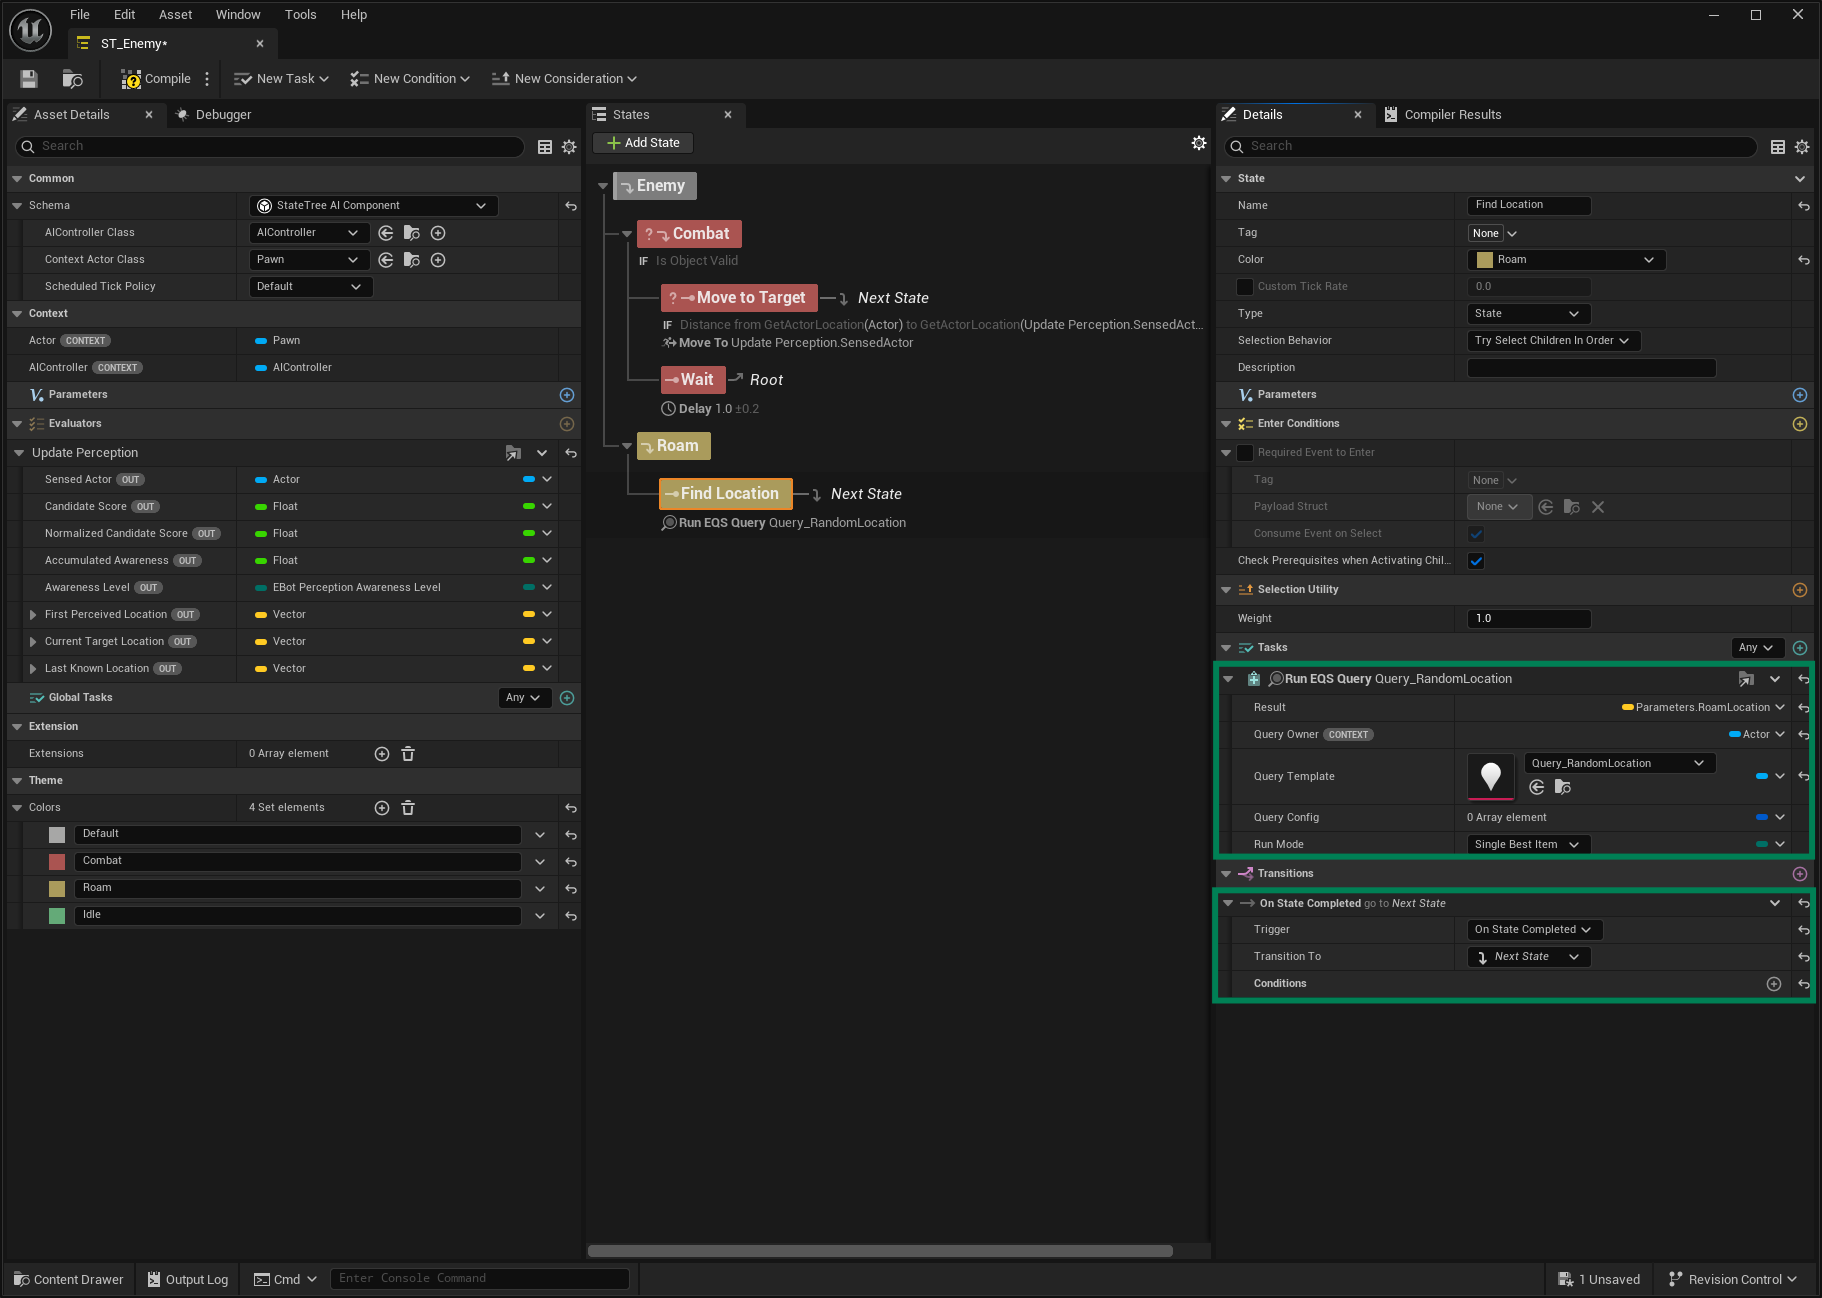
From the Roam state, add a Child State named Find Location. Add a Run EQS Query task, bind the Result to the Roam Location parameter, bind the Query Owner to the Context Actor, and set the Query Template. Add an On State Completed transition to Next State.
Add another state named Move to Location, and from the Roam state add another sibling named Idle. For Move to Location, add a Move To task and bind the AI Controller from the Context, and the Destination to
Parameters.RoamLocation. Add an On State Completed transition to Idle.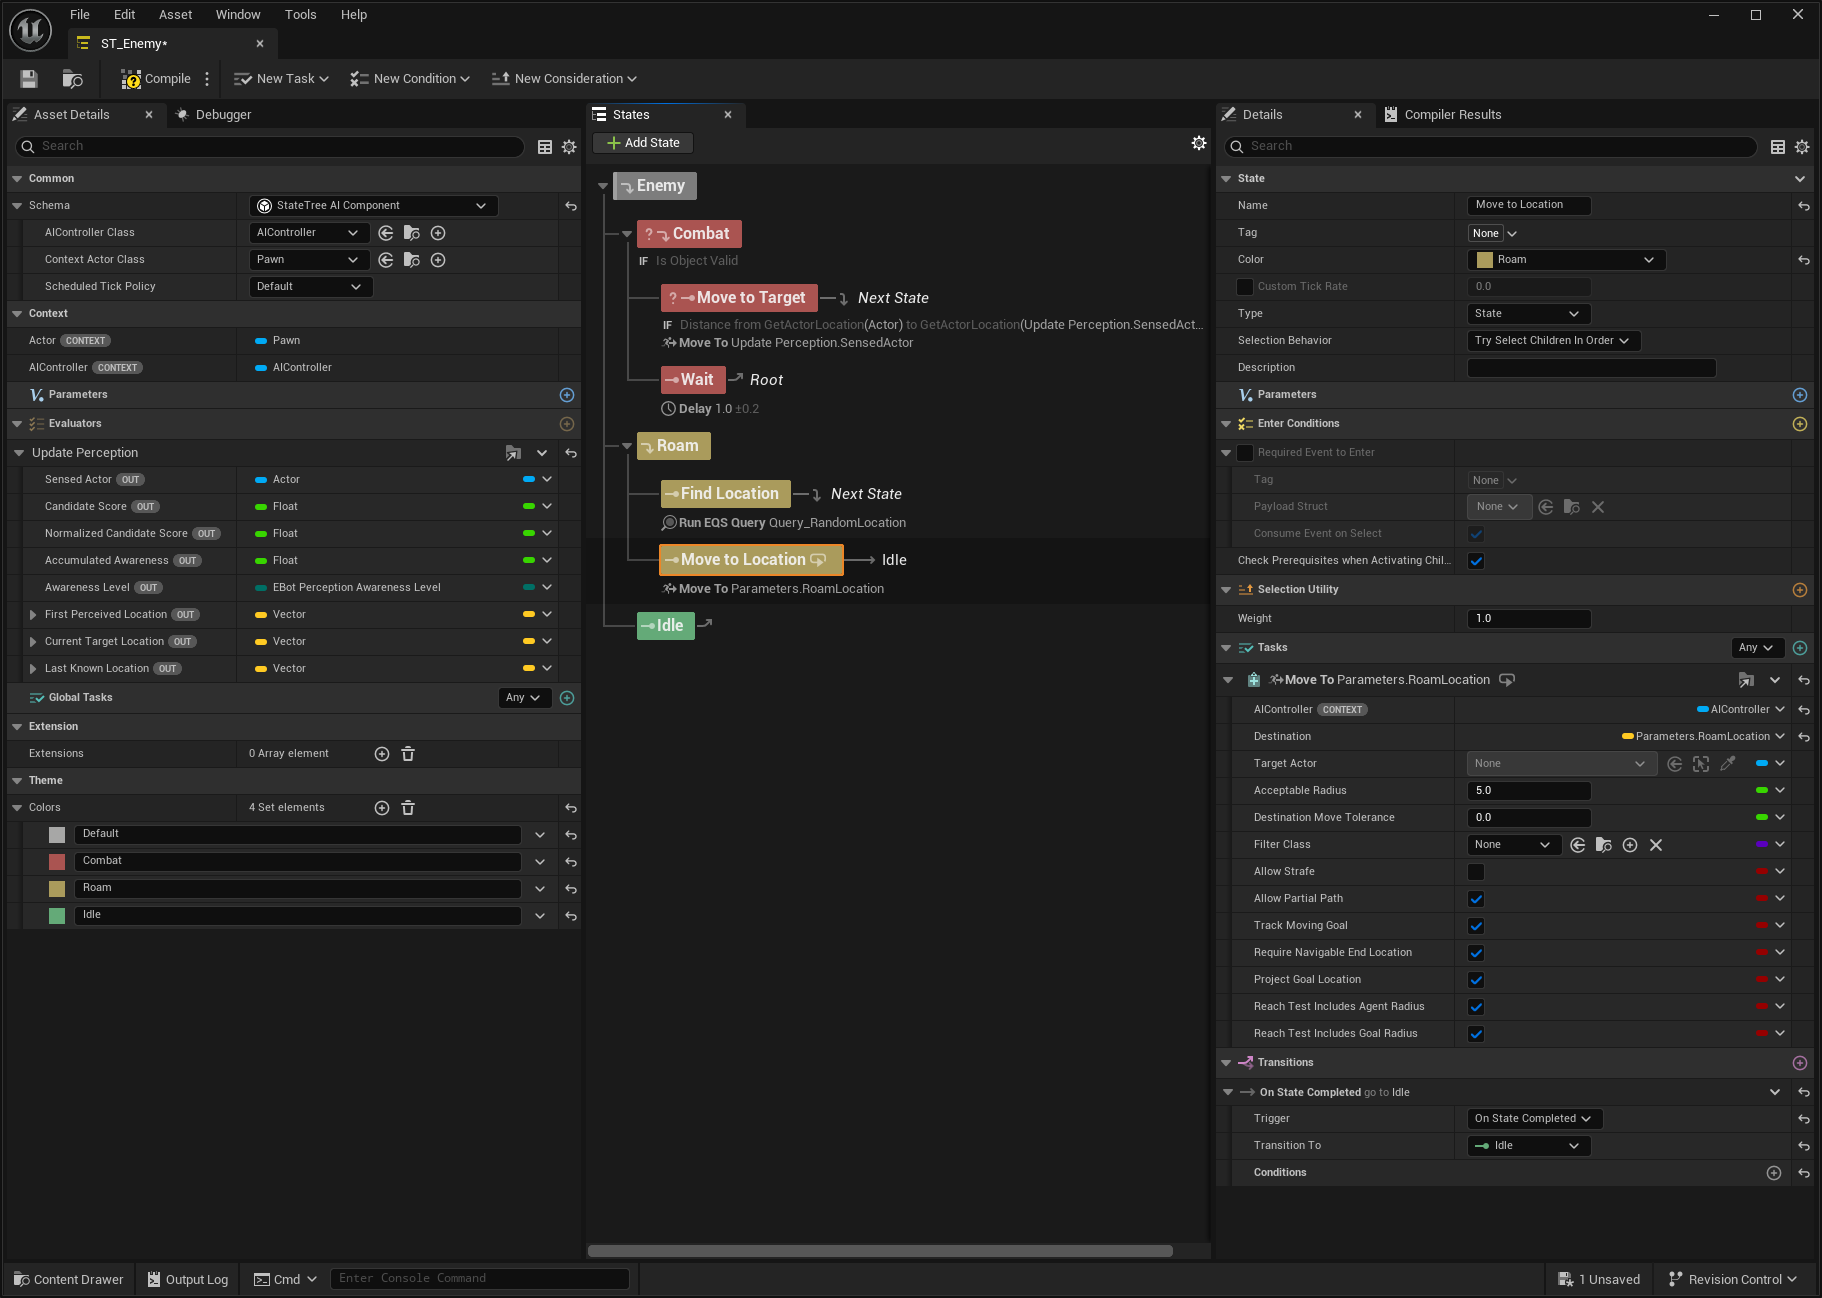
From the Idle state, add a Child State named Wait. Add a Delay task with a Duration of
5.0.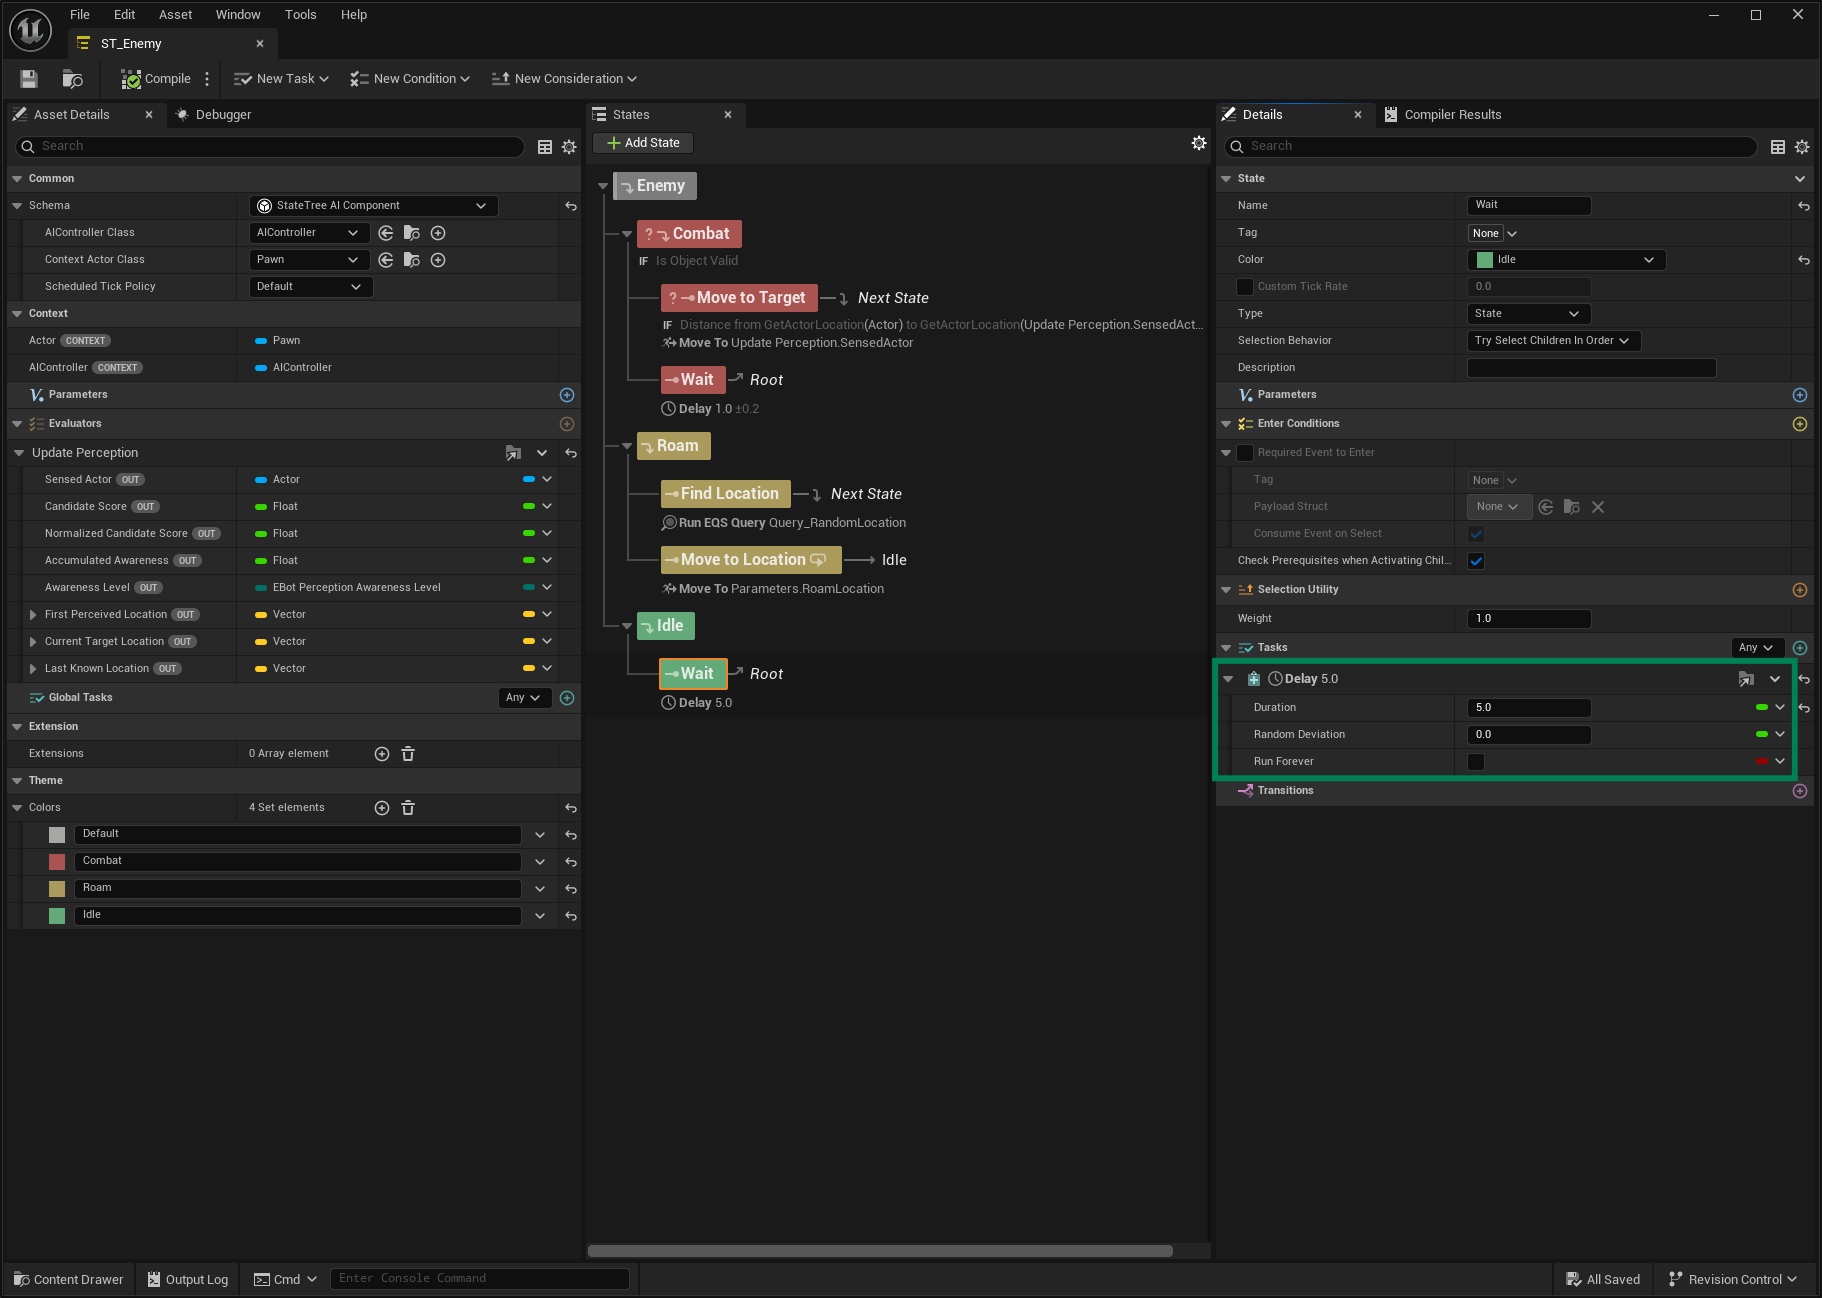
Bot Setup Data
The Bot Setup Data Asset connects the bot's perception configuration with the decision system used by the AI Controller.
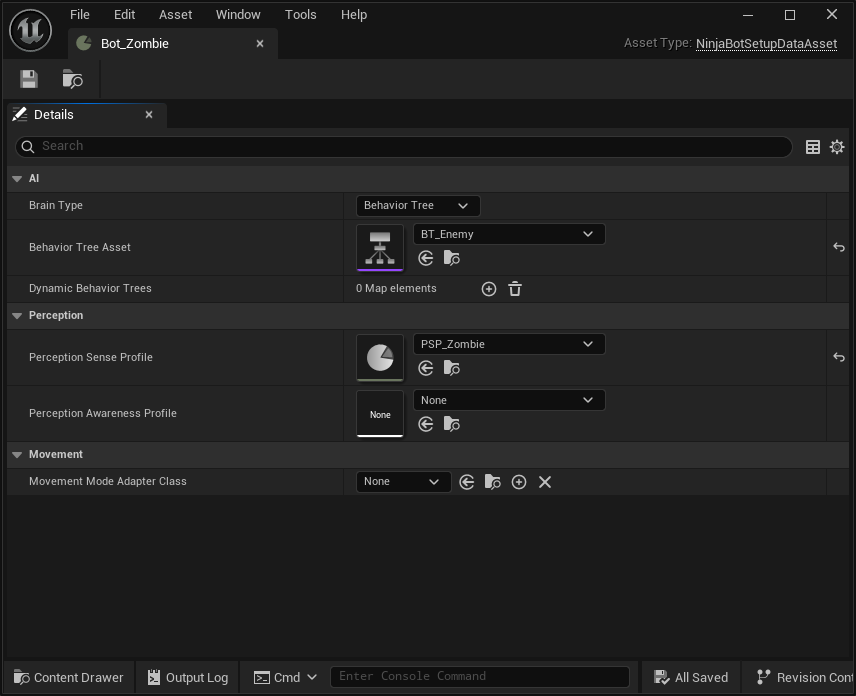
Create the Bot Setup
In your Bot Setup Data folder, create a new Bot Setup using the Content Browser contextual menu: Ninja Bear Studio → Ninja Bot → Bot Setup.
Set the Brain Type to Behavior Tree and assign your Behavior Tree asset.
Create the Bot Setup
In your Bot Setup Data folder, create a new Bot Setup, using the Content Browser contextual menu: Ninja Bear Studio → Ninja Bot → Bot Setup.
Set the Brain Type to State Tree and add your State Tree asset.

Bot Character
The Bot Character provides the Bot Setup Data and uses the Ninja Bot AI Controller.
Create the Bot Character
Create a new Character and add the Bot Setup Provider Interface.
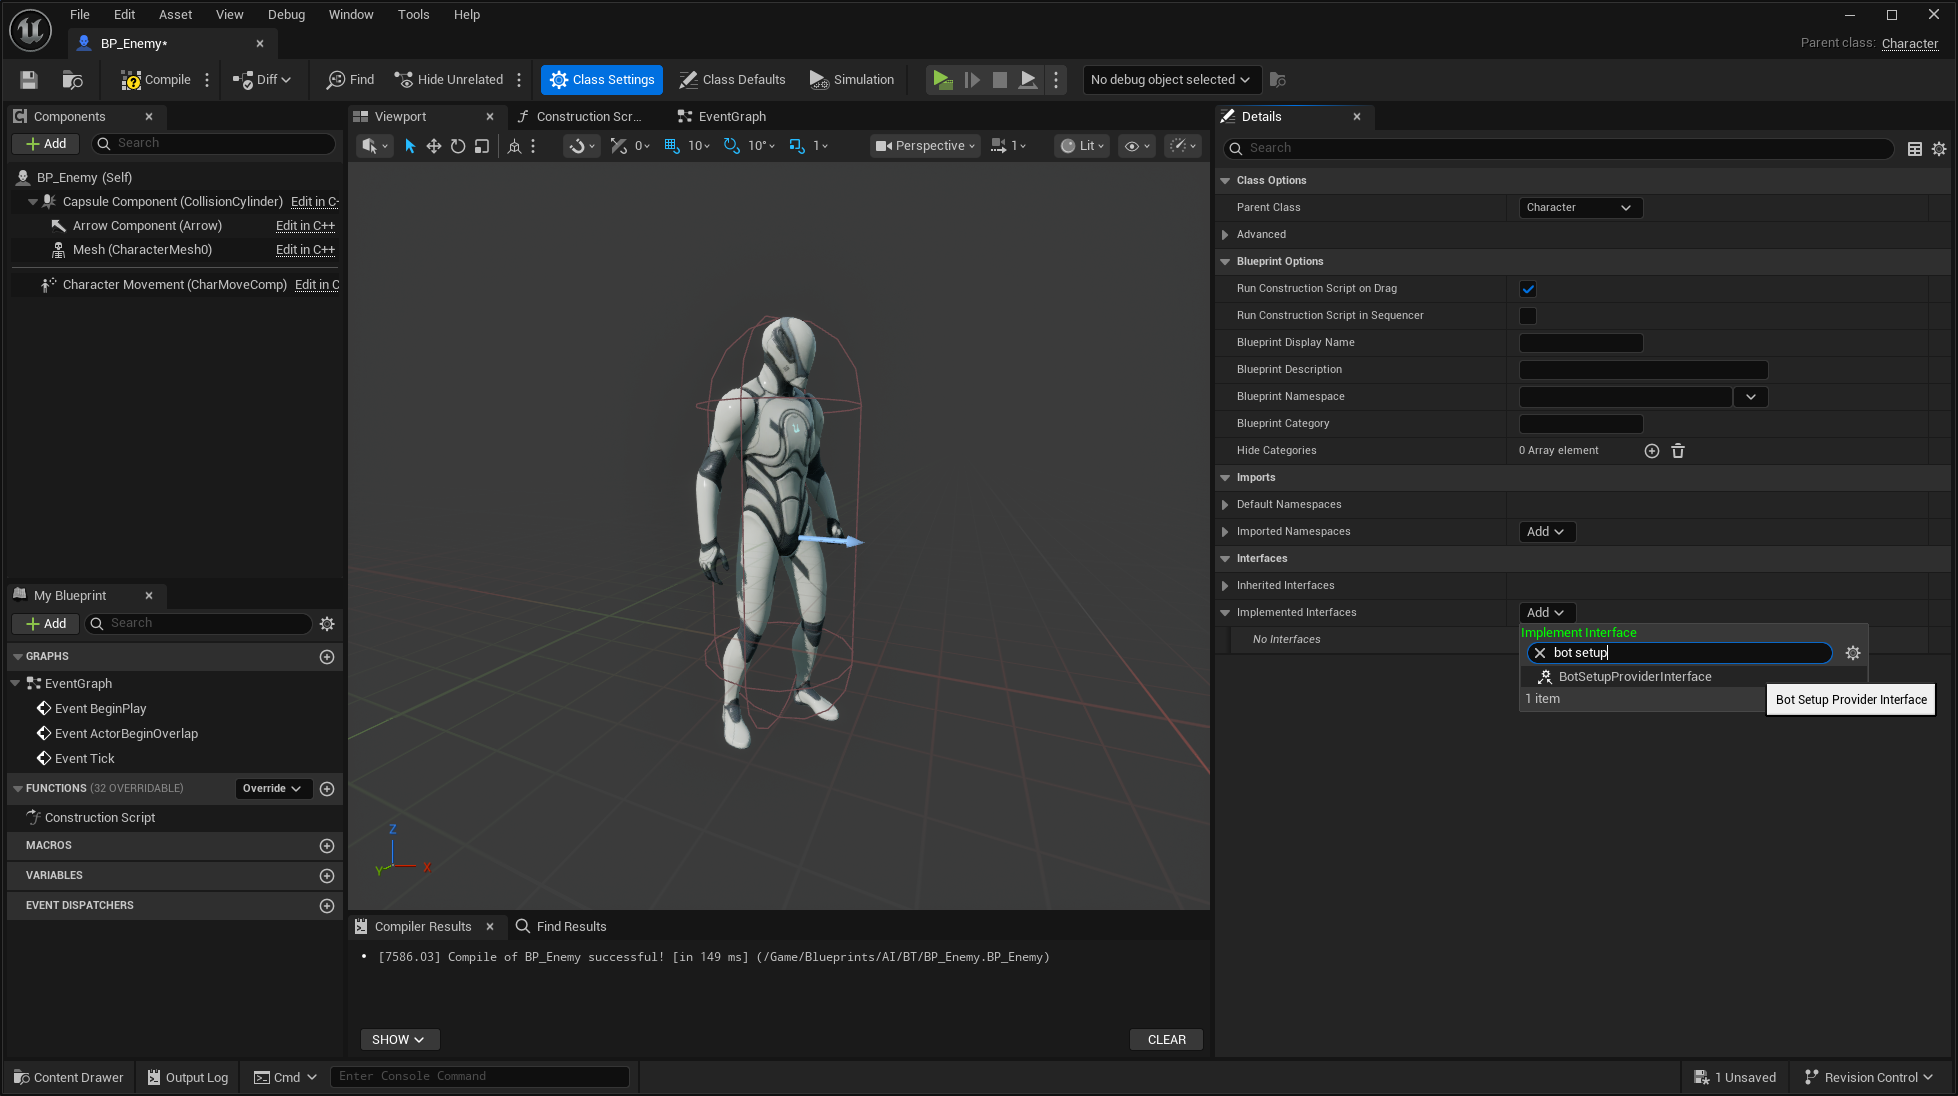
Double-click
GetBotSetupDatafrom the list of Interface Functions. Drag from the Return Value and Promote it to a Variable. Set the Bot Setup as its default value.
In the Character Defaults, locate the AI Controller Class and set it to
NinjaBotAIController.
Next Steps
At this point, you should have a Bot that roams around the environment until it detects the player. Once the player is sensed, the Bot transitions into a chase behavior and actively pursues the target.
From here, you can:
Learn more about Perception and Awareness.
Configure Patrol Points.
Integrate Ninja Factions for team-aware perception.
Extend the AI logic using Behavior Trees or State Trees.